Remote Kernels
By default, Pyodios runs Python locally on your device using Pyodide, a WebAssembly build of CPython. This is fast, works offline, and keeps everything on your device. But WebAssembly has limits: you cannot install packages with C extensions, run subprocesses, access a GPU, or work with datasets larger than what fits in your device’s memory. Remote kernels let you break through those limits by sending your code to a Jupyter server running full CPython on a Mac, a PC, a cloud VM, or a lab cluster.
The experience is seamless. You pick a backend from the kernel picker, and from that point on every notebook cell, editor script, and console command runs on the remote server. Outputs, plots, and errors appear exactly the same way as local execution. You get the portability of your iPhone or iPad with the full power of a real Python environment on the other end.
Why Use a Remote Kernel?
A remote kernel is worth setting up whenever you need something that the local Pyodide sandbox cannot provide:
- All PyPI packages. Install anything with
pip, including packages with compiled C/C++ extensions like PyTorch, TensorFlow, OpenCV, and SciPy with full BLAS support. - GPU acceleration. If your server has a CUDA-capable GPU, you can train deep learning models, run inference, and accelerate numerical workloads.
- Large datasets. Your server’s RAM is the limit, not the 300 MB available on an iPad. Load multi-gigabyte DataFrames, process images in bulk, or query large databases.
- Subprocesses and system access. Run shell commands, call external tools, interact with the filesystem, and use
subprocessfreely. - Interrupt execution. Stop a long-running computation mid-execution, something that is not possible with the local Pyodide kernel.
The trade-off is that you need a network connection and a Jupyter server running somewhere. If you work offline or want to keep all data on your device, the local kernel is always there.
Adding a Jupyter Server
You can add servers from Settings > Jupyter Servers or by tapping the kernel picker in the notebook toolbar and choosing Manage Servers…
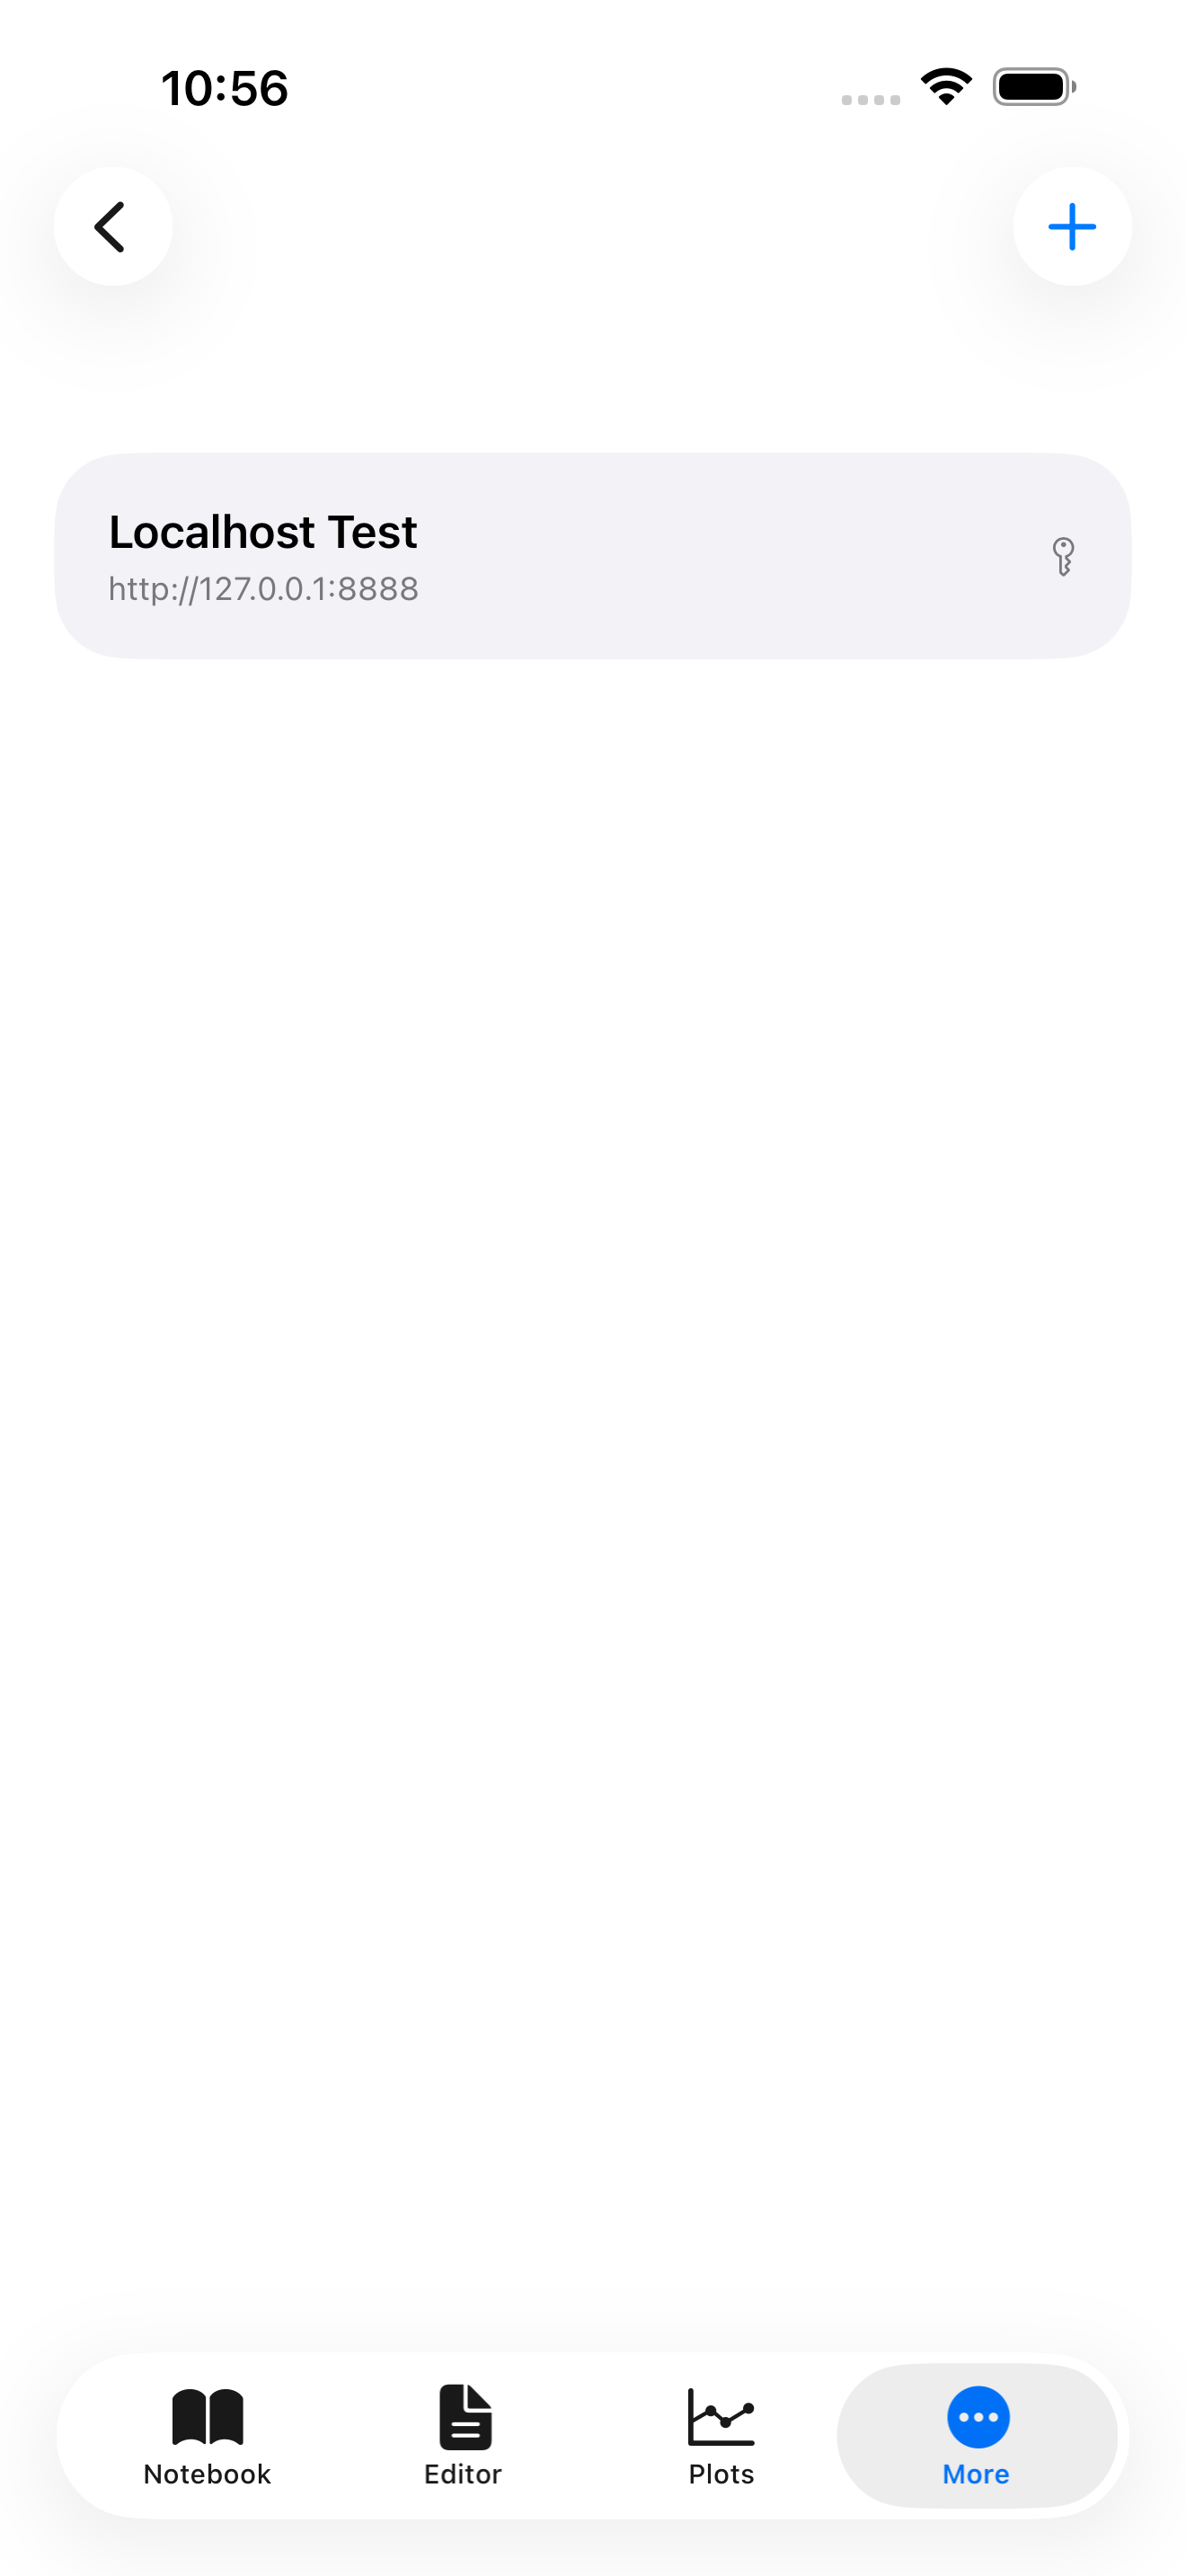

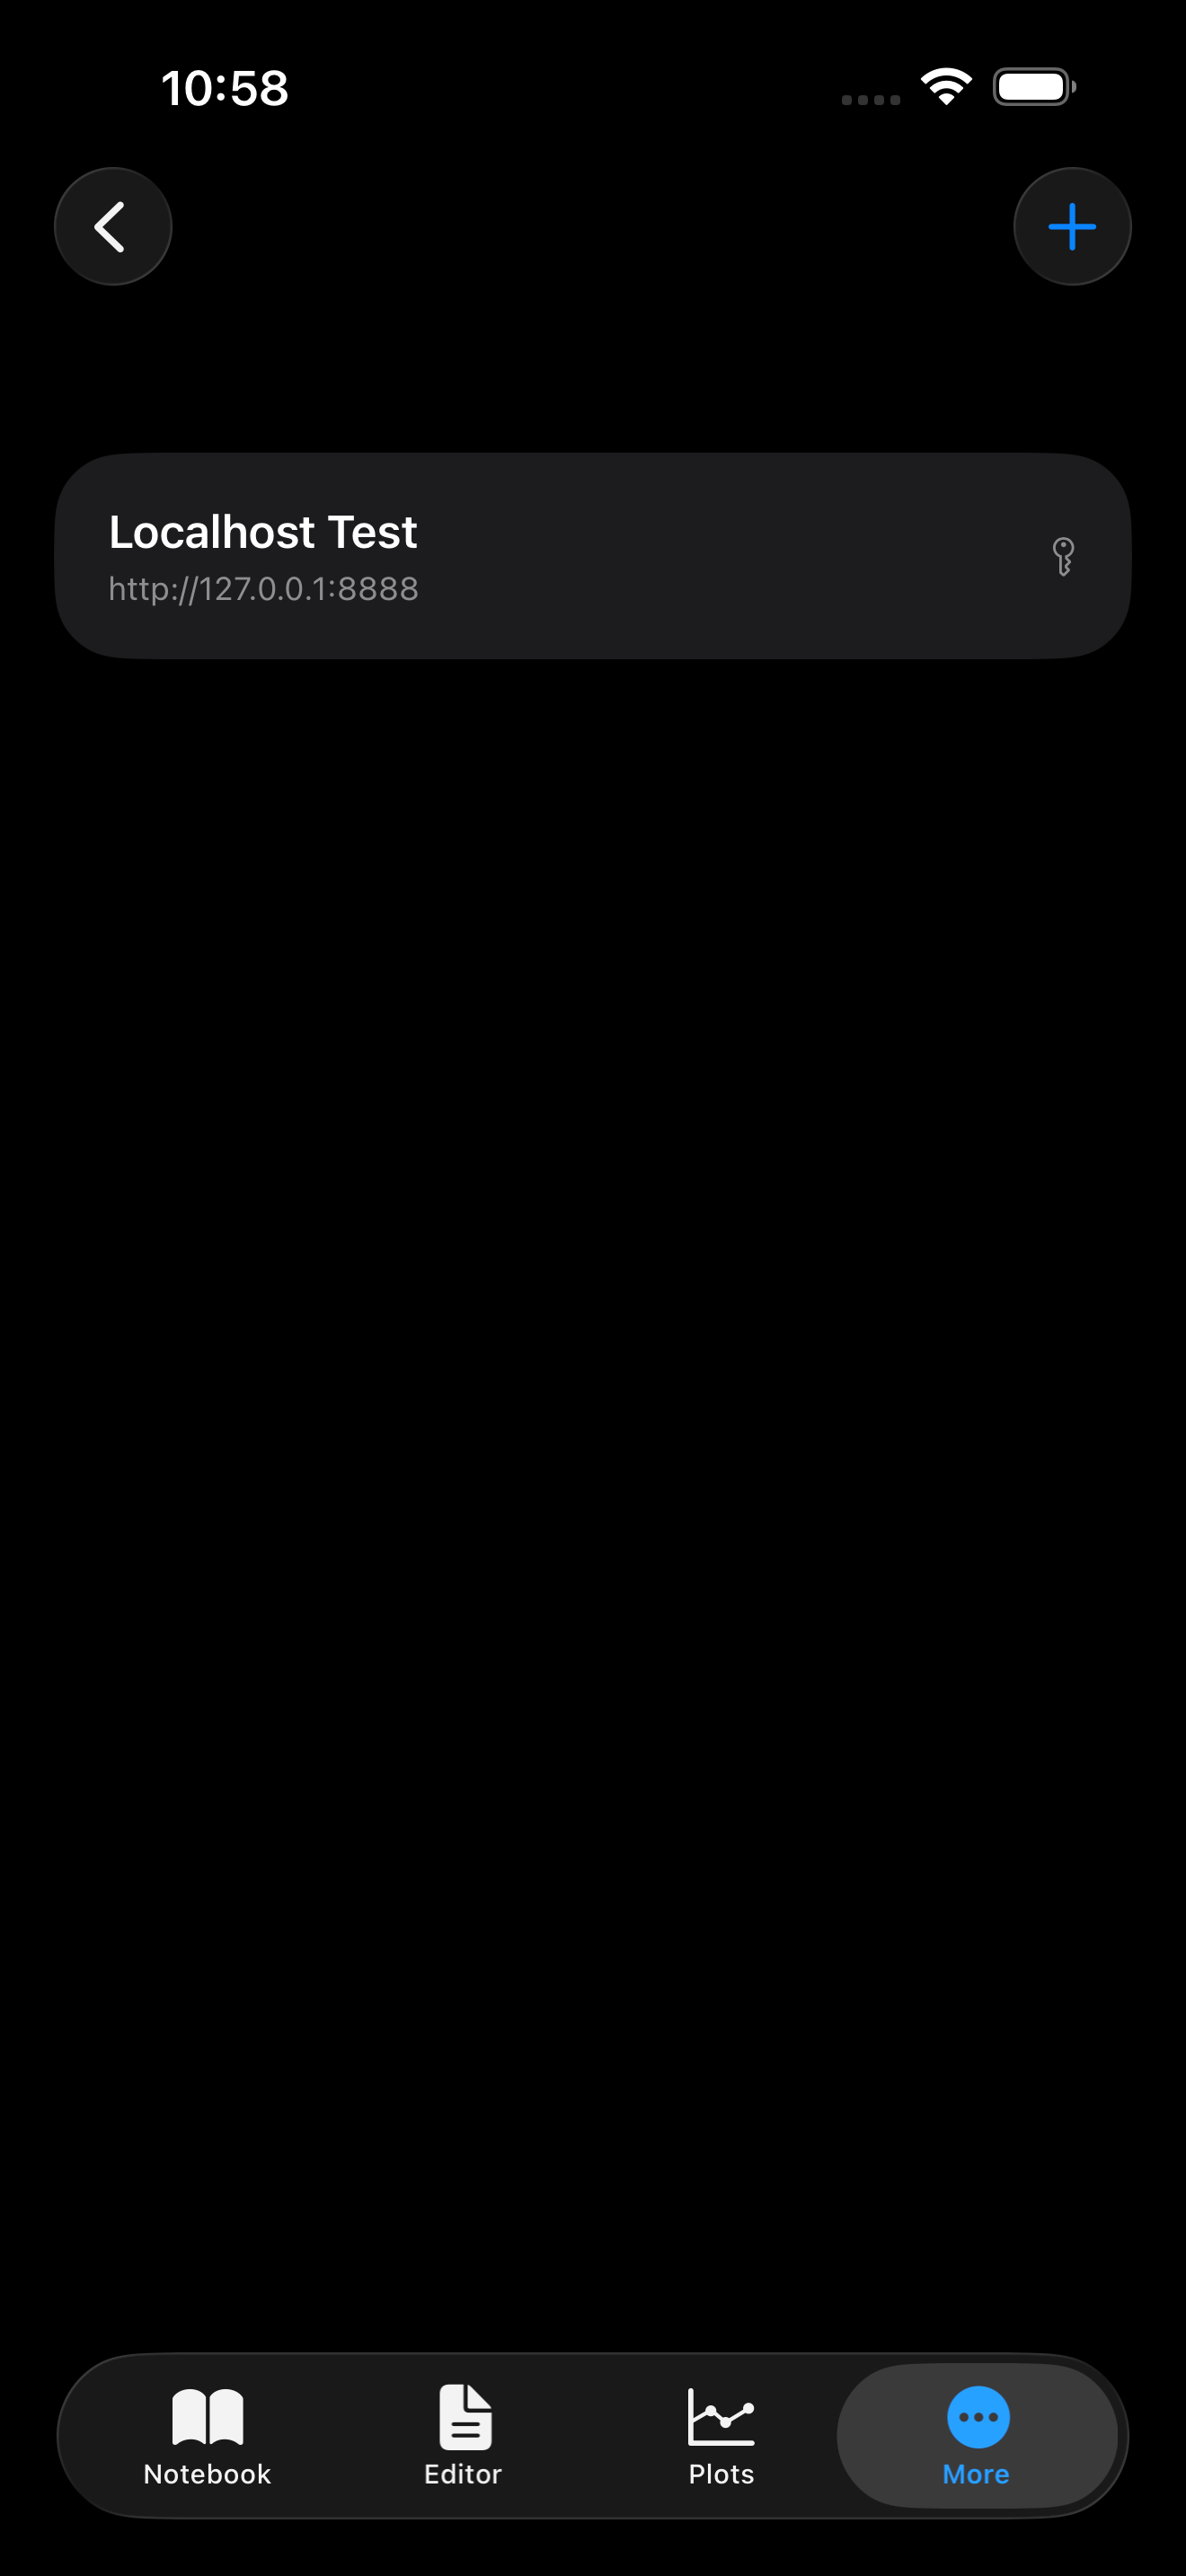

Tap the + button to add a new server. The server form has the following fields:
Server Details
- Name (required): A friendly label for this server. Use something descriptive like “My MacBook”, “Lab Cluster”, or “AWS GPU Instance”.
- URL (required): The Jupyter server URL, including the port. For example,
http://192.168.1.5:8888for a server on your local network, orhttps://jupyter.example.comfor a hosted server. - Default Kernel: An optional kernel spec name that tells the server which kernel to start. Common values are
python3(the default on most servers),ir(R), orjulia-1.10. Leave this blank to use the server’s default.
Authentication
Choose one of three authentication methods:
- Token: Paste the token string that Jupyter prints when it starts. This is the most common method for personal servers. You can find the token by running
jupyter server liston your server. - Password: Enter the Jupyter server password. This is used when the server has been configured with
jupyter server password. - None: No authentication. Only use this for servers that are explicitly configured to allow unauthenticated access on a trusted network.
SSH Tunnel (Optional)
If your server is behind a firewall or on a private network that your device cannot reach directly, enable the SSH tunnel toggle. This opens additional fields:
- SSH Host: The hostname or IP address of the SSH server (e.g.,
example.comor10.0.0.1). - SSH Port: The SSH port, typically
22. - SSH Username: Your SSH login username.
- Auth Method: Choose Password to authenticate with your SSH password, or Private Key to import a
.pemor.keyfile from your device. - Remote Jupyter Port: The port Jupyter is listening on at the remote end, typically
8888.
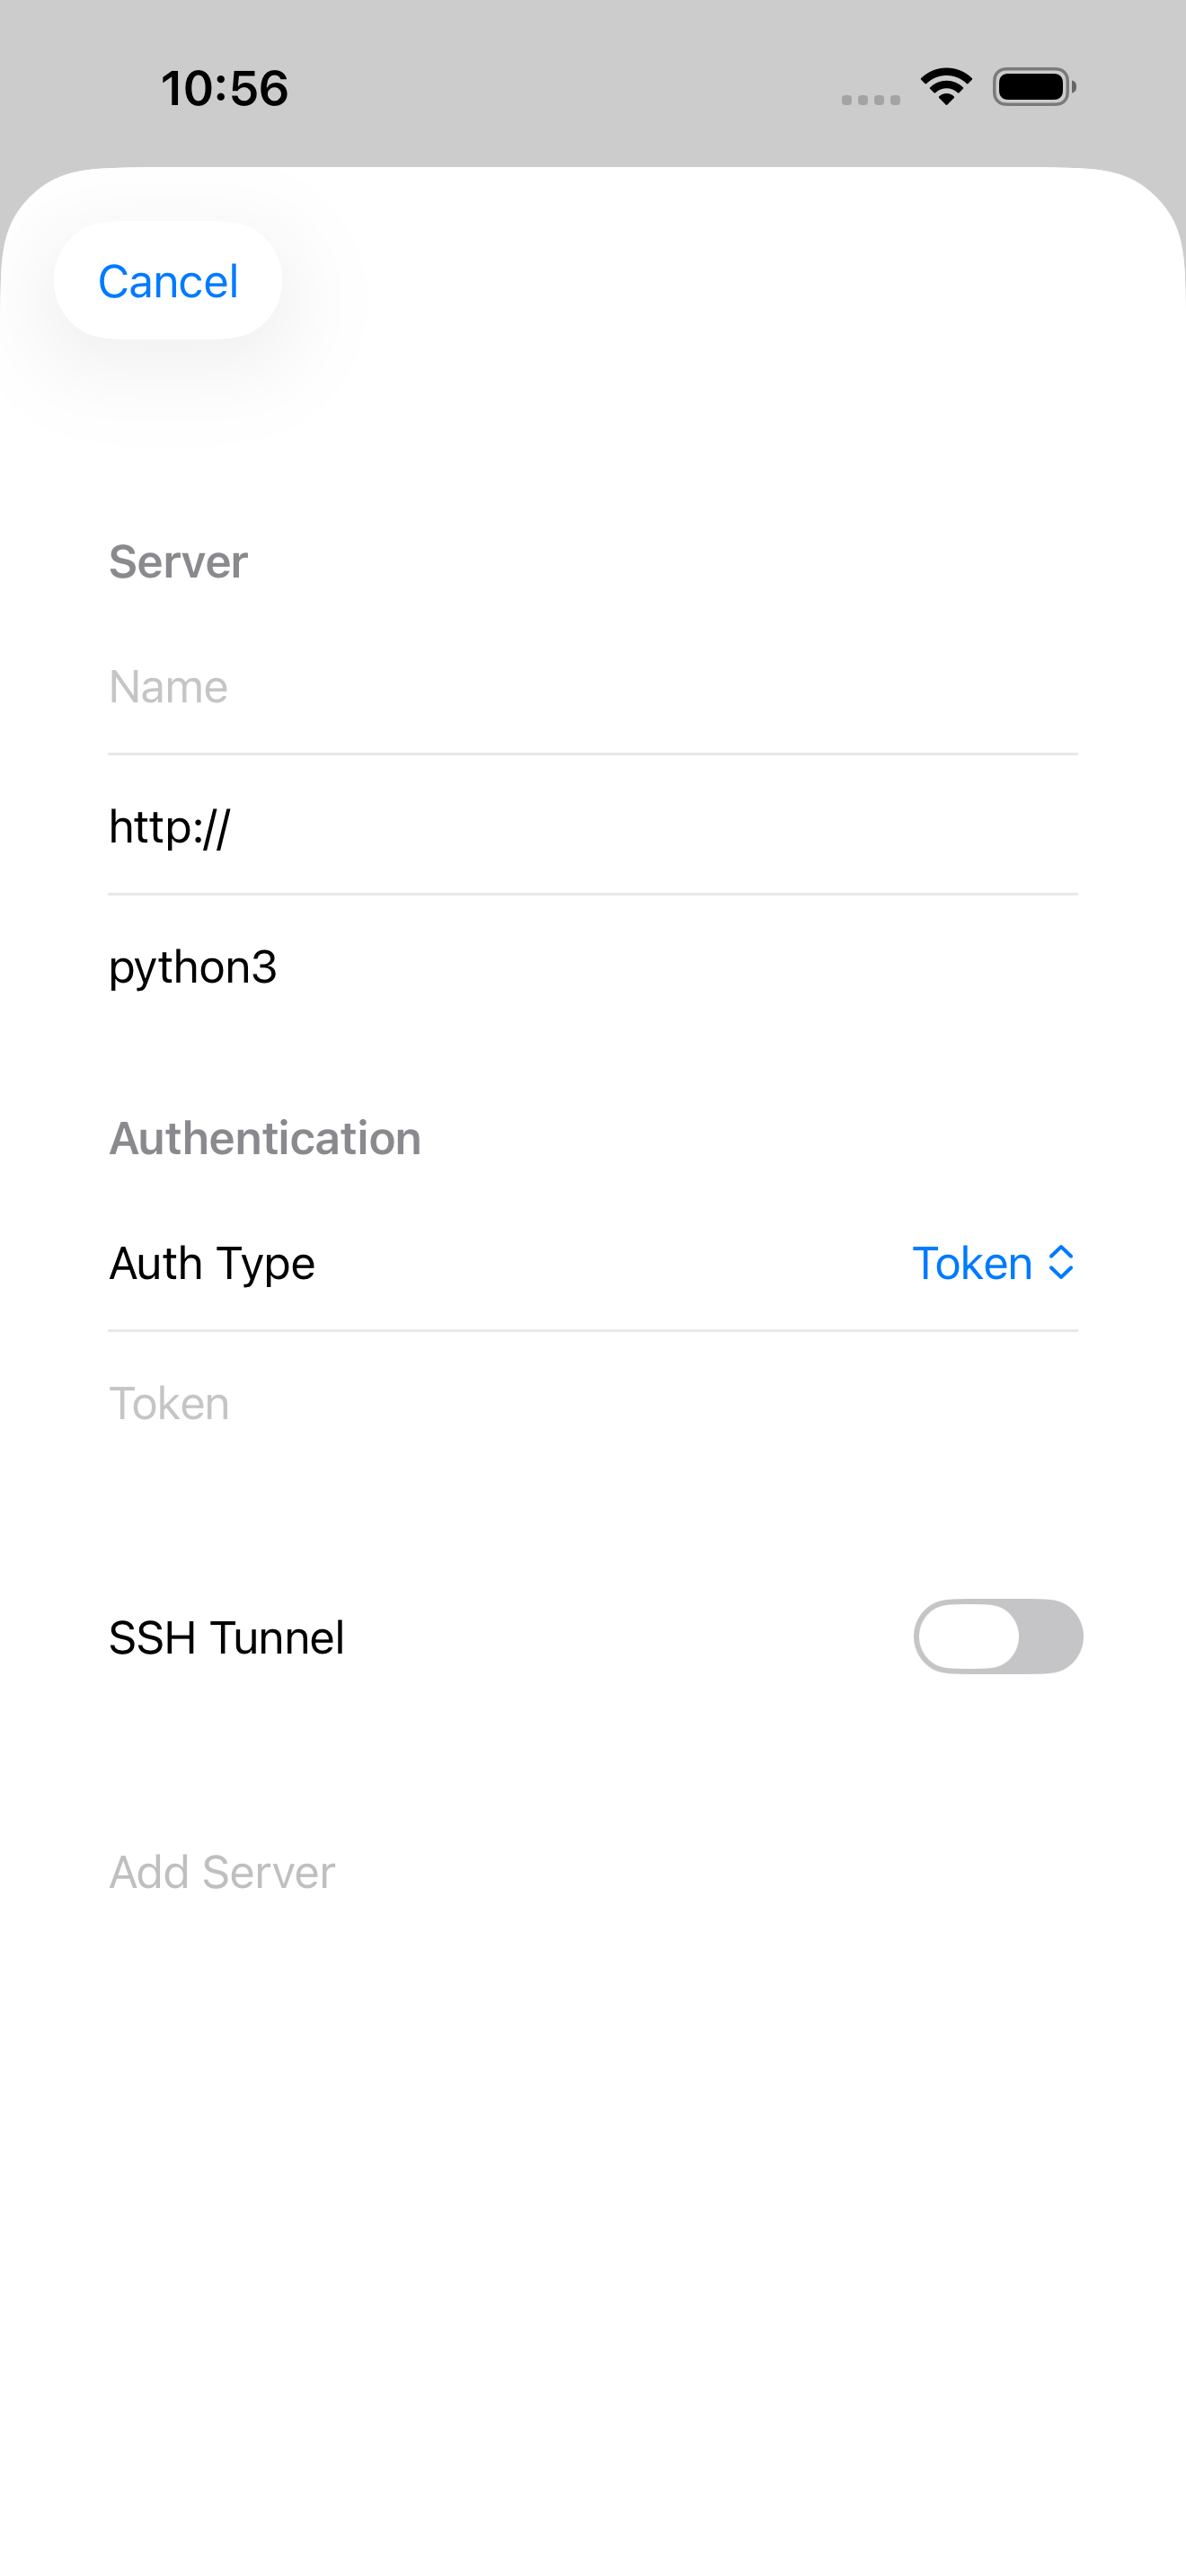
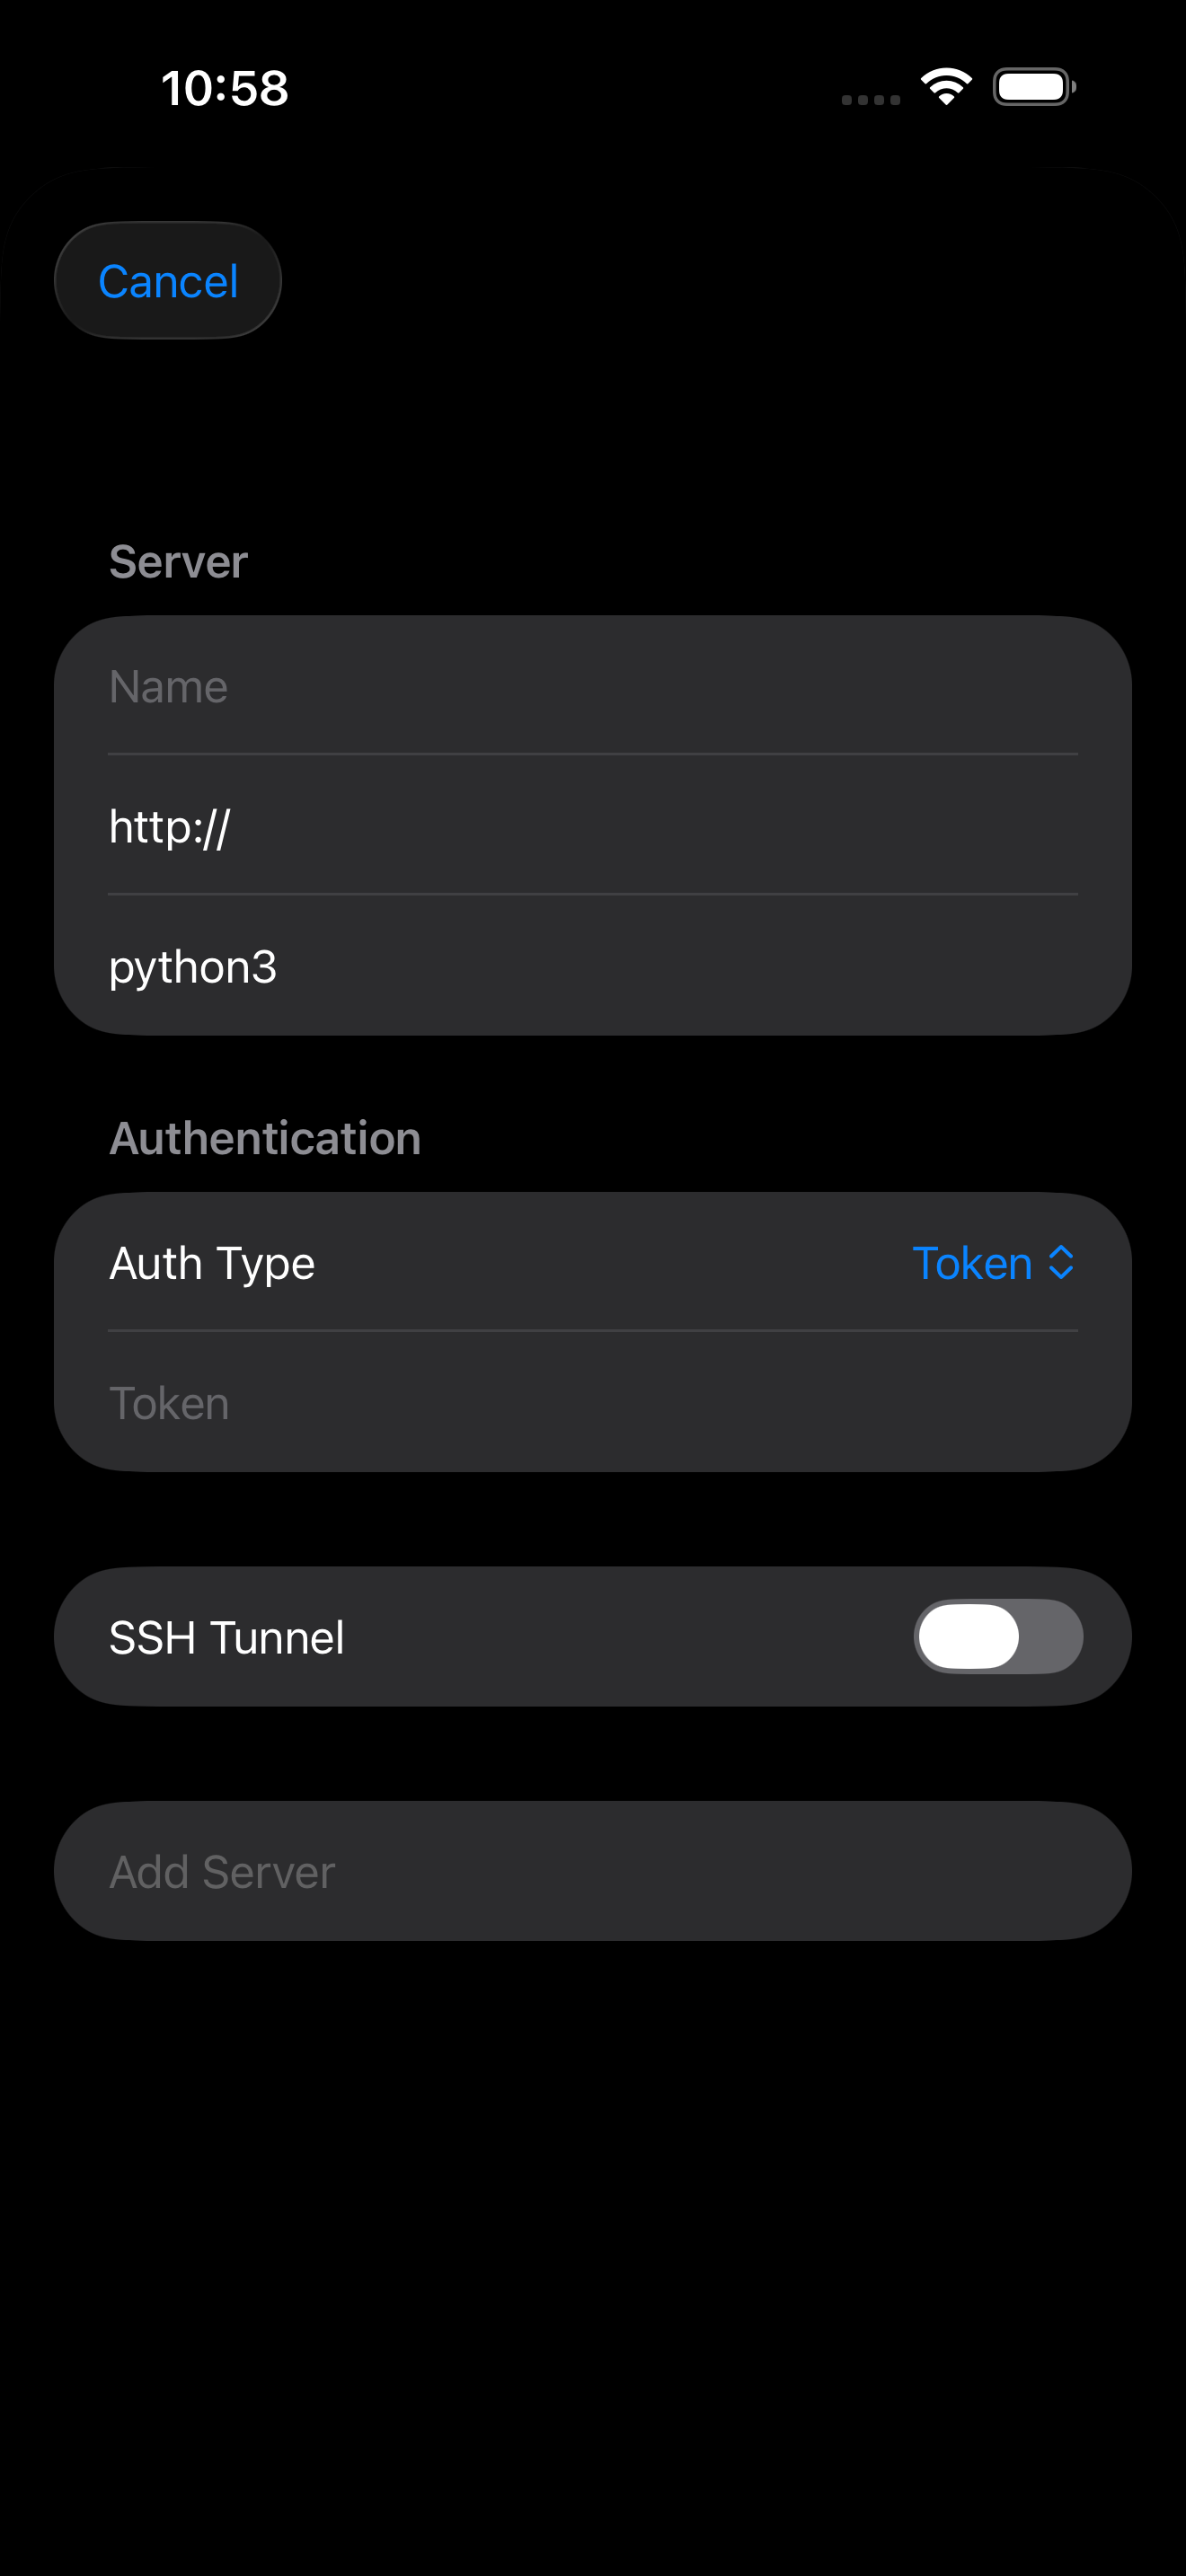
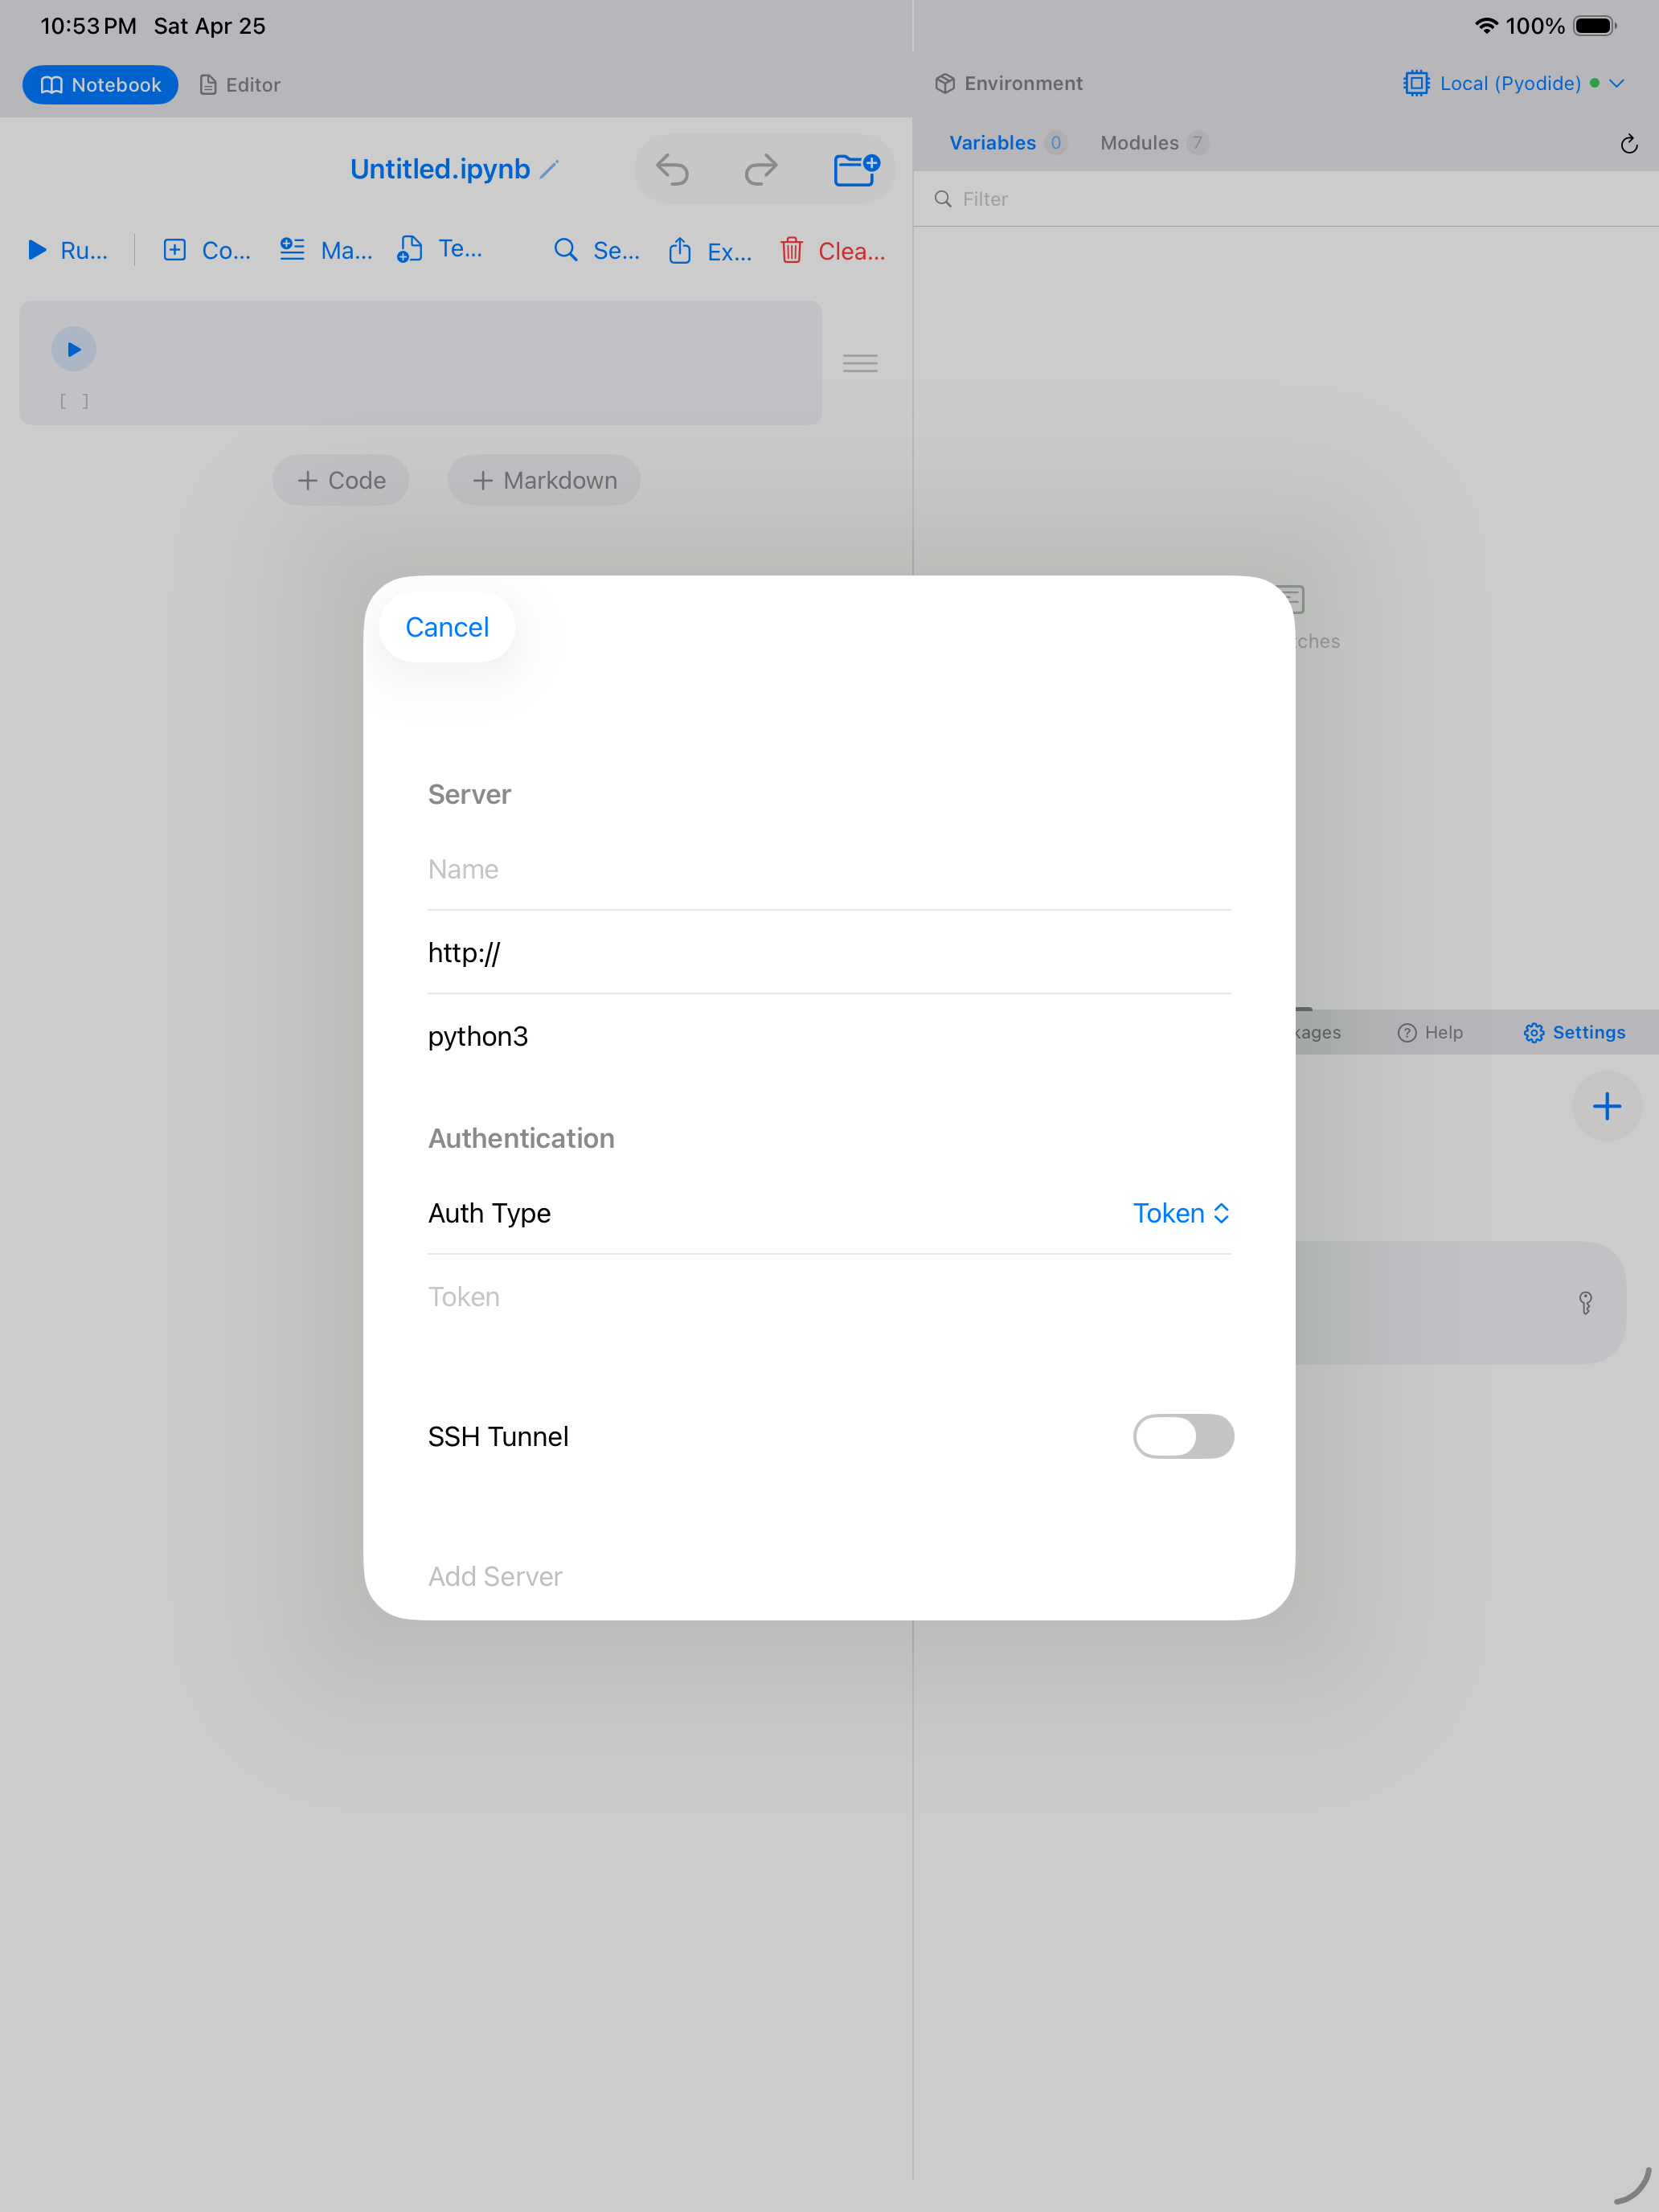
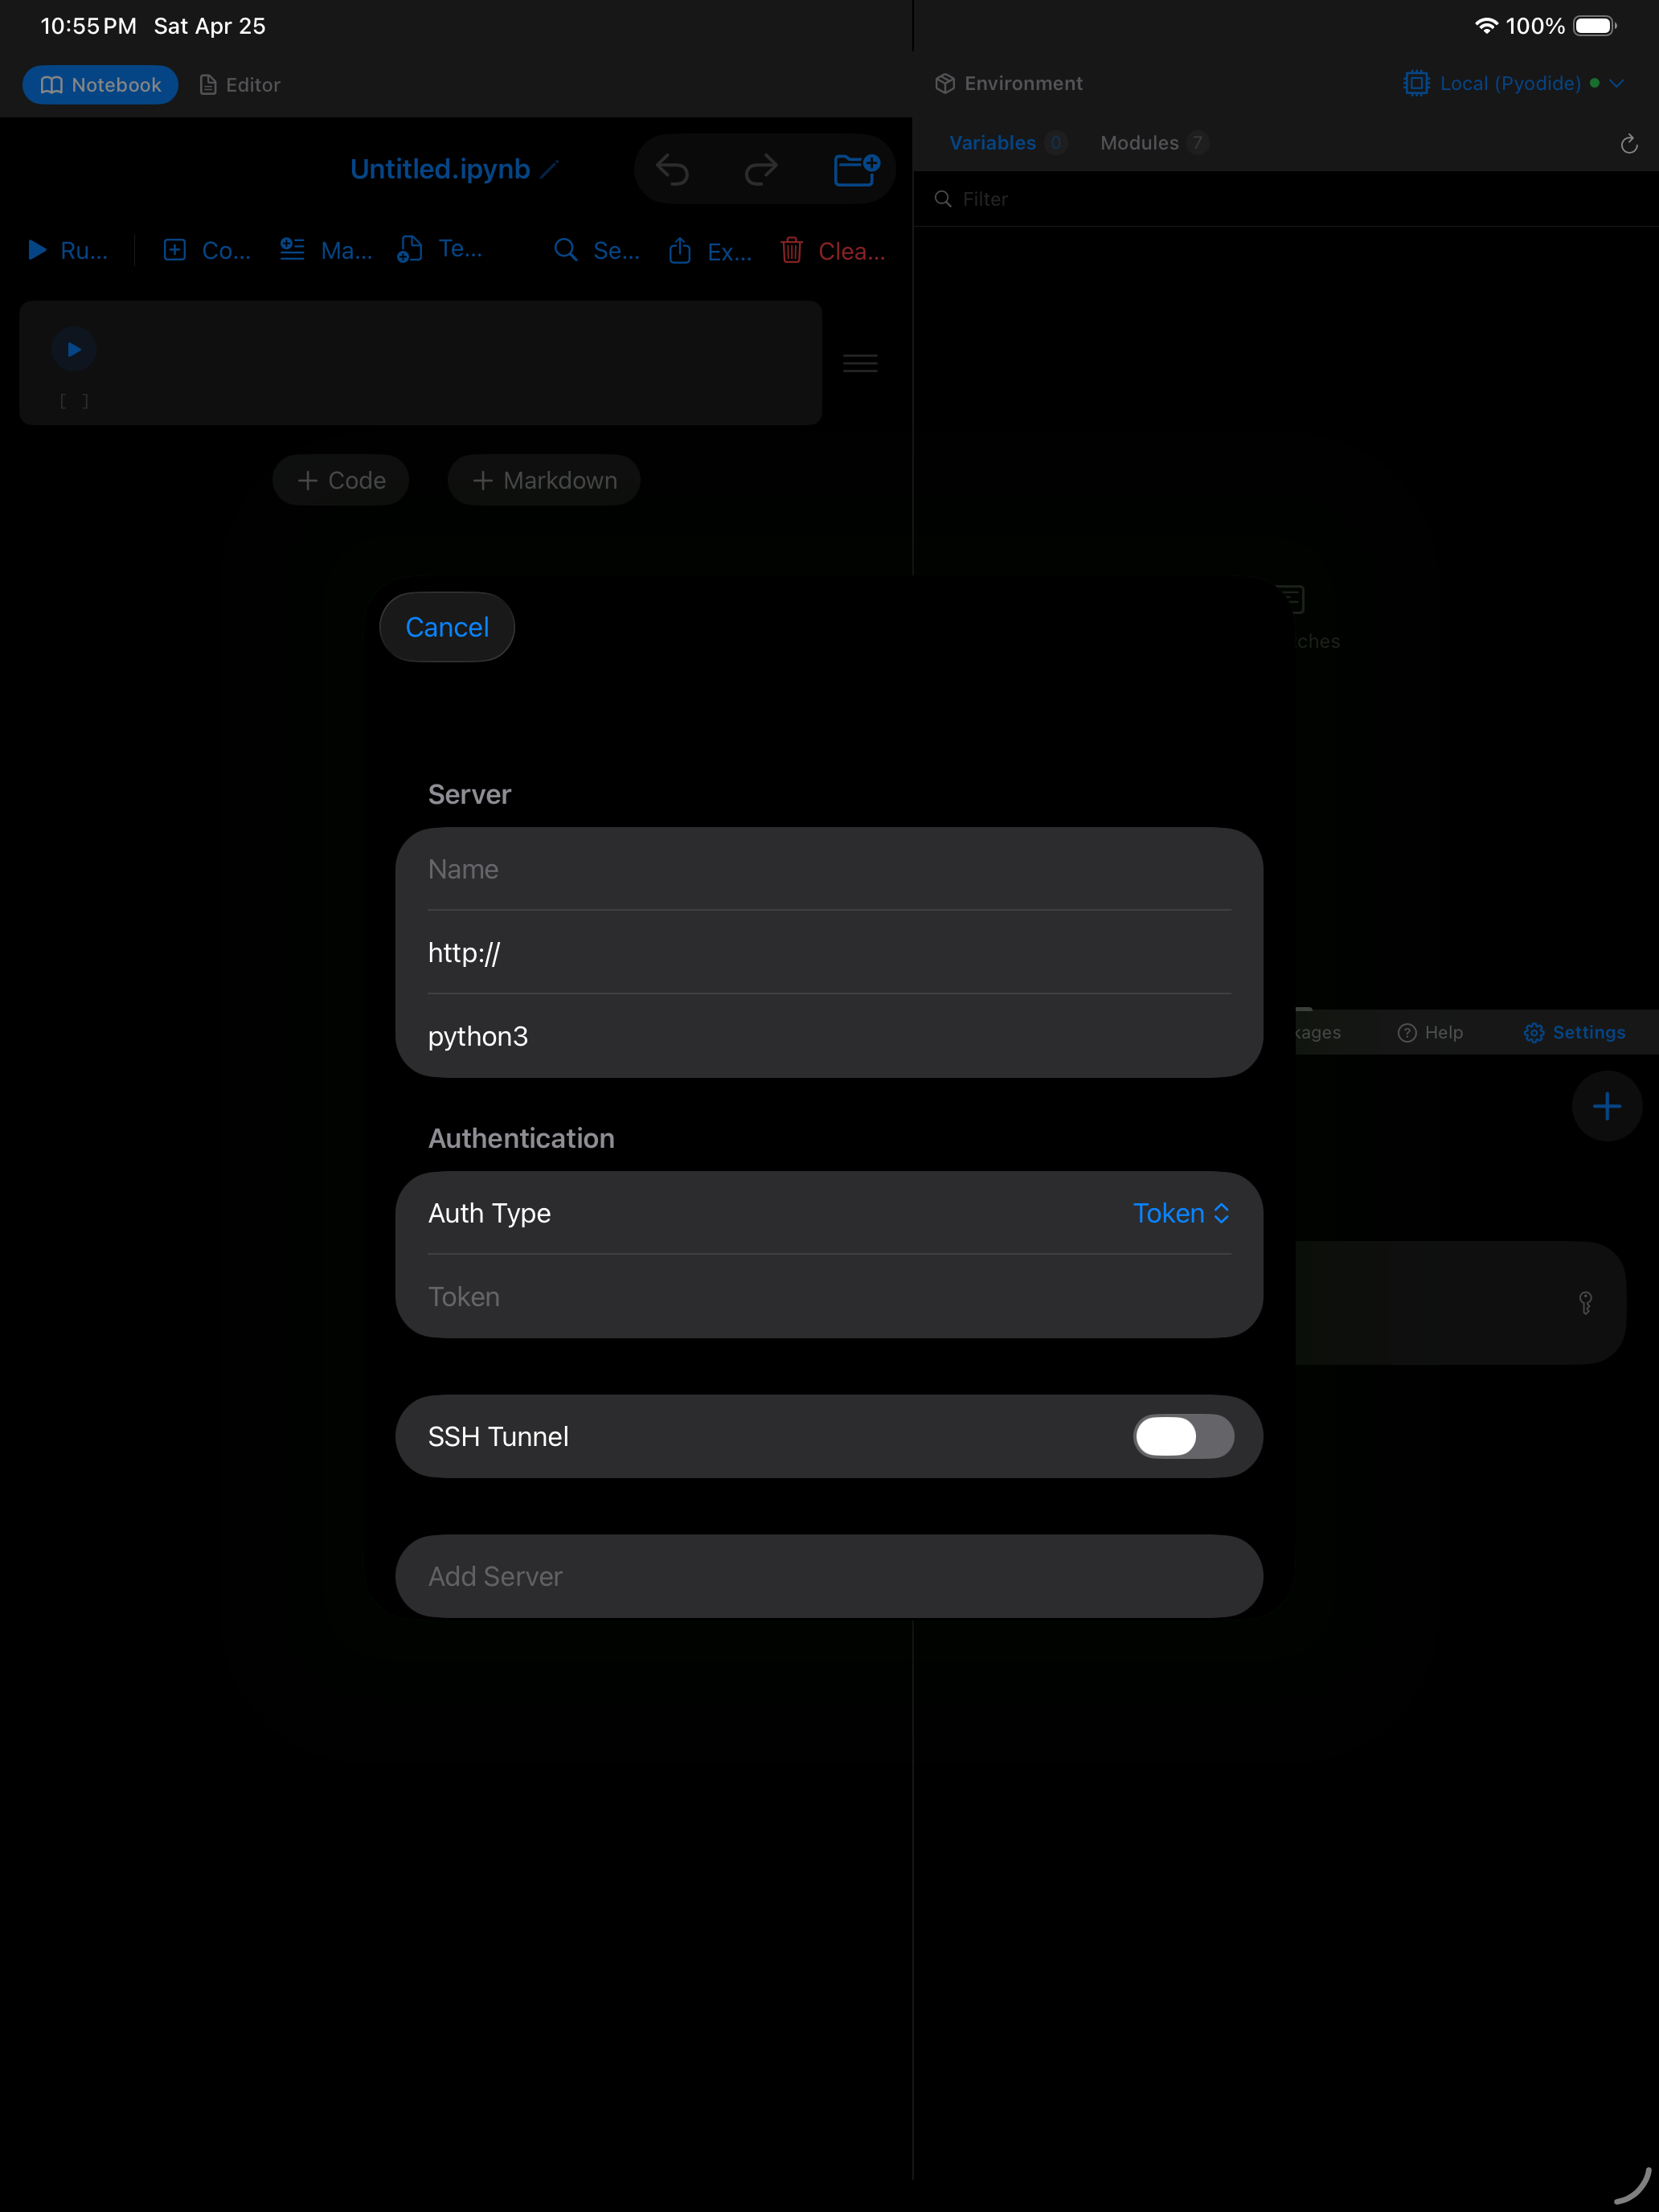
What you are seeing above:
- Name and URL fields: identify the server and tell Pyodios where to connect
- Default Kernel: optional kernel spec name for multi-kernel servers
- Authentication section: choose Token, Password, or None
- SSH Tunnel toggle: expand to configure tunneling for servers behind firewalls
All credentials (tokens, passwords, and SSH keys) are stored securely in the iOS Keychain. They are encrypted on-device, never written to plain text files, and are not backed up to iCloud.
Connecting to a Remote Kernel
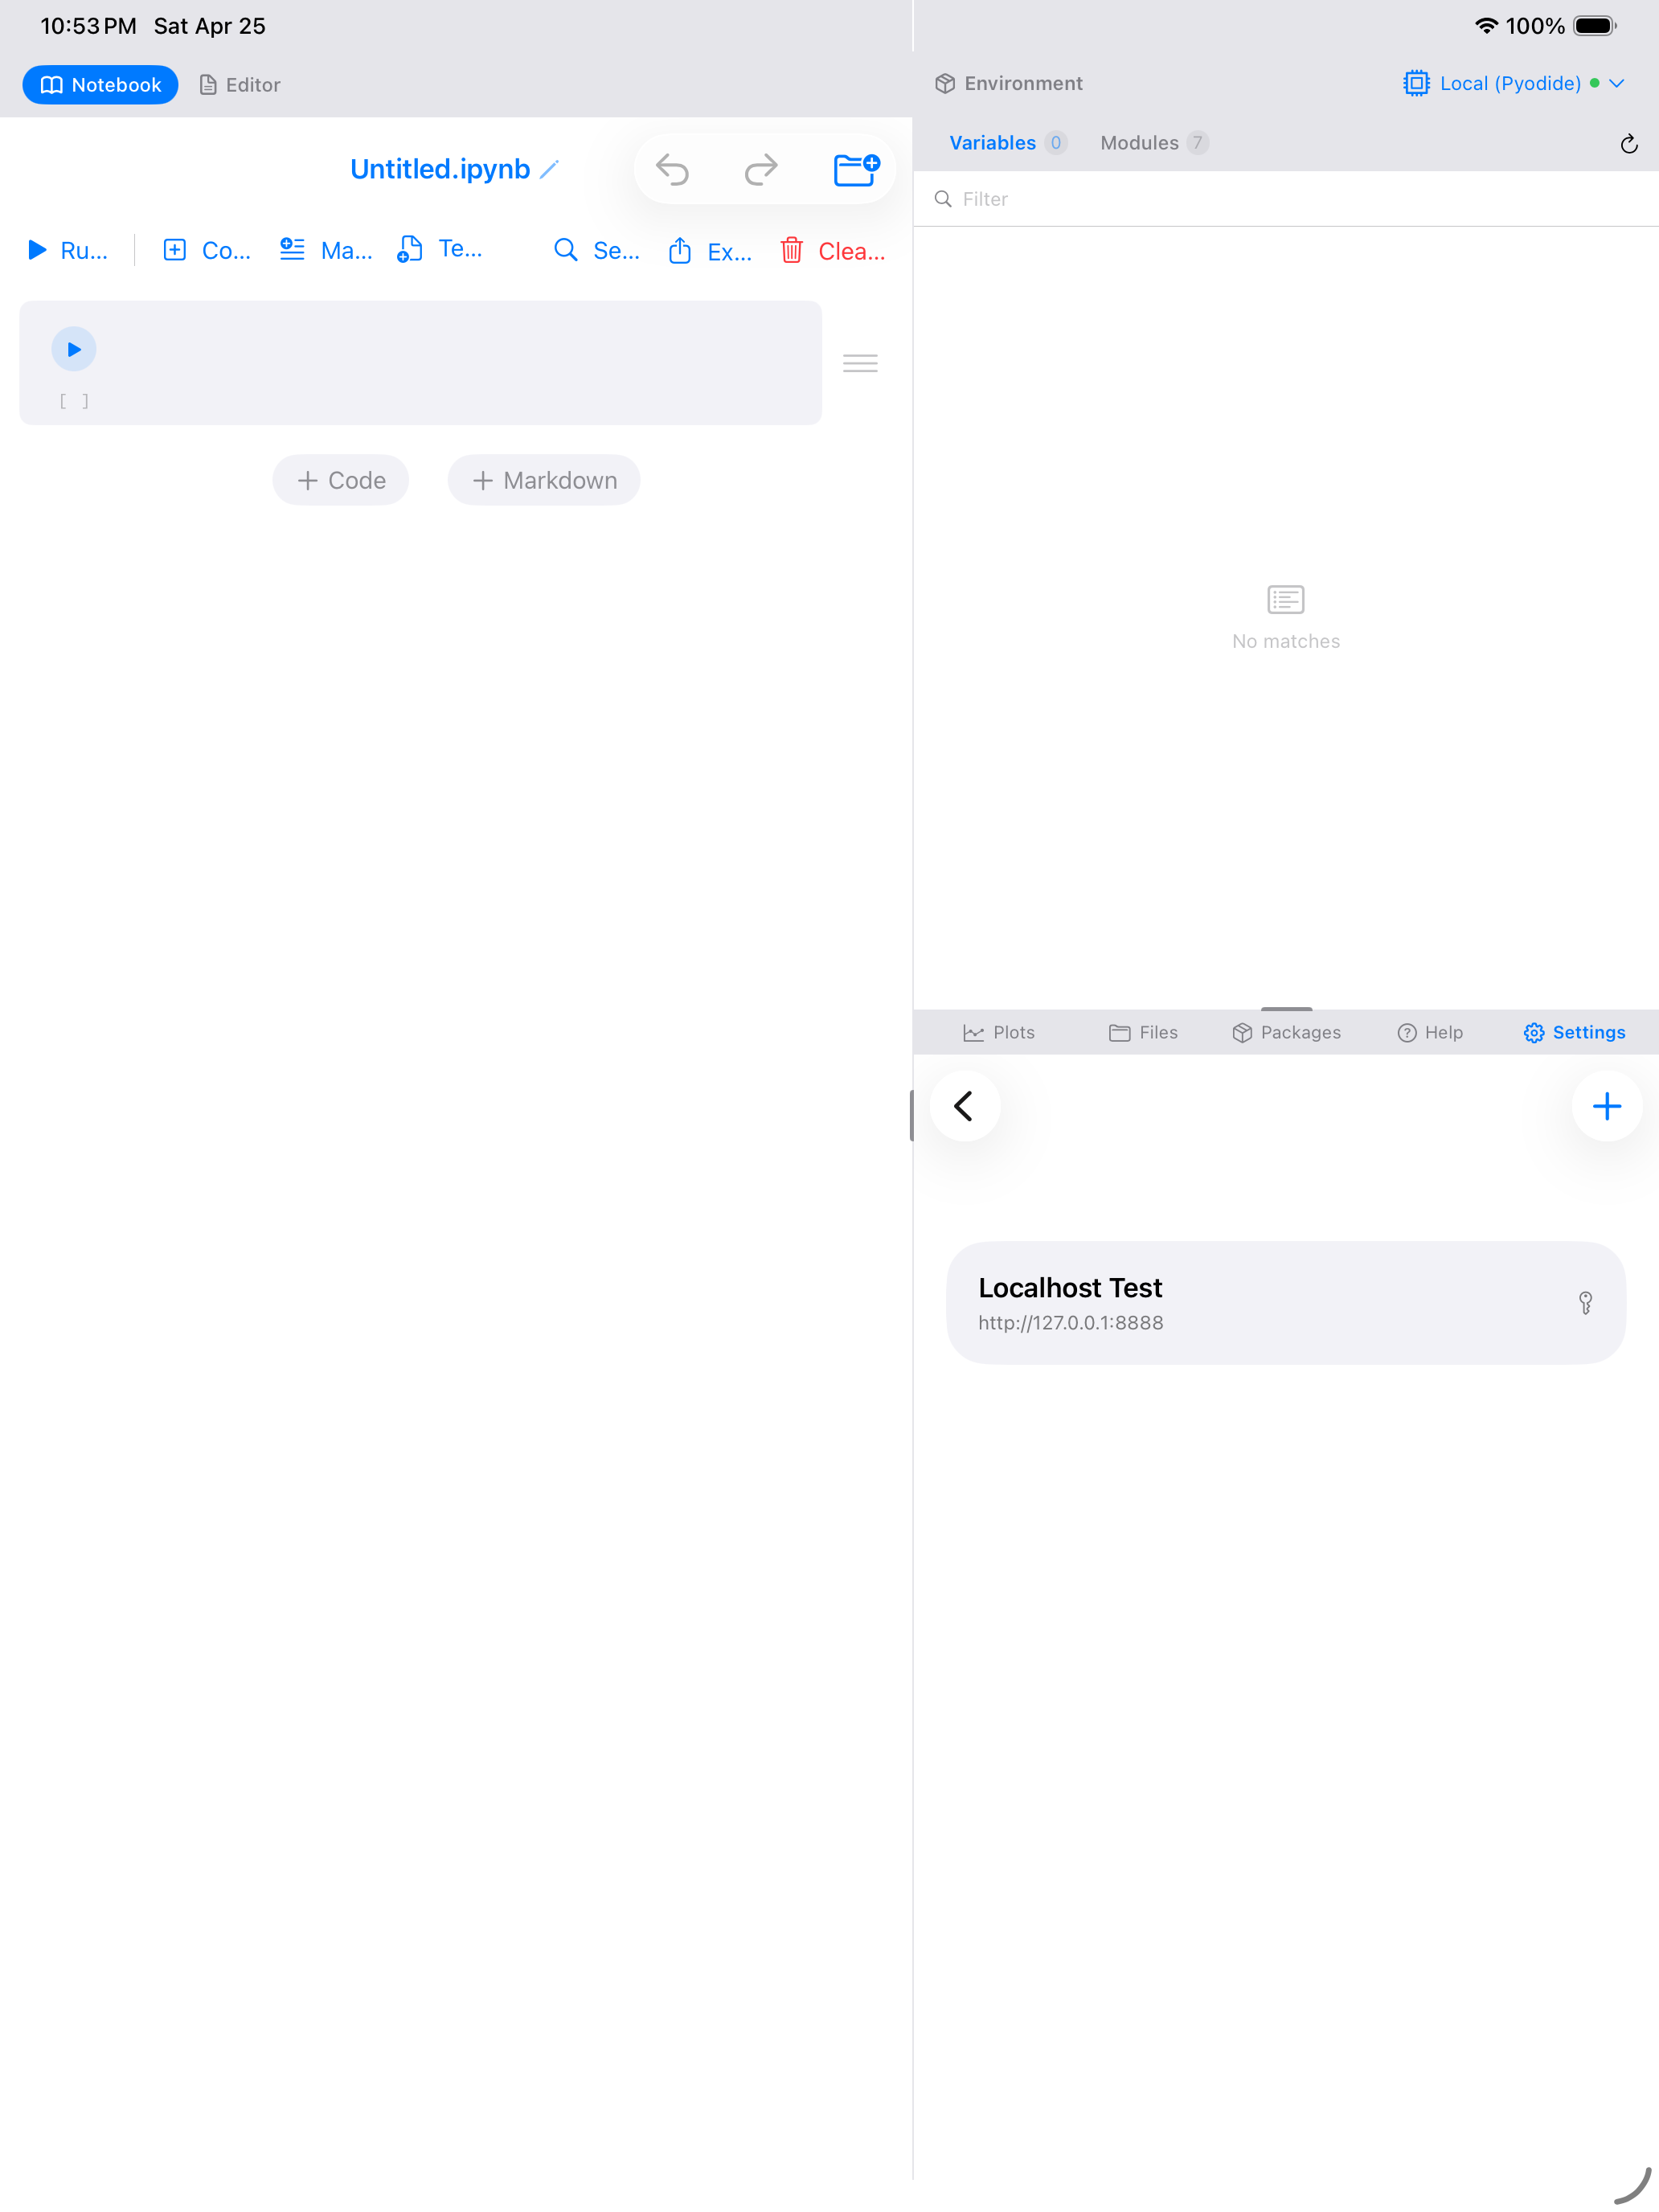
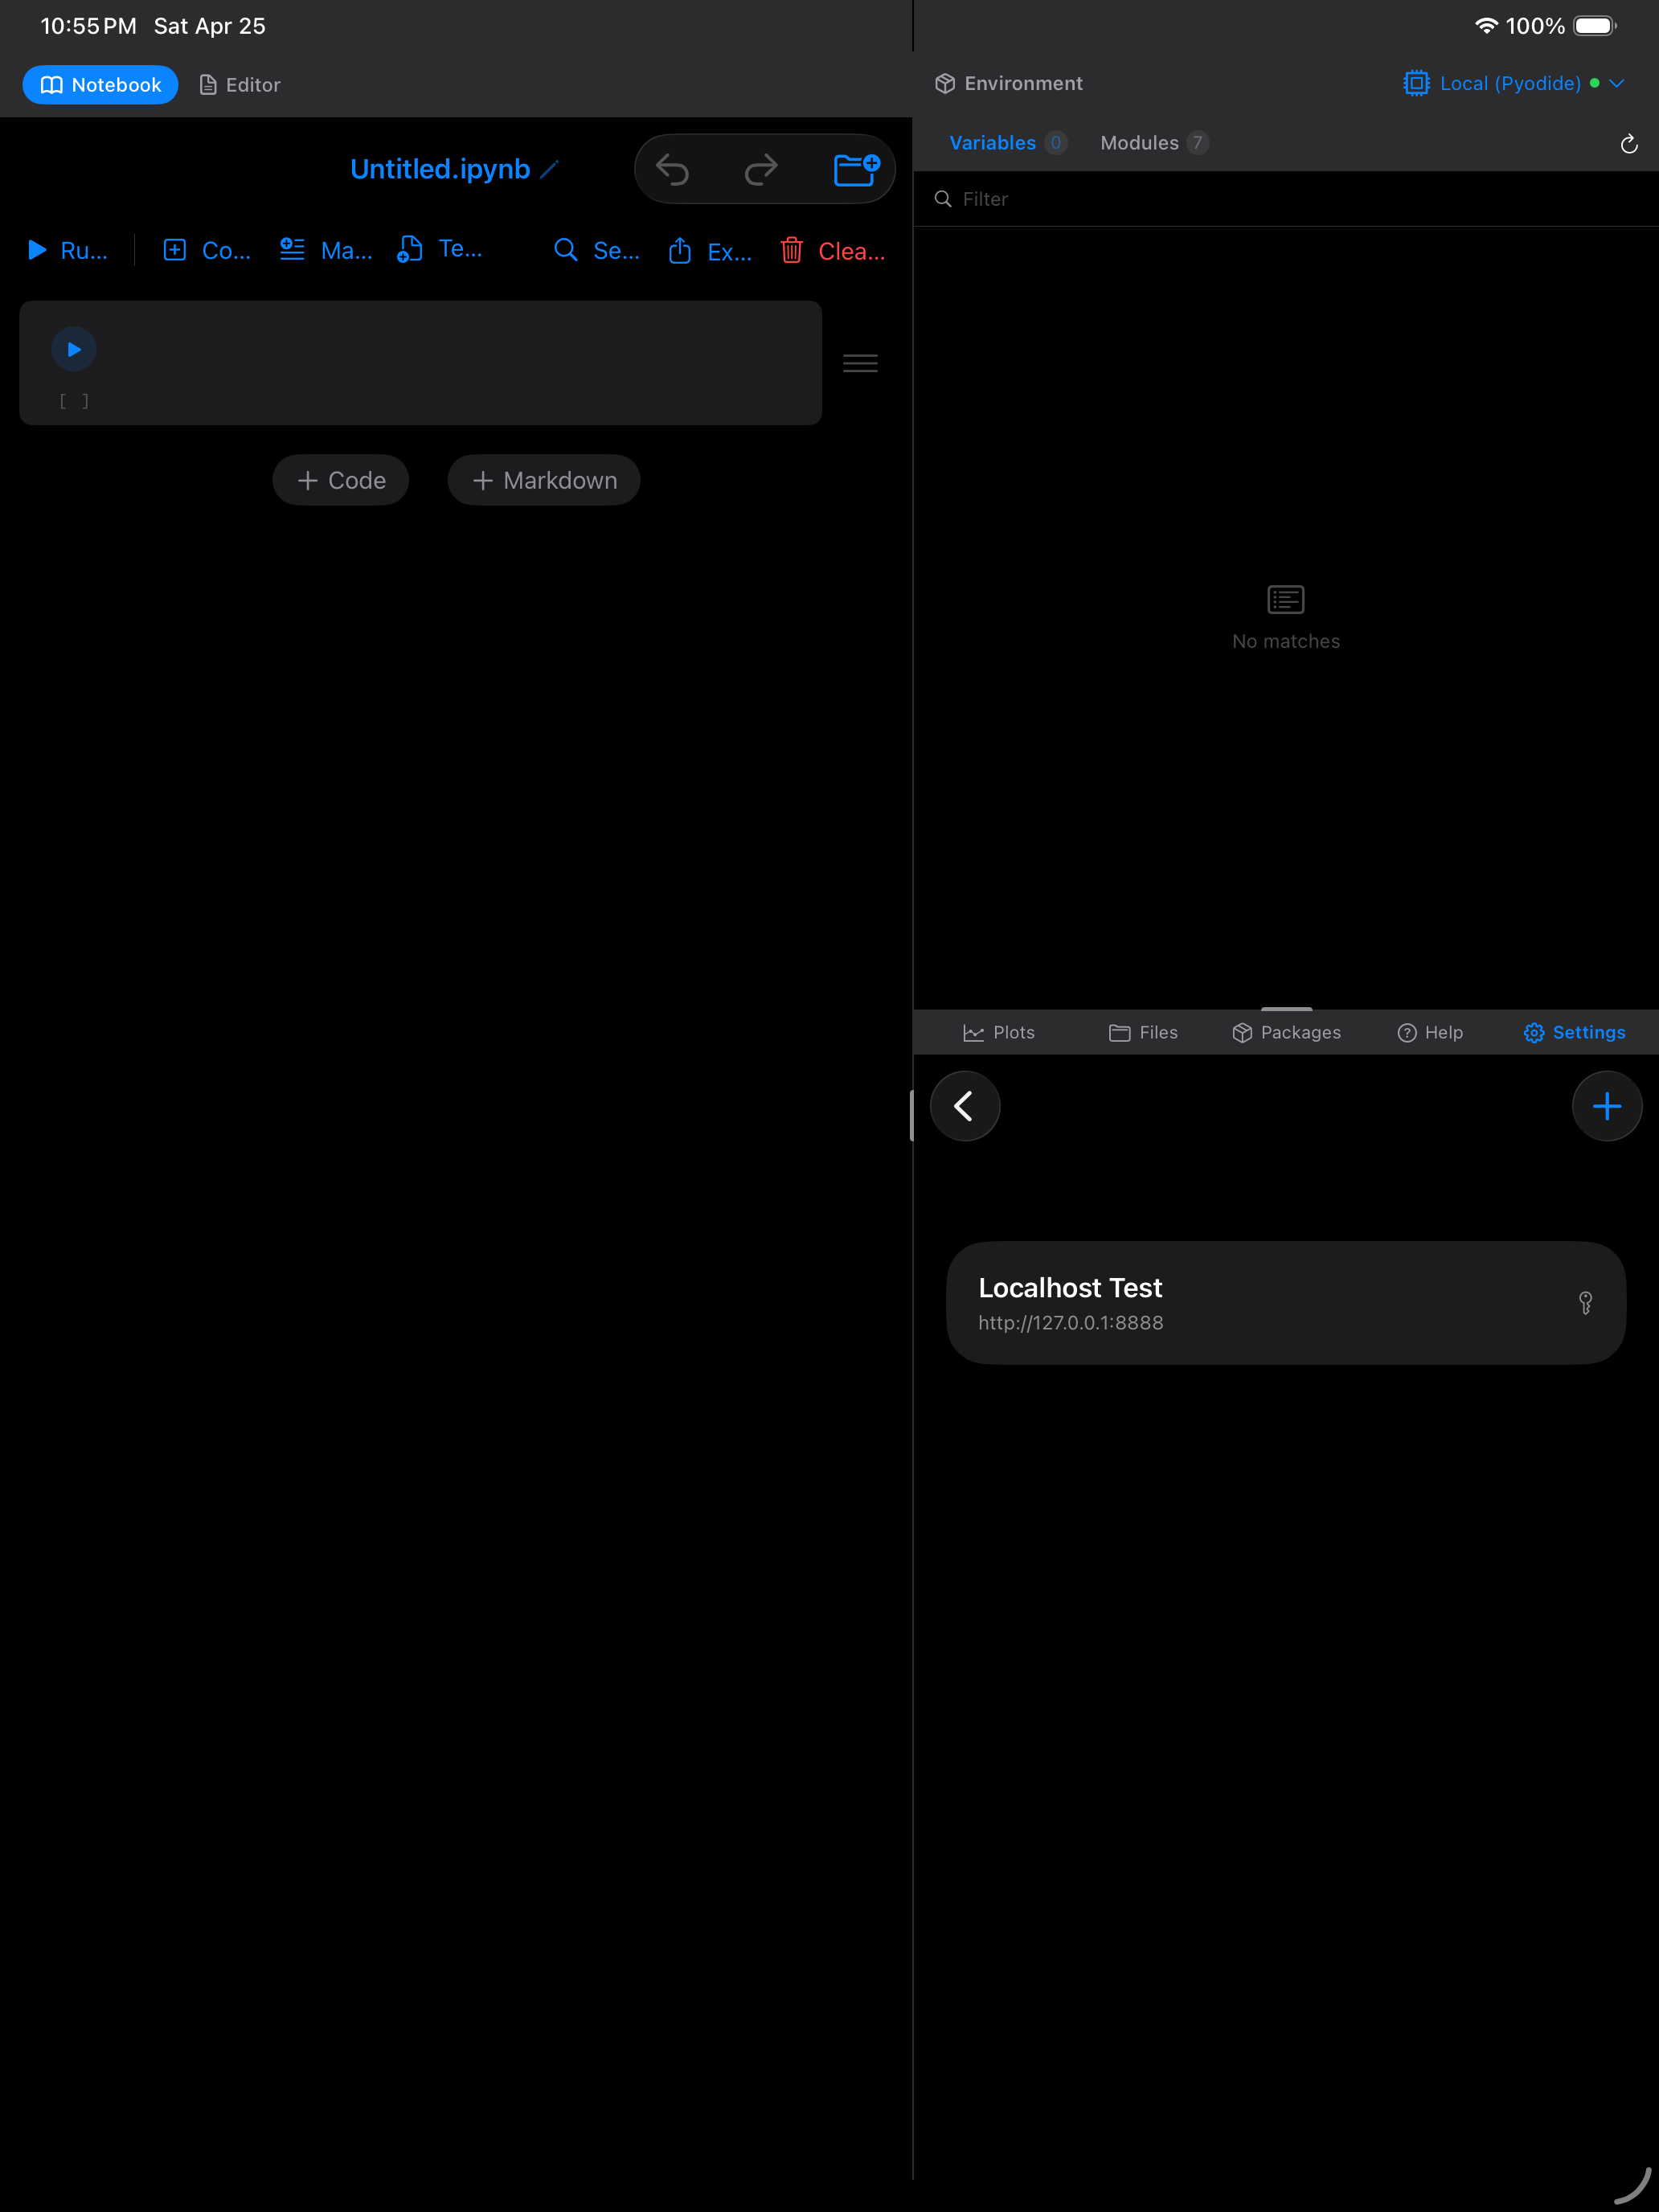
Once you have saved at least one server, you can switch to it from the kernel picker in the notebook toolbar.
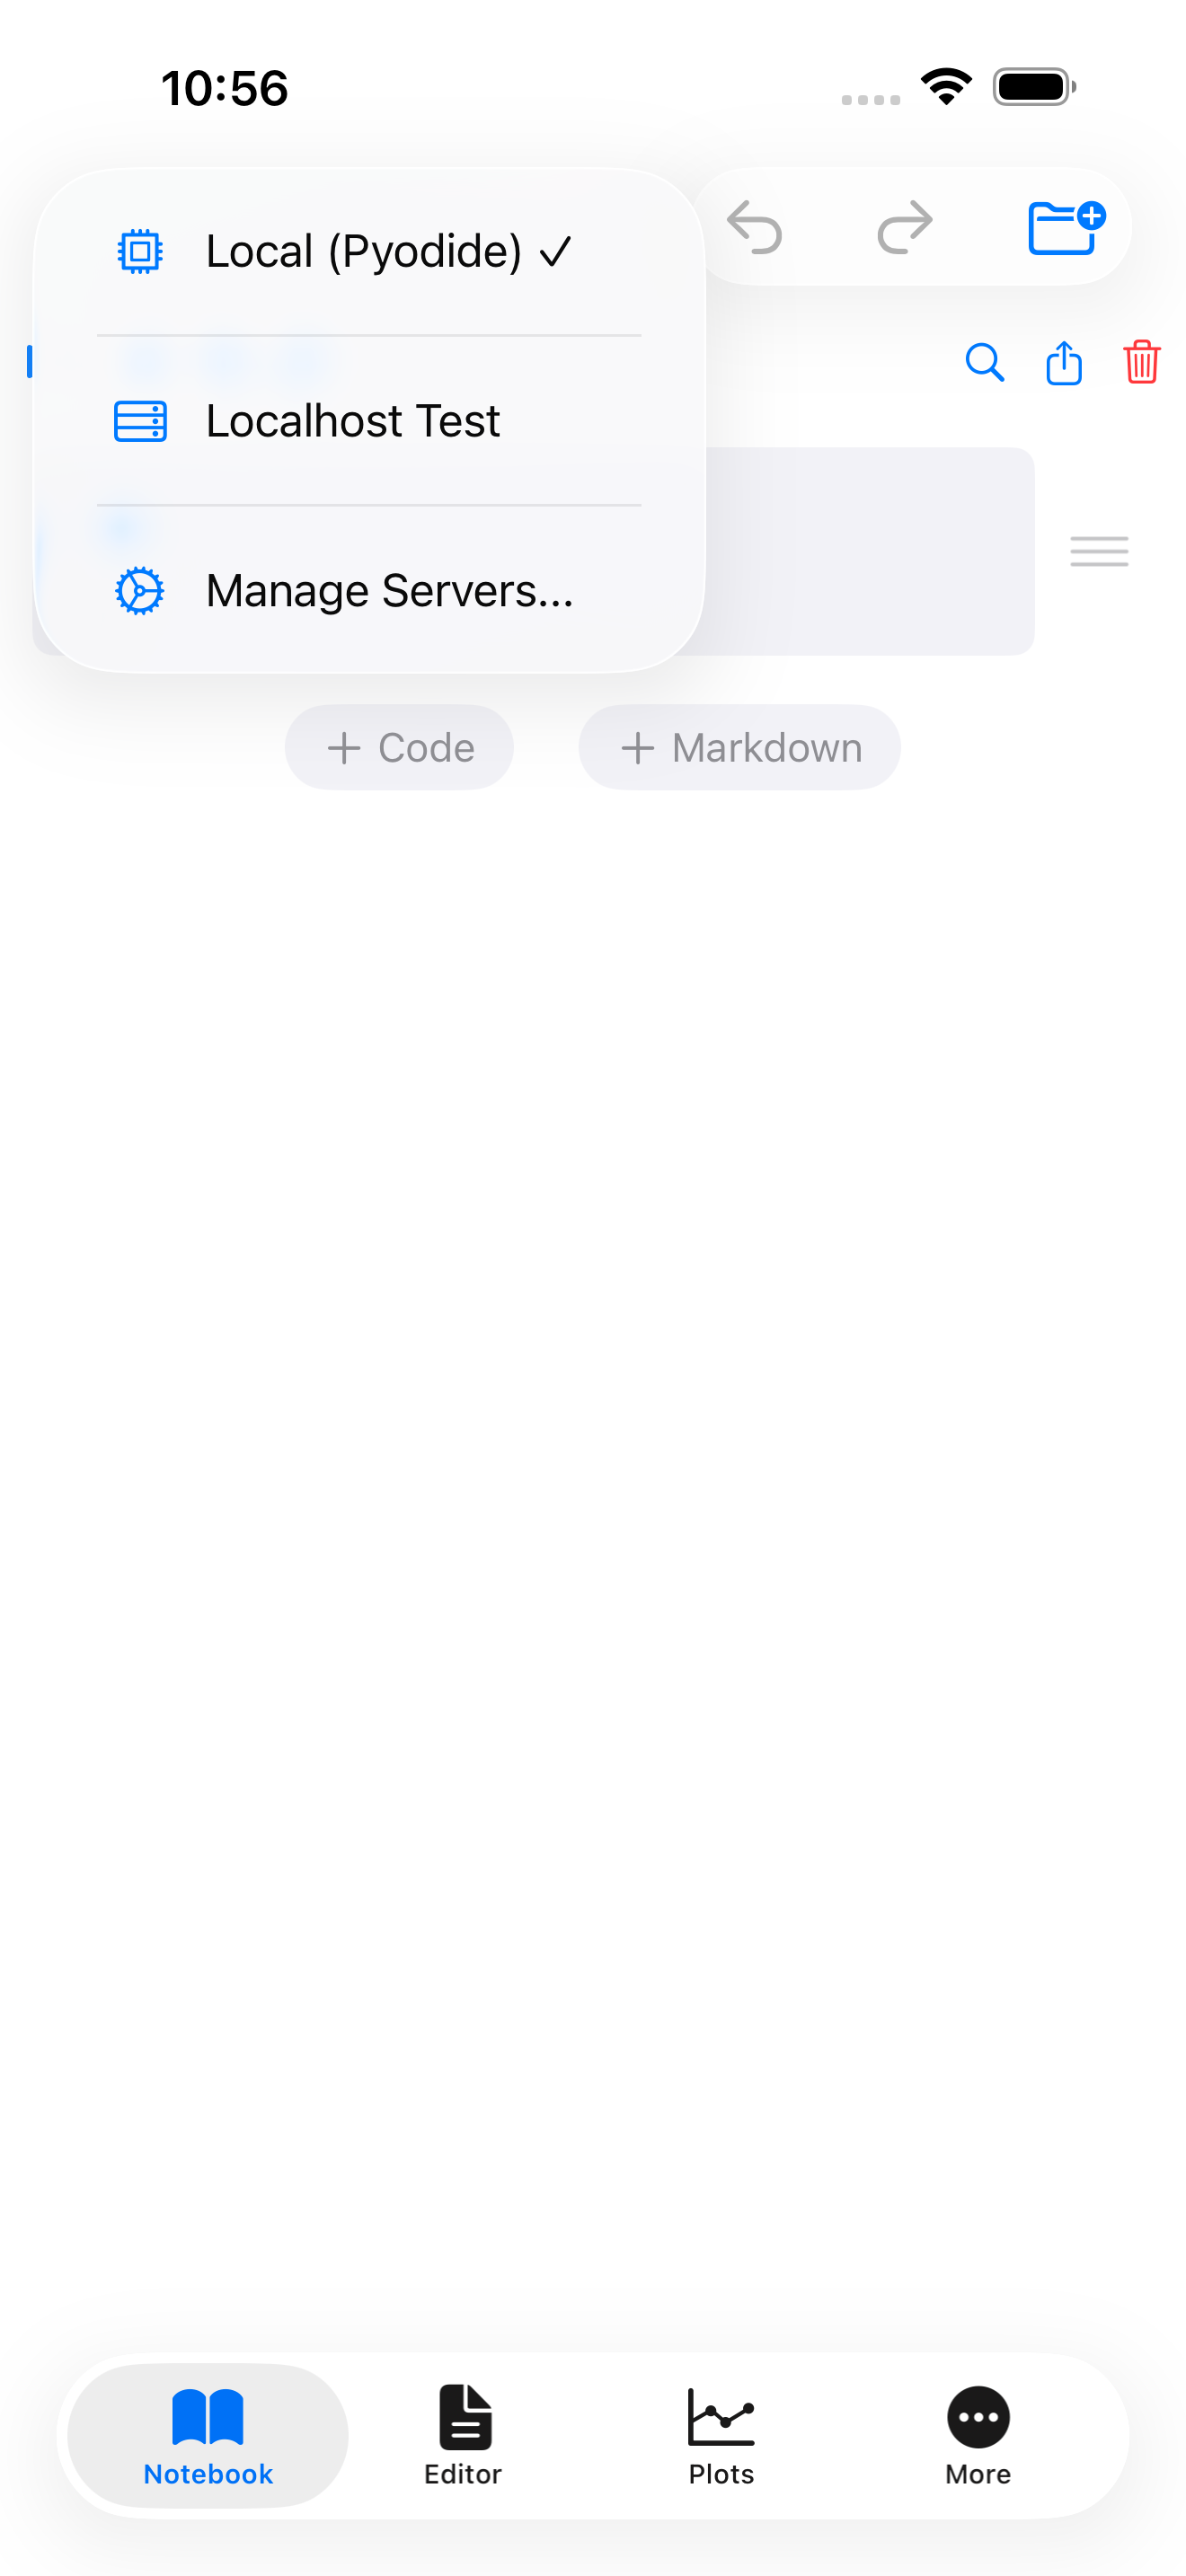
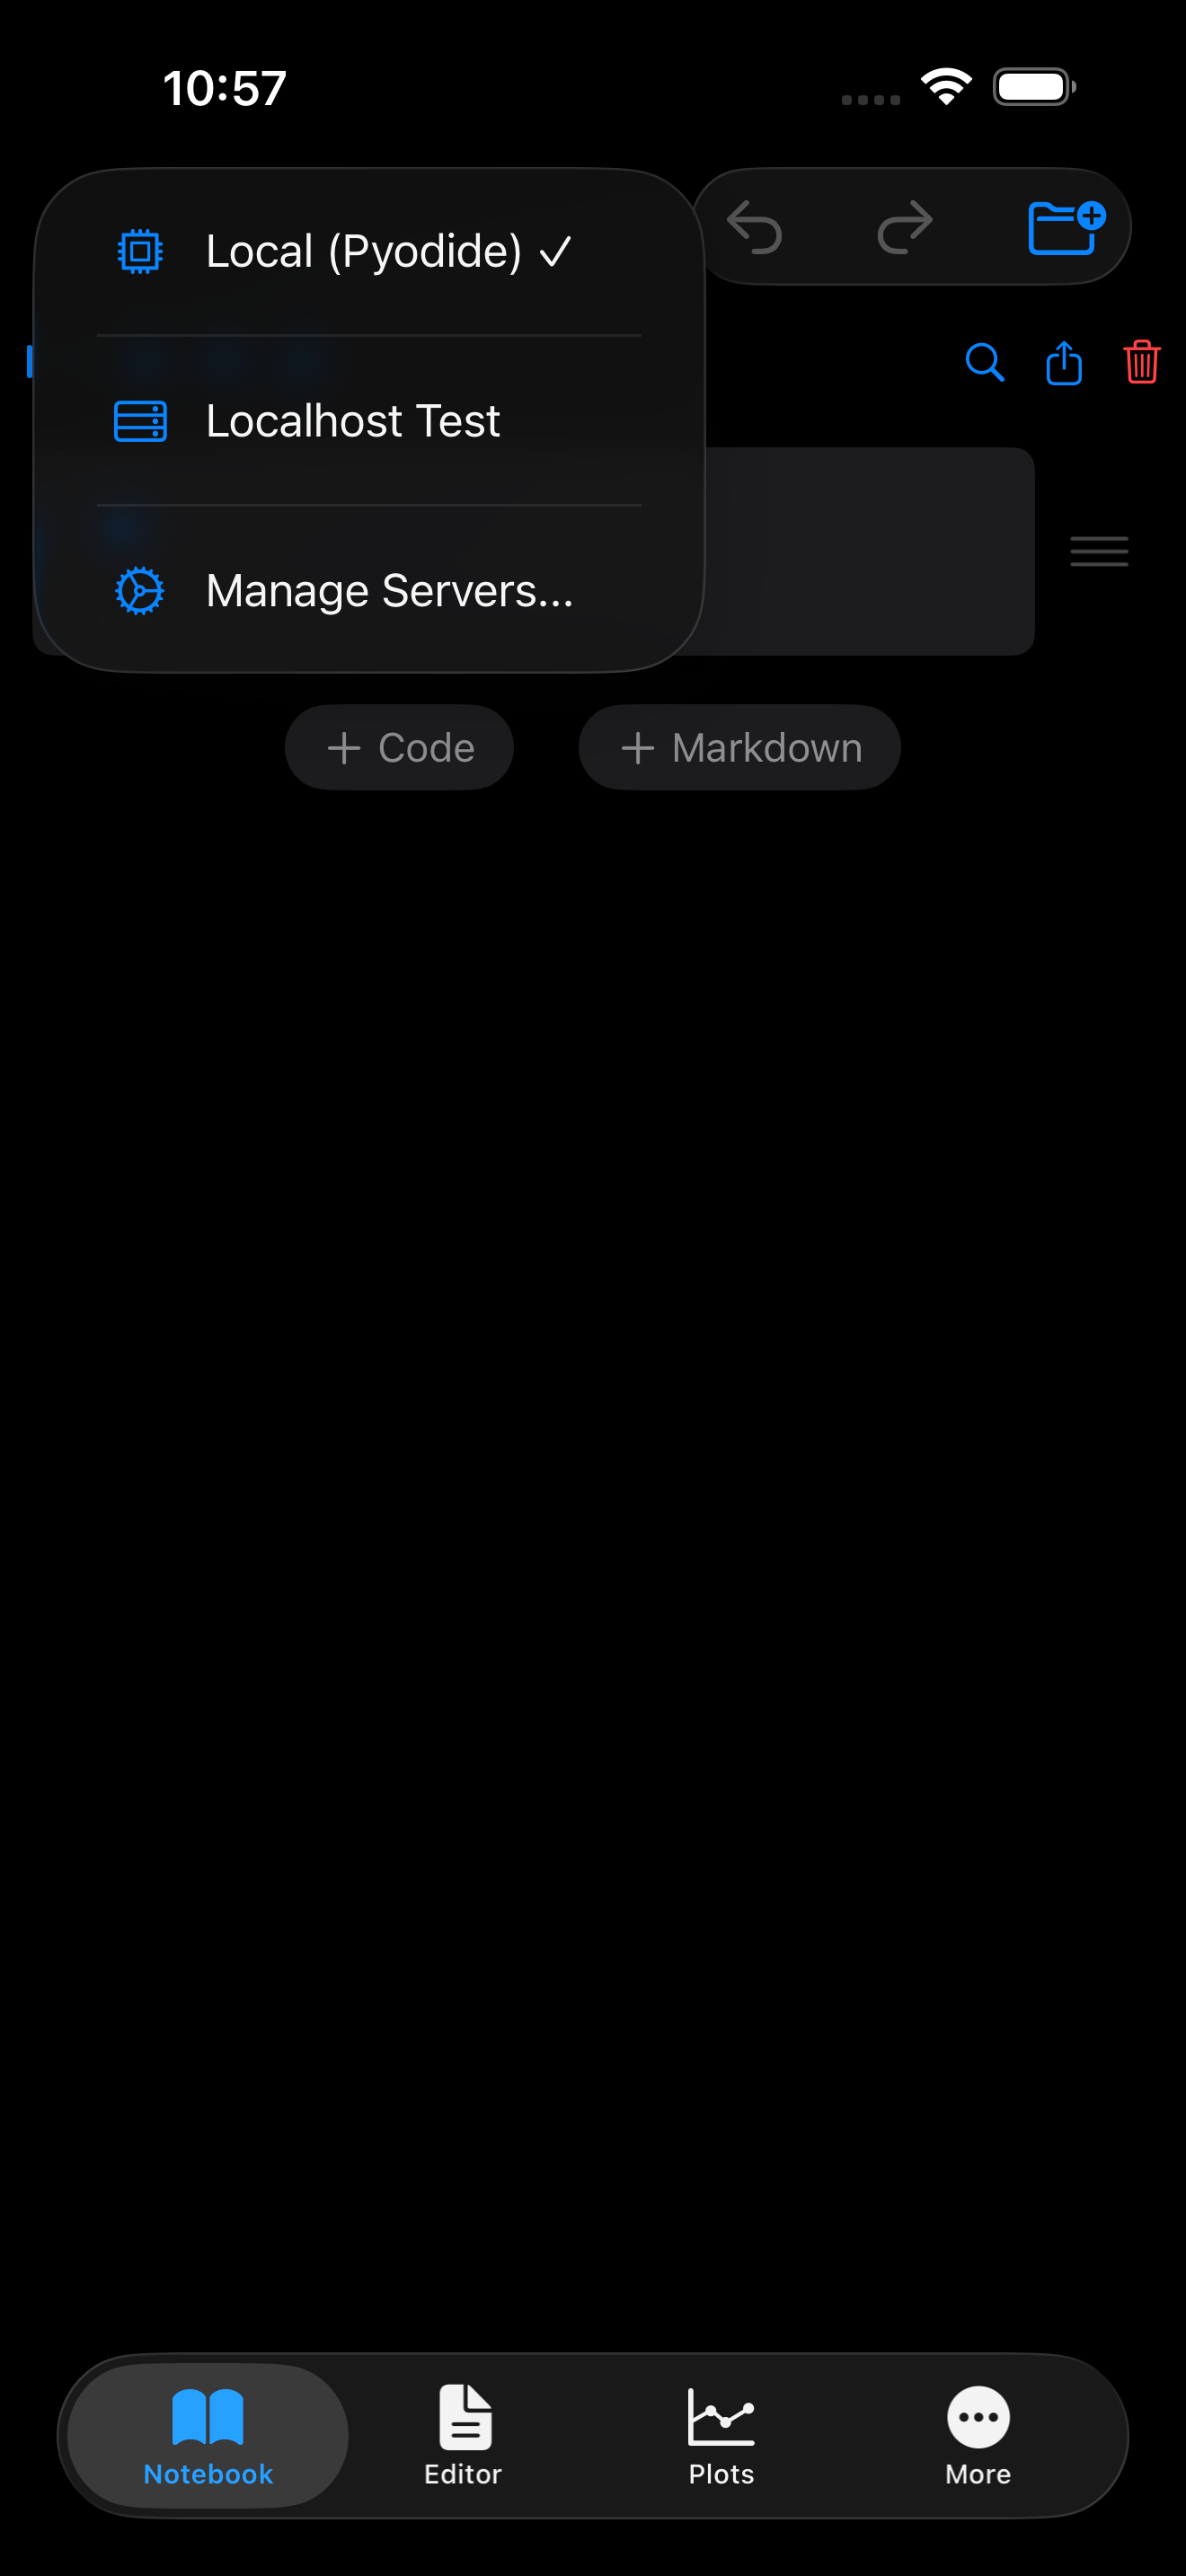
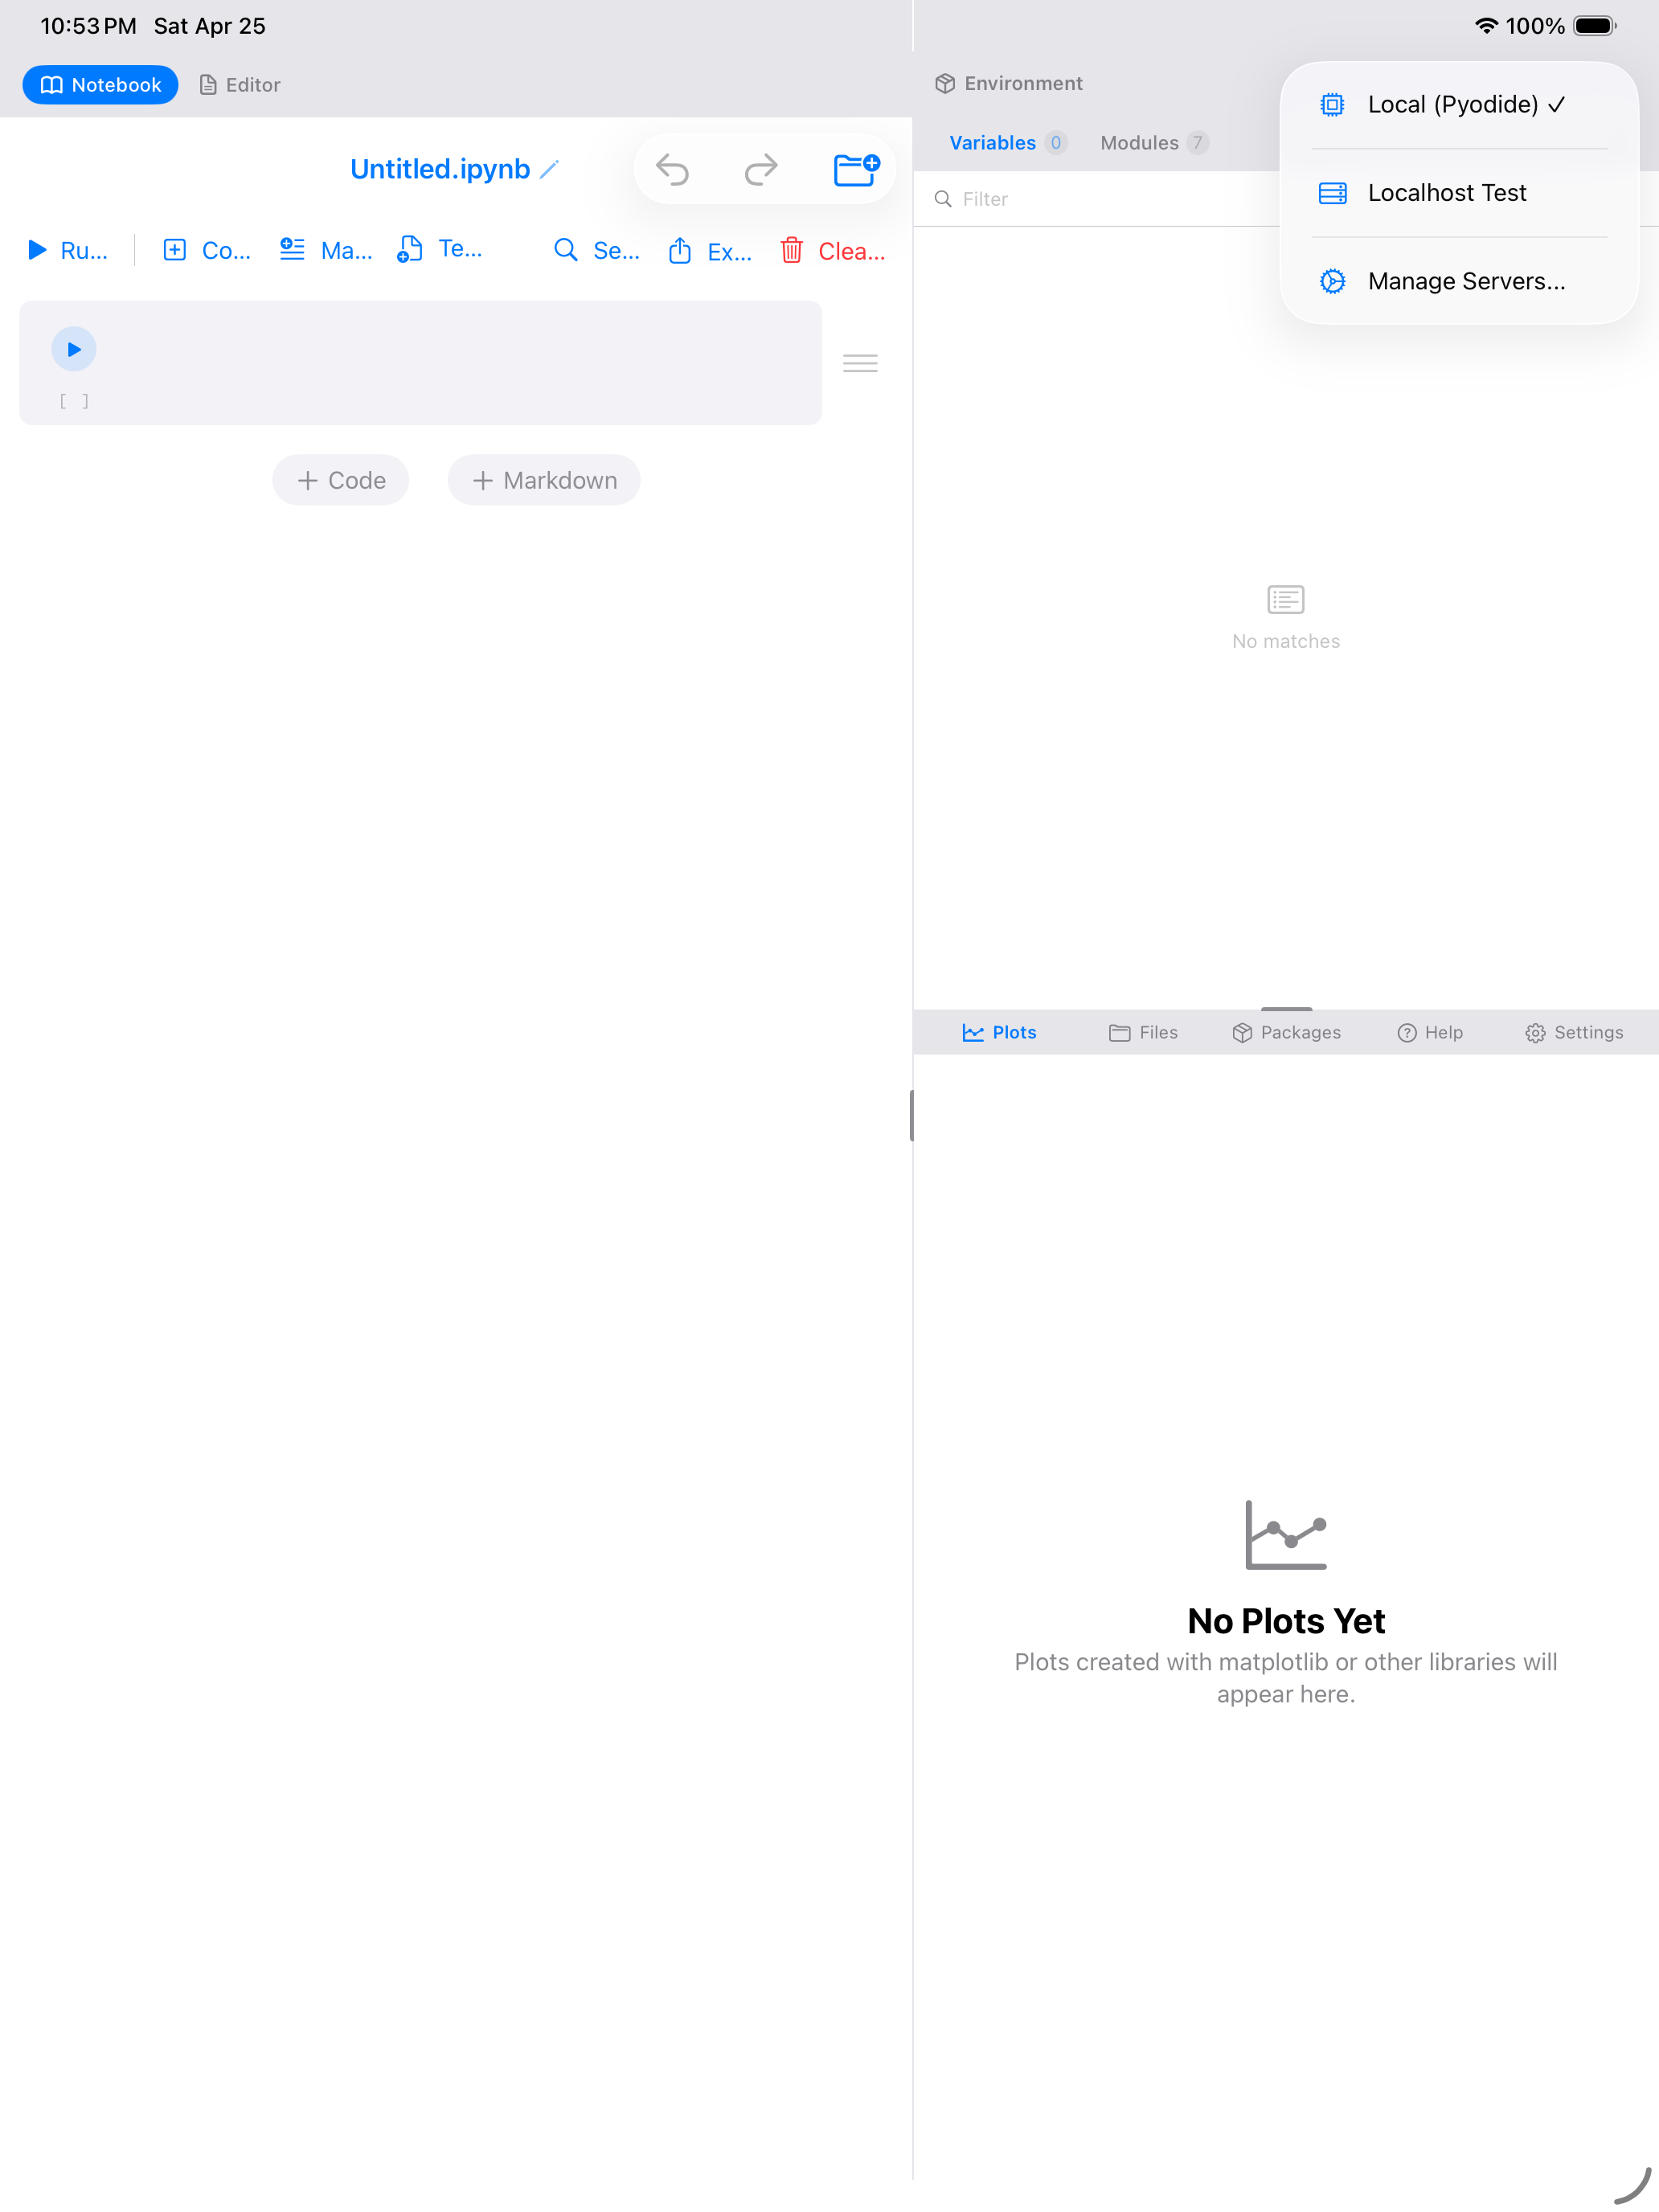
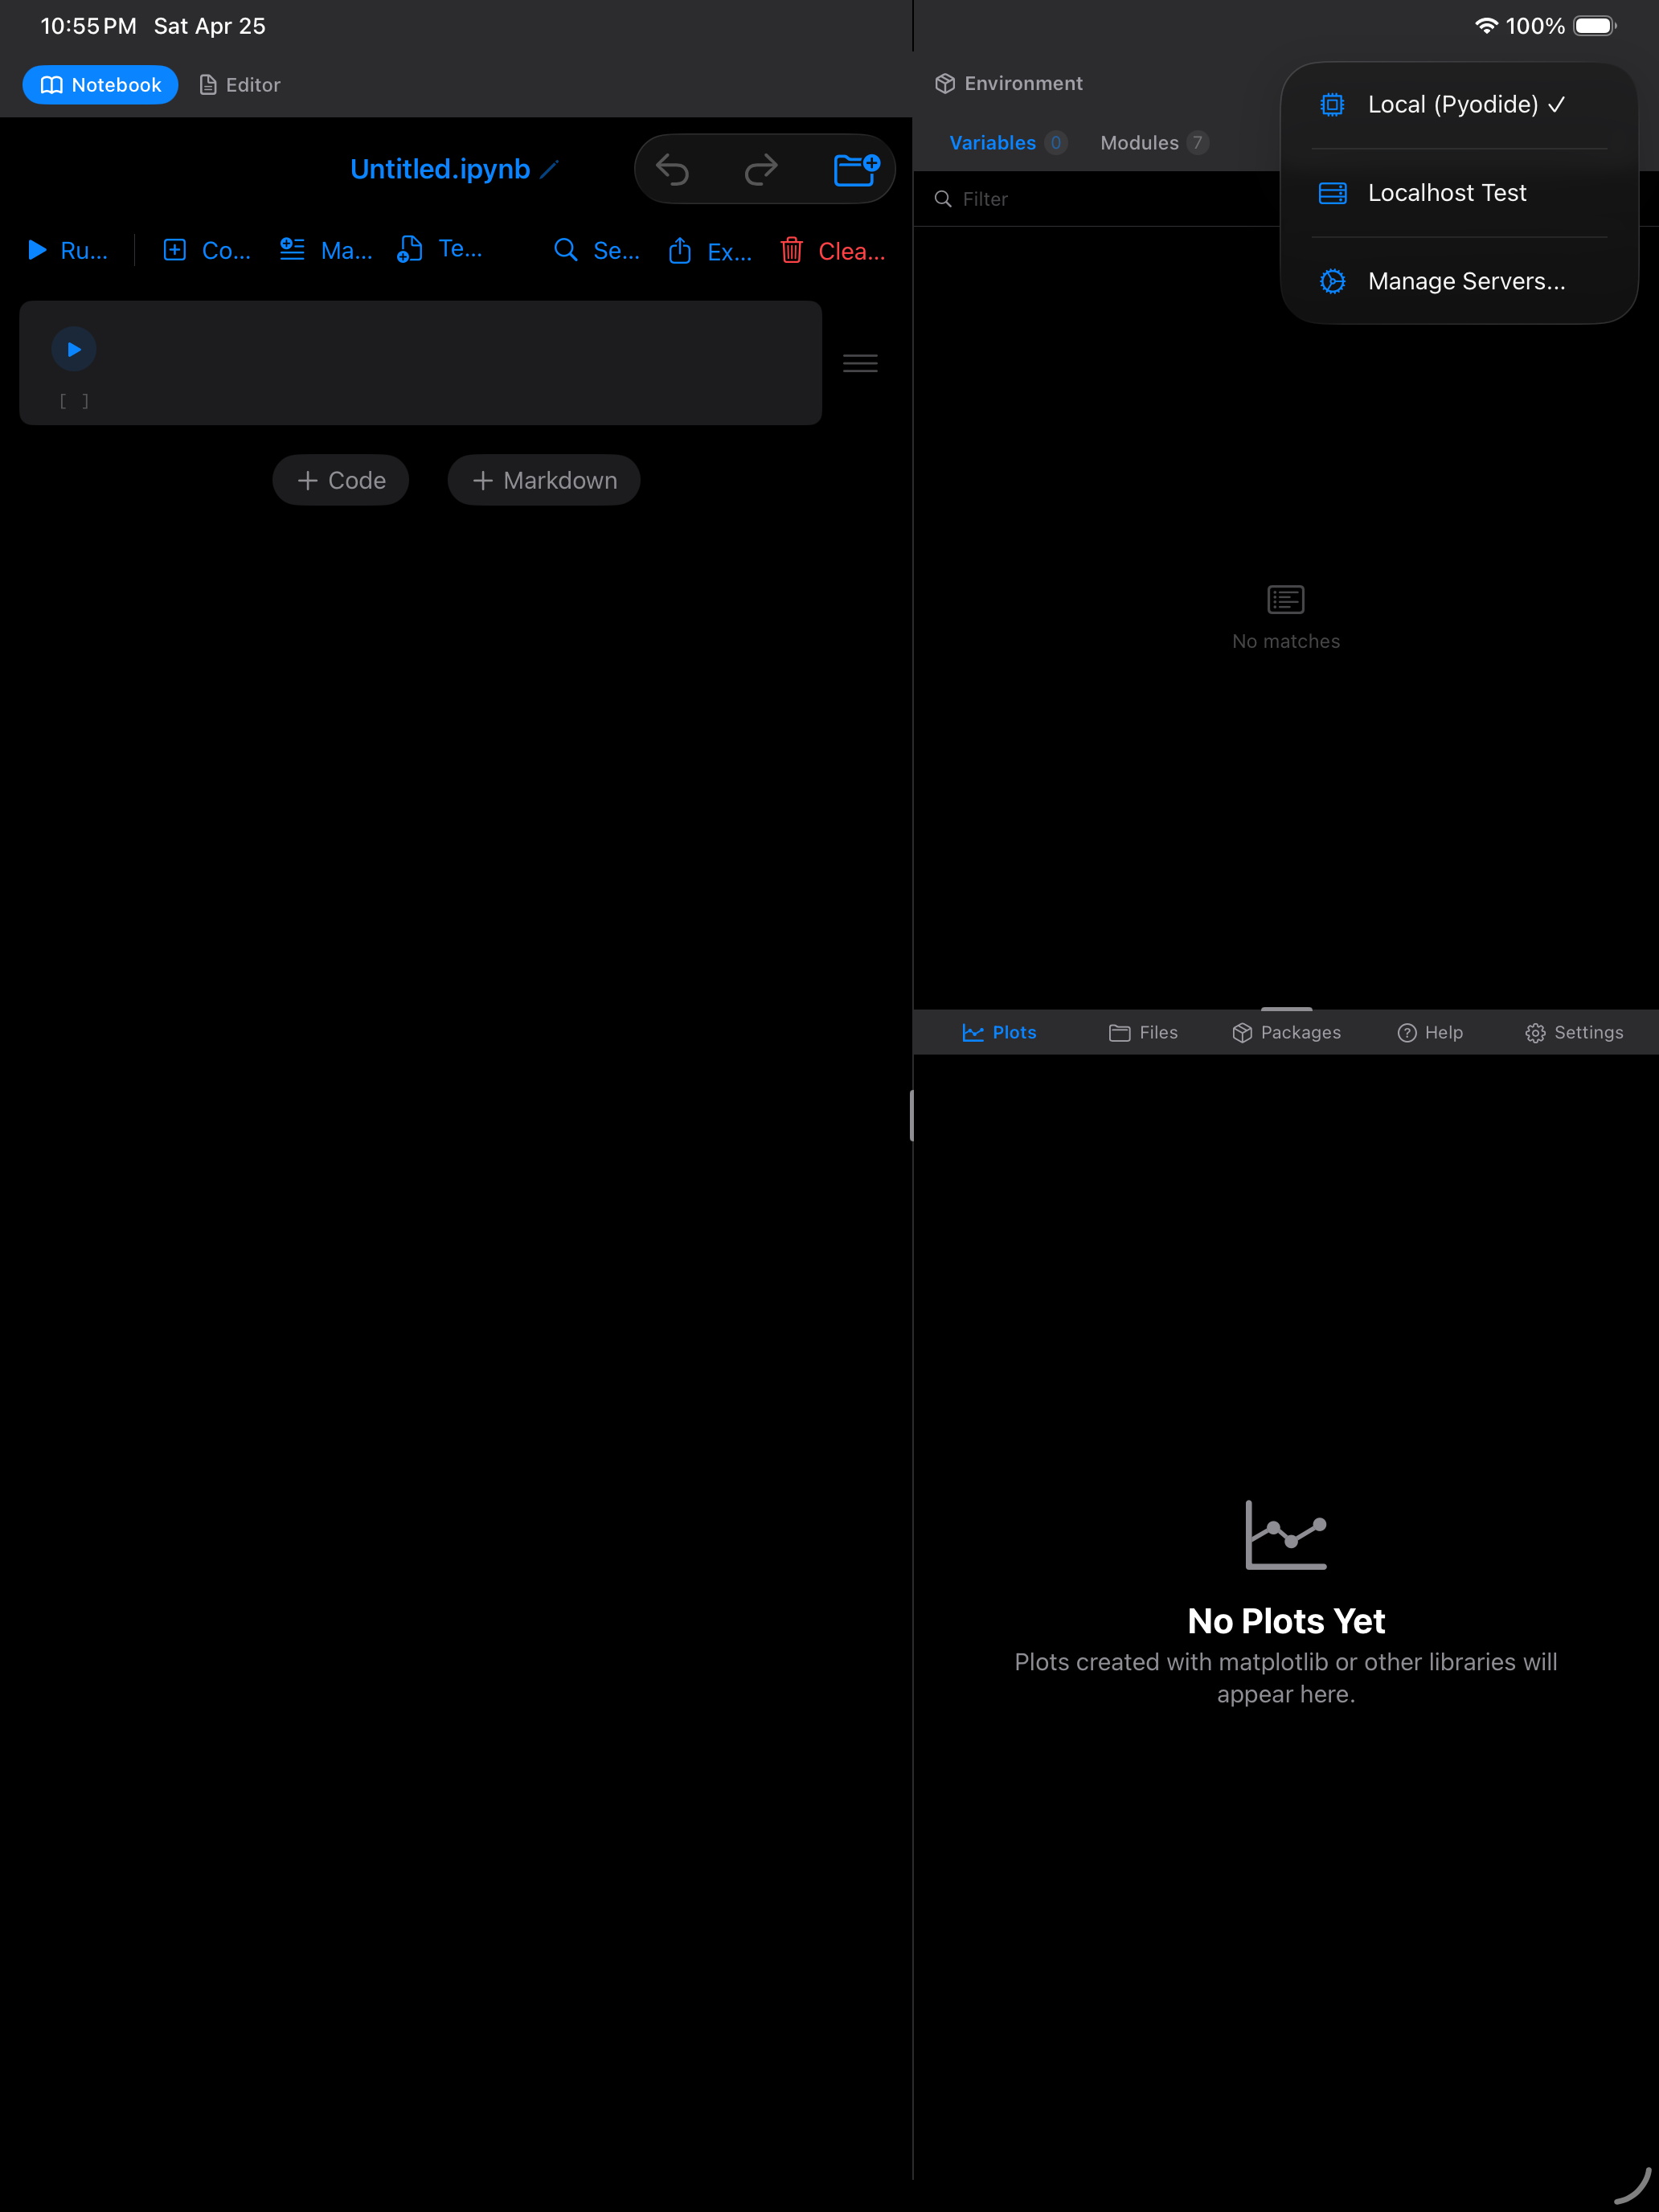
- Tap the kernel picker dropdown in the notebook toolbar. It shows Local (Pyodide) (always available) along with all your saved servers.
- Tap a server name to start connecting.
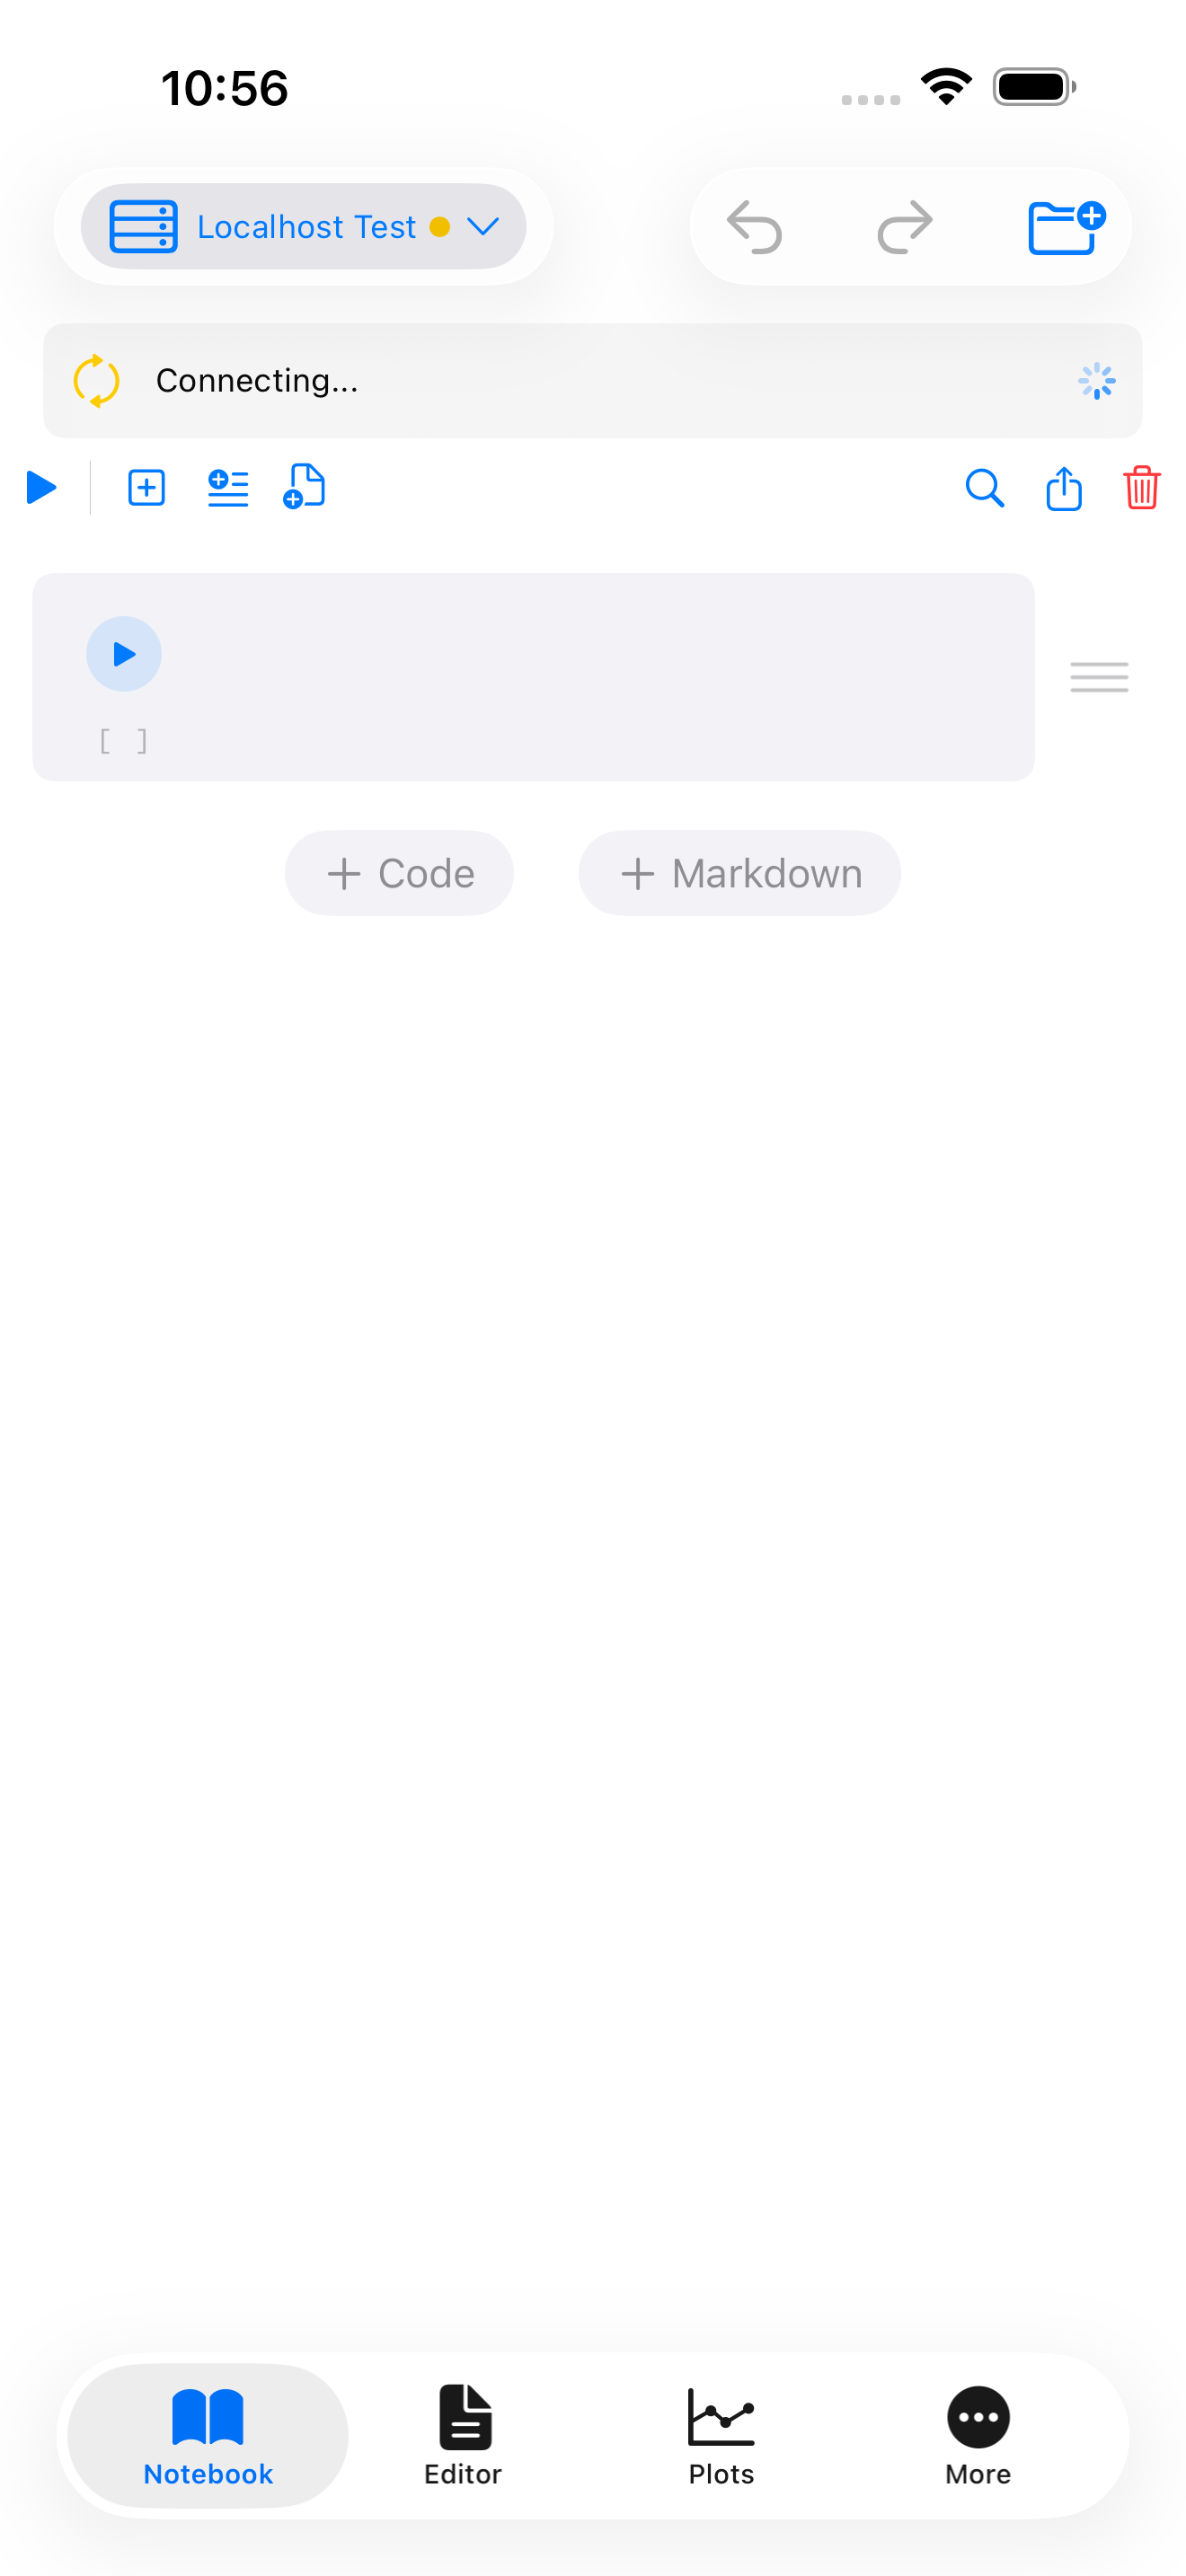
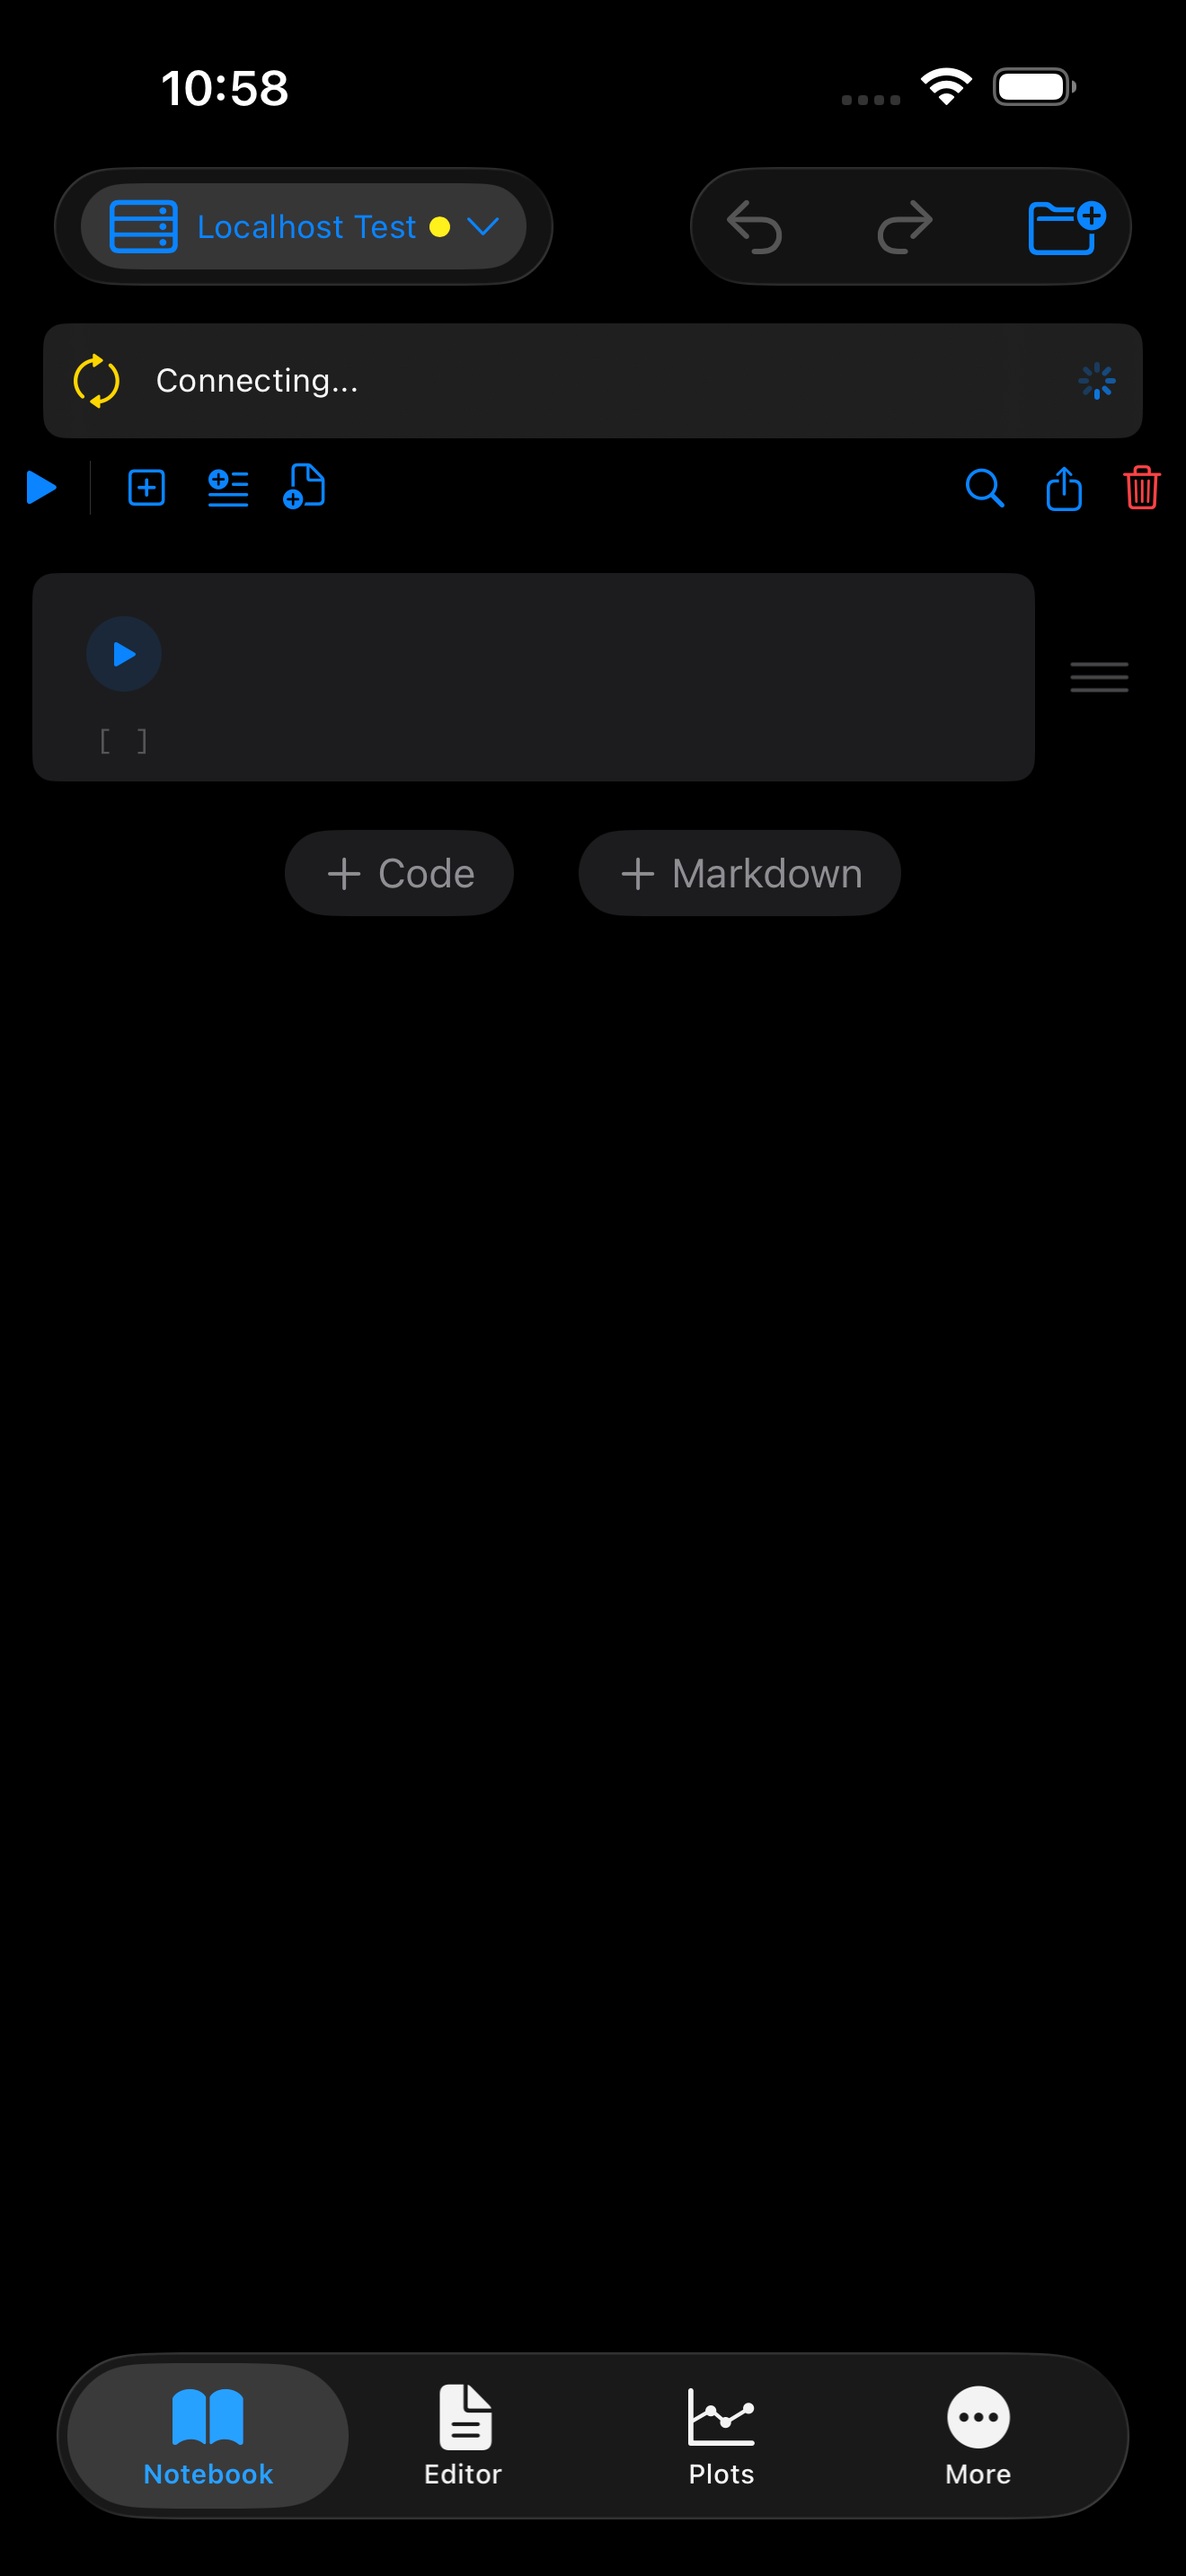
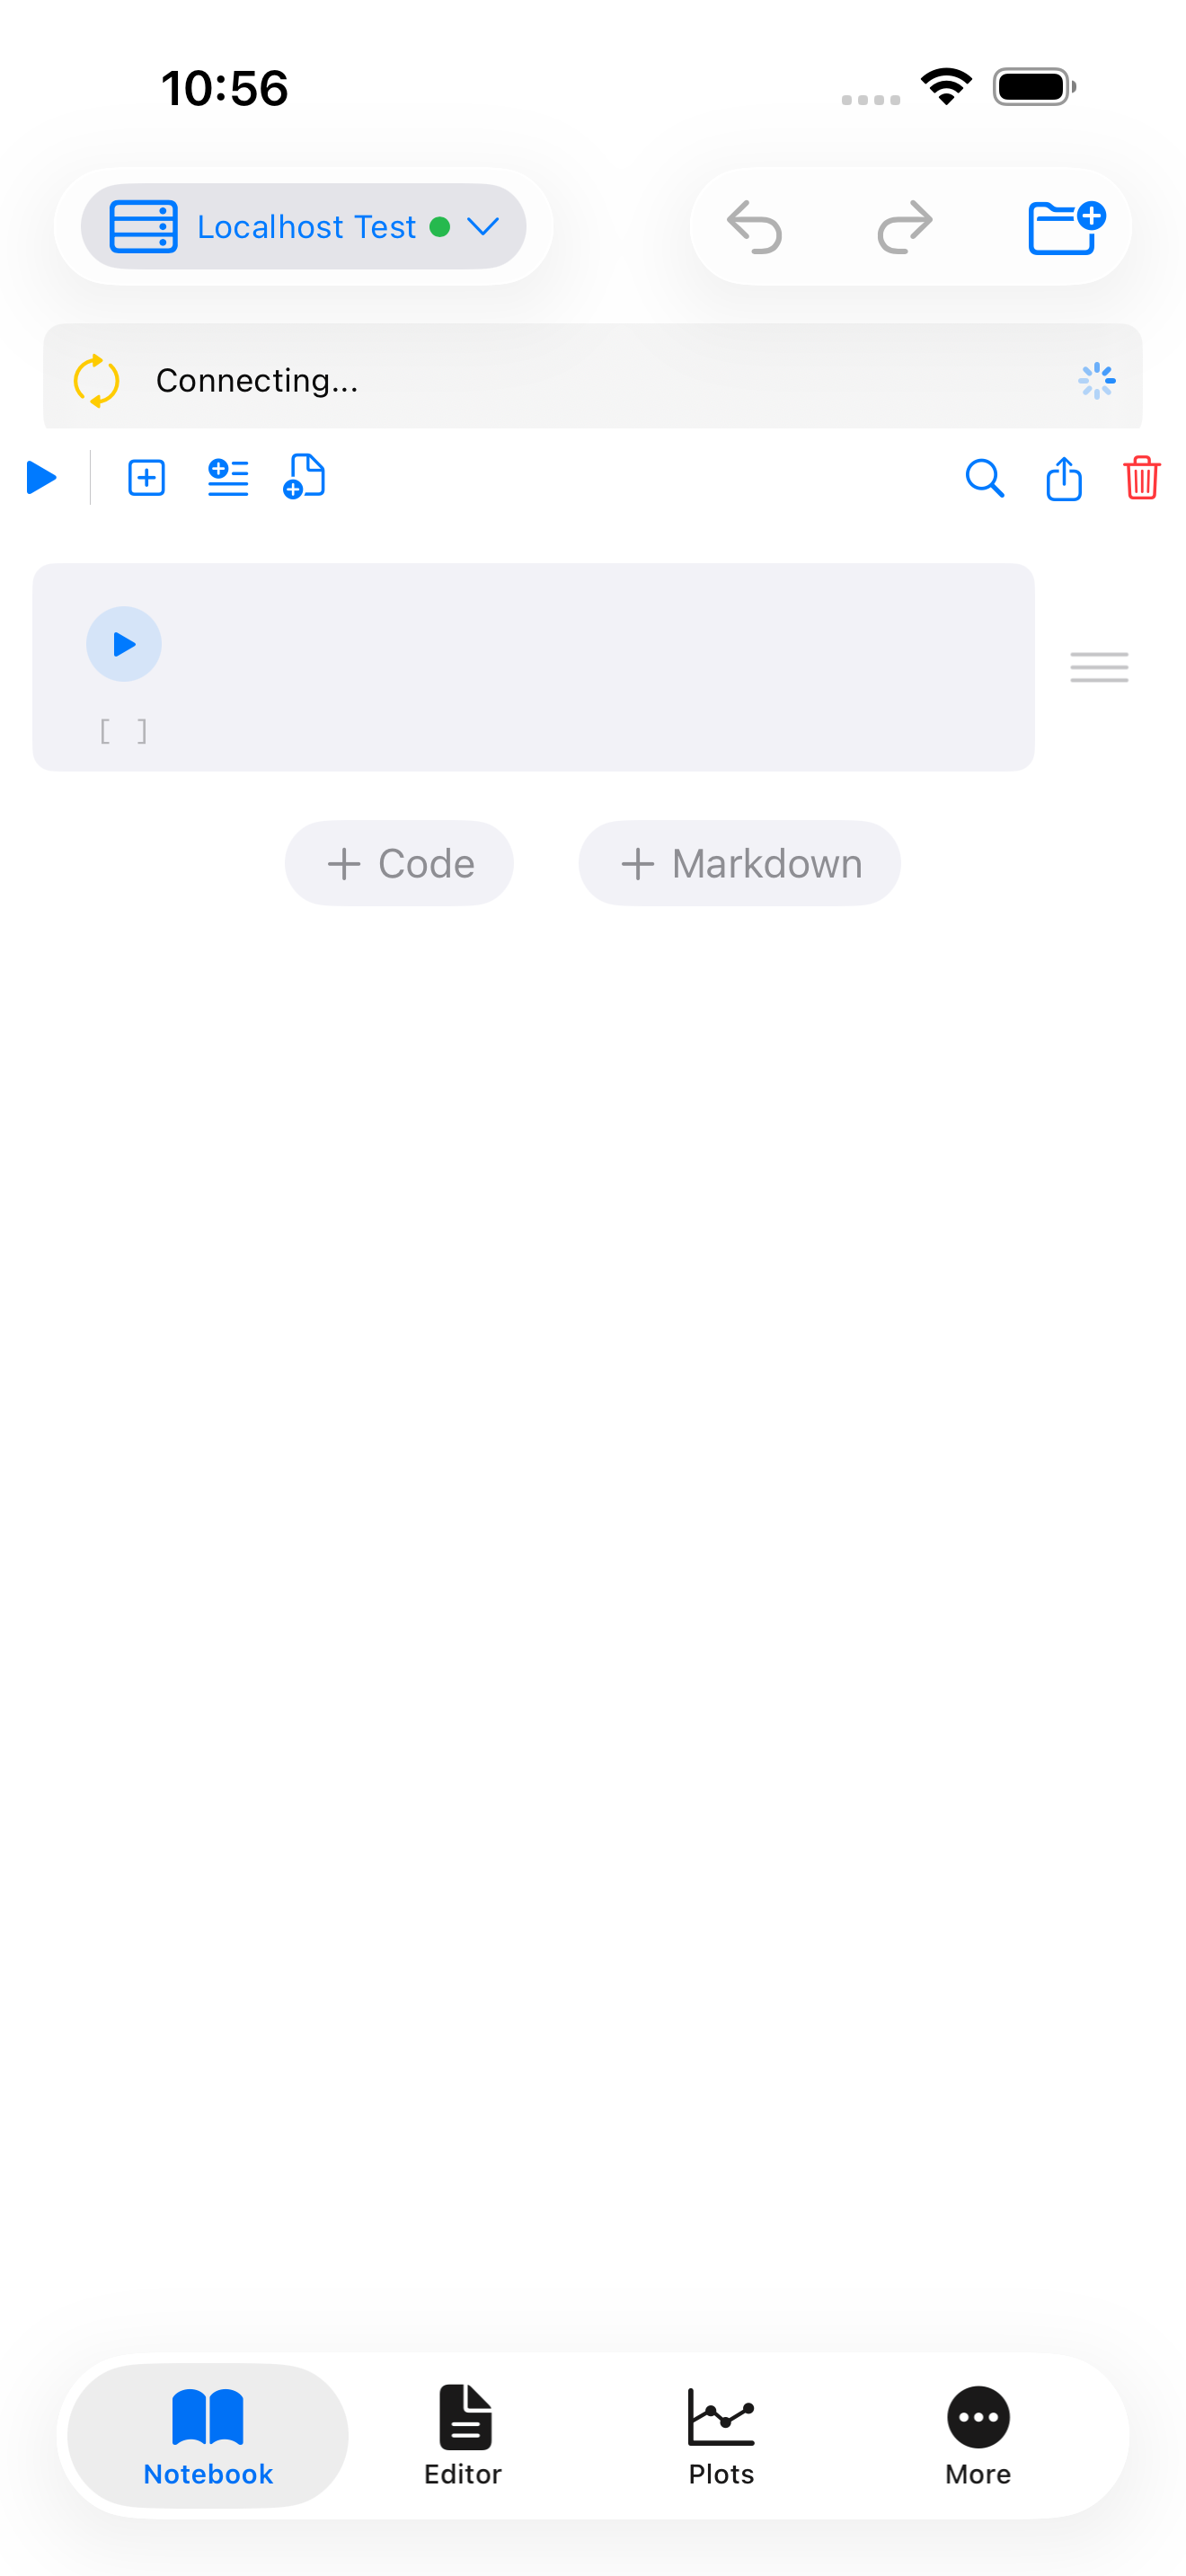
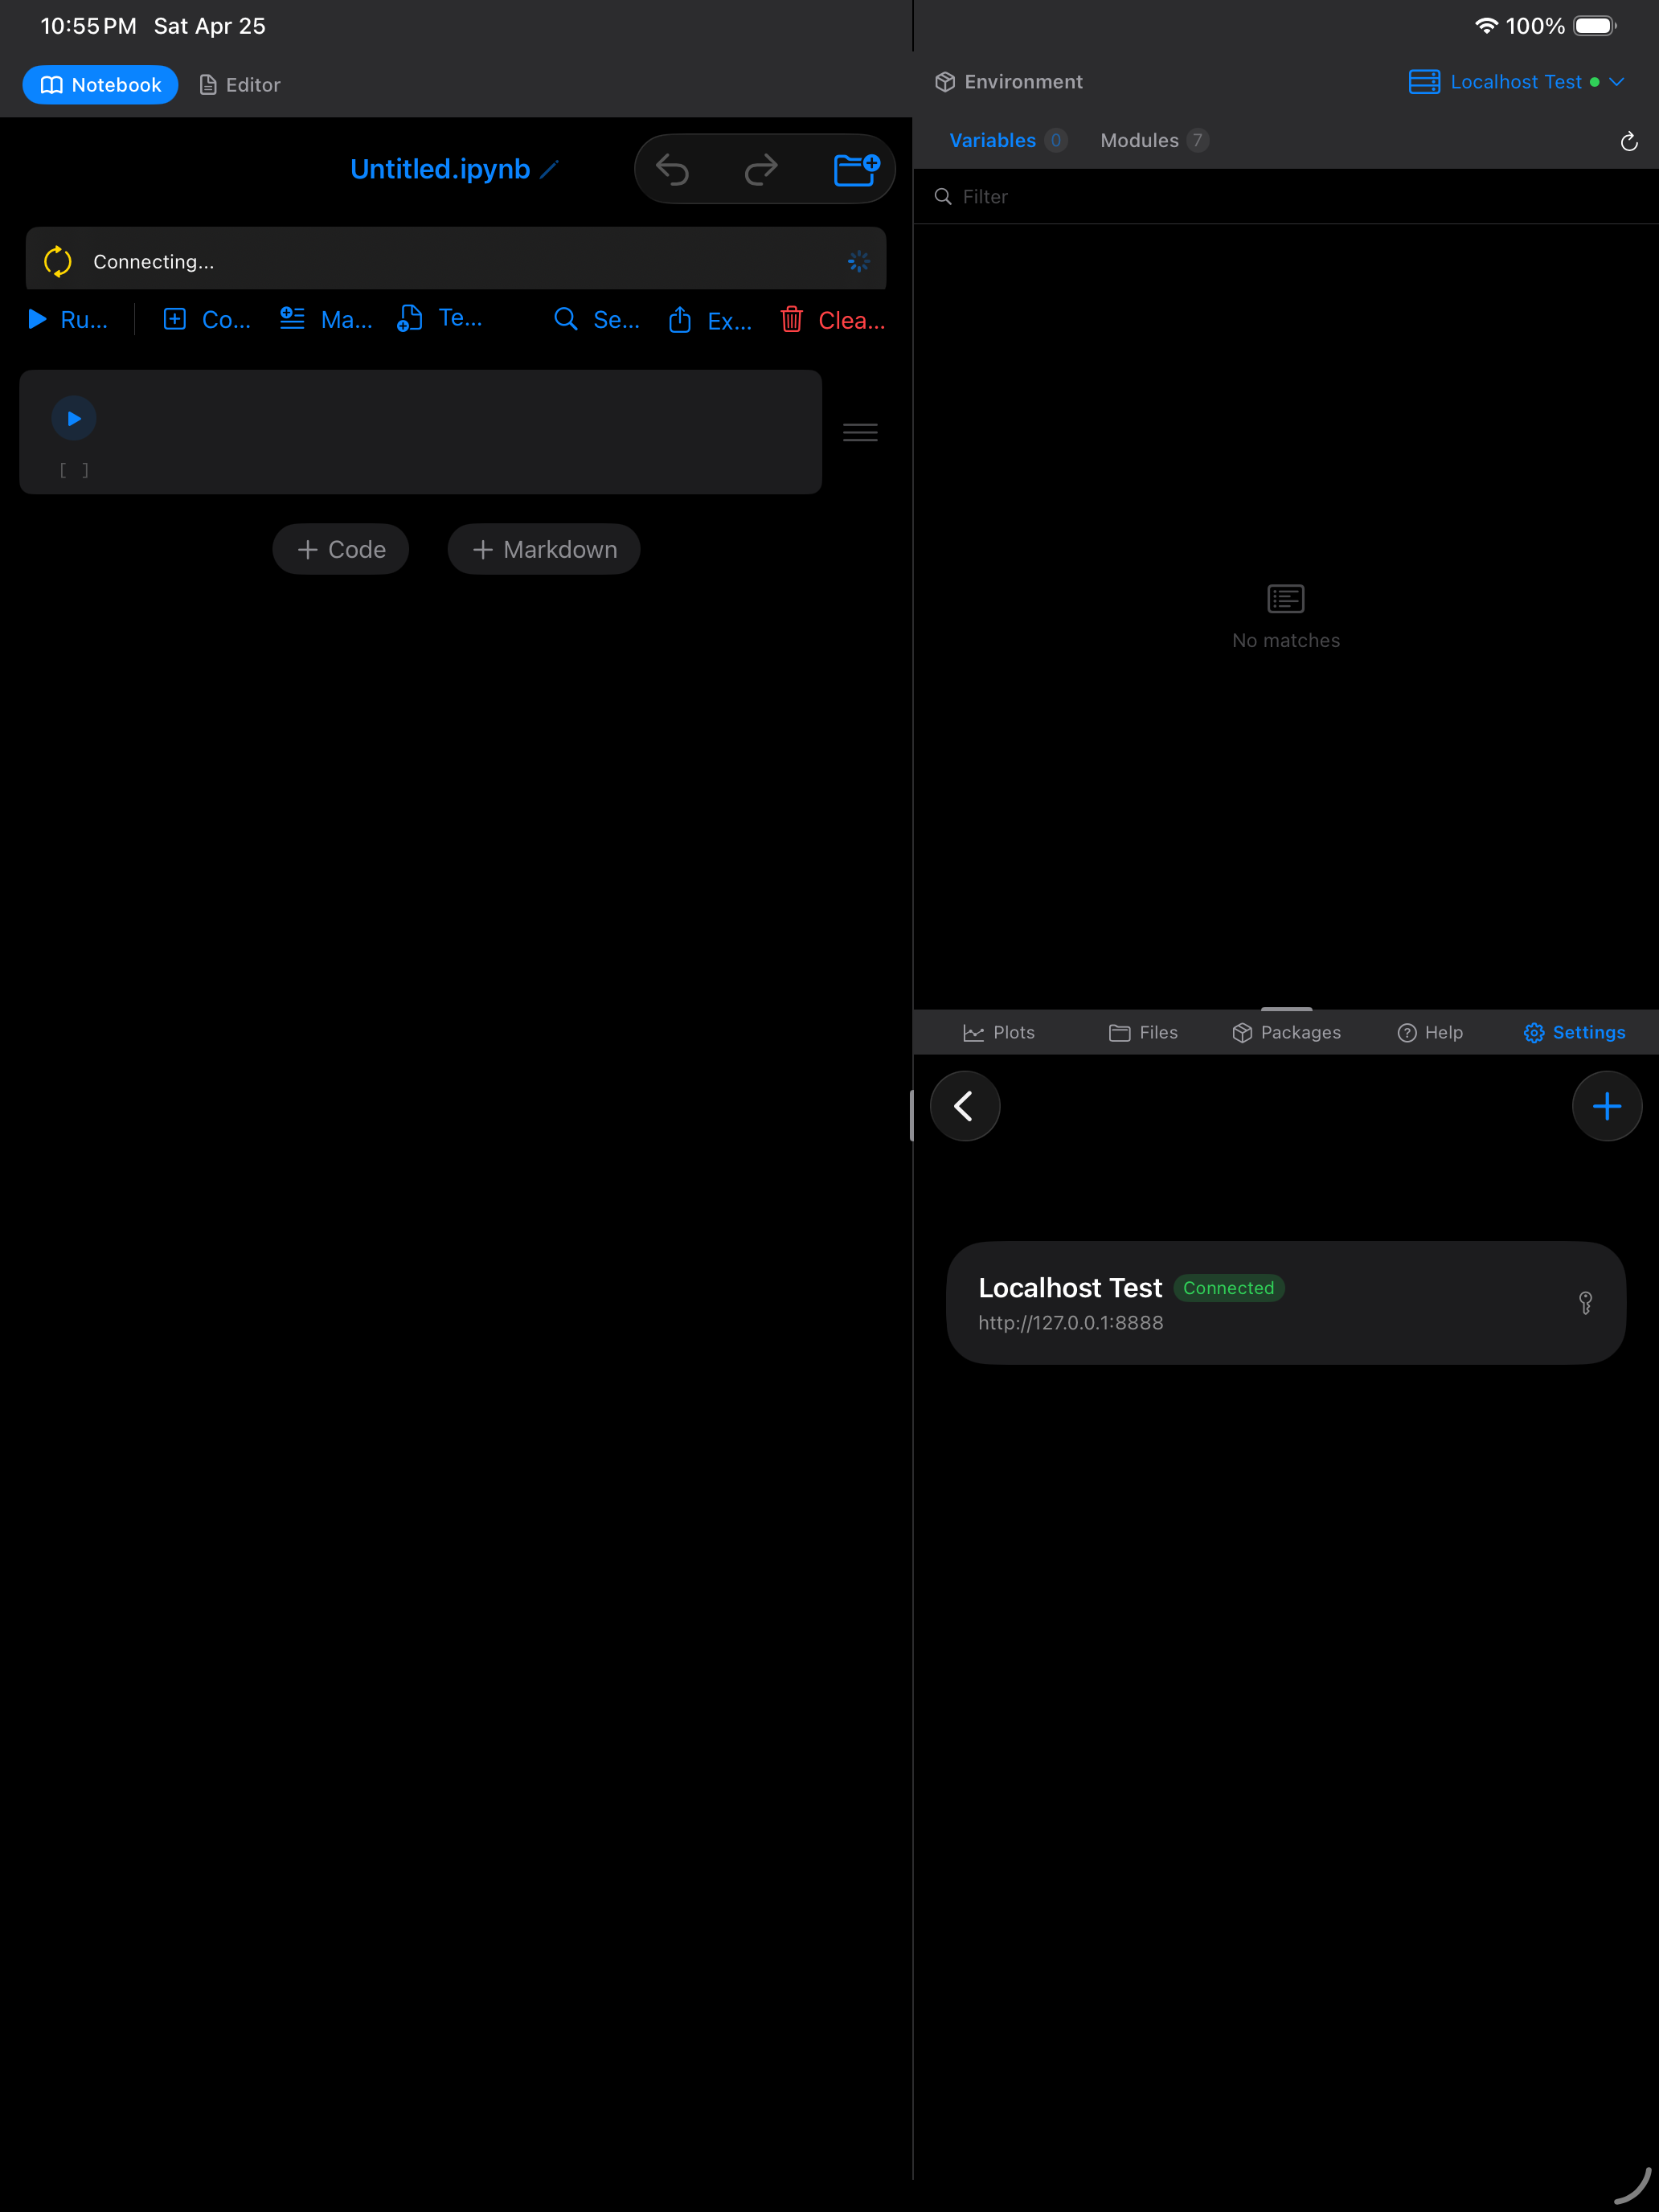
- A yellow “Connecting…” banner appears with a spinner while Pyodios establishes the connection. The connection flow is: SSH tunnel (if configured) > authentication > start kernel > WebSocket connection.
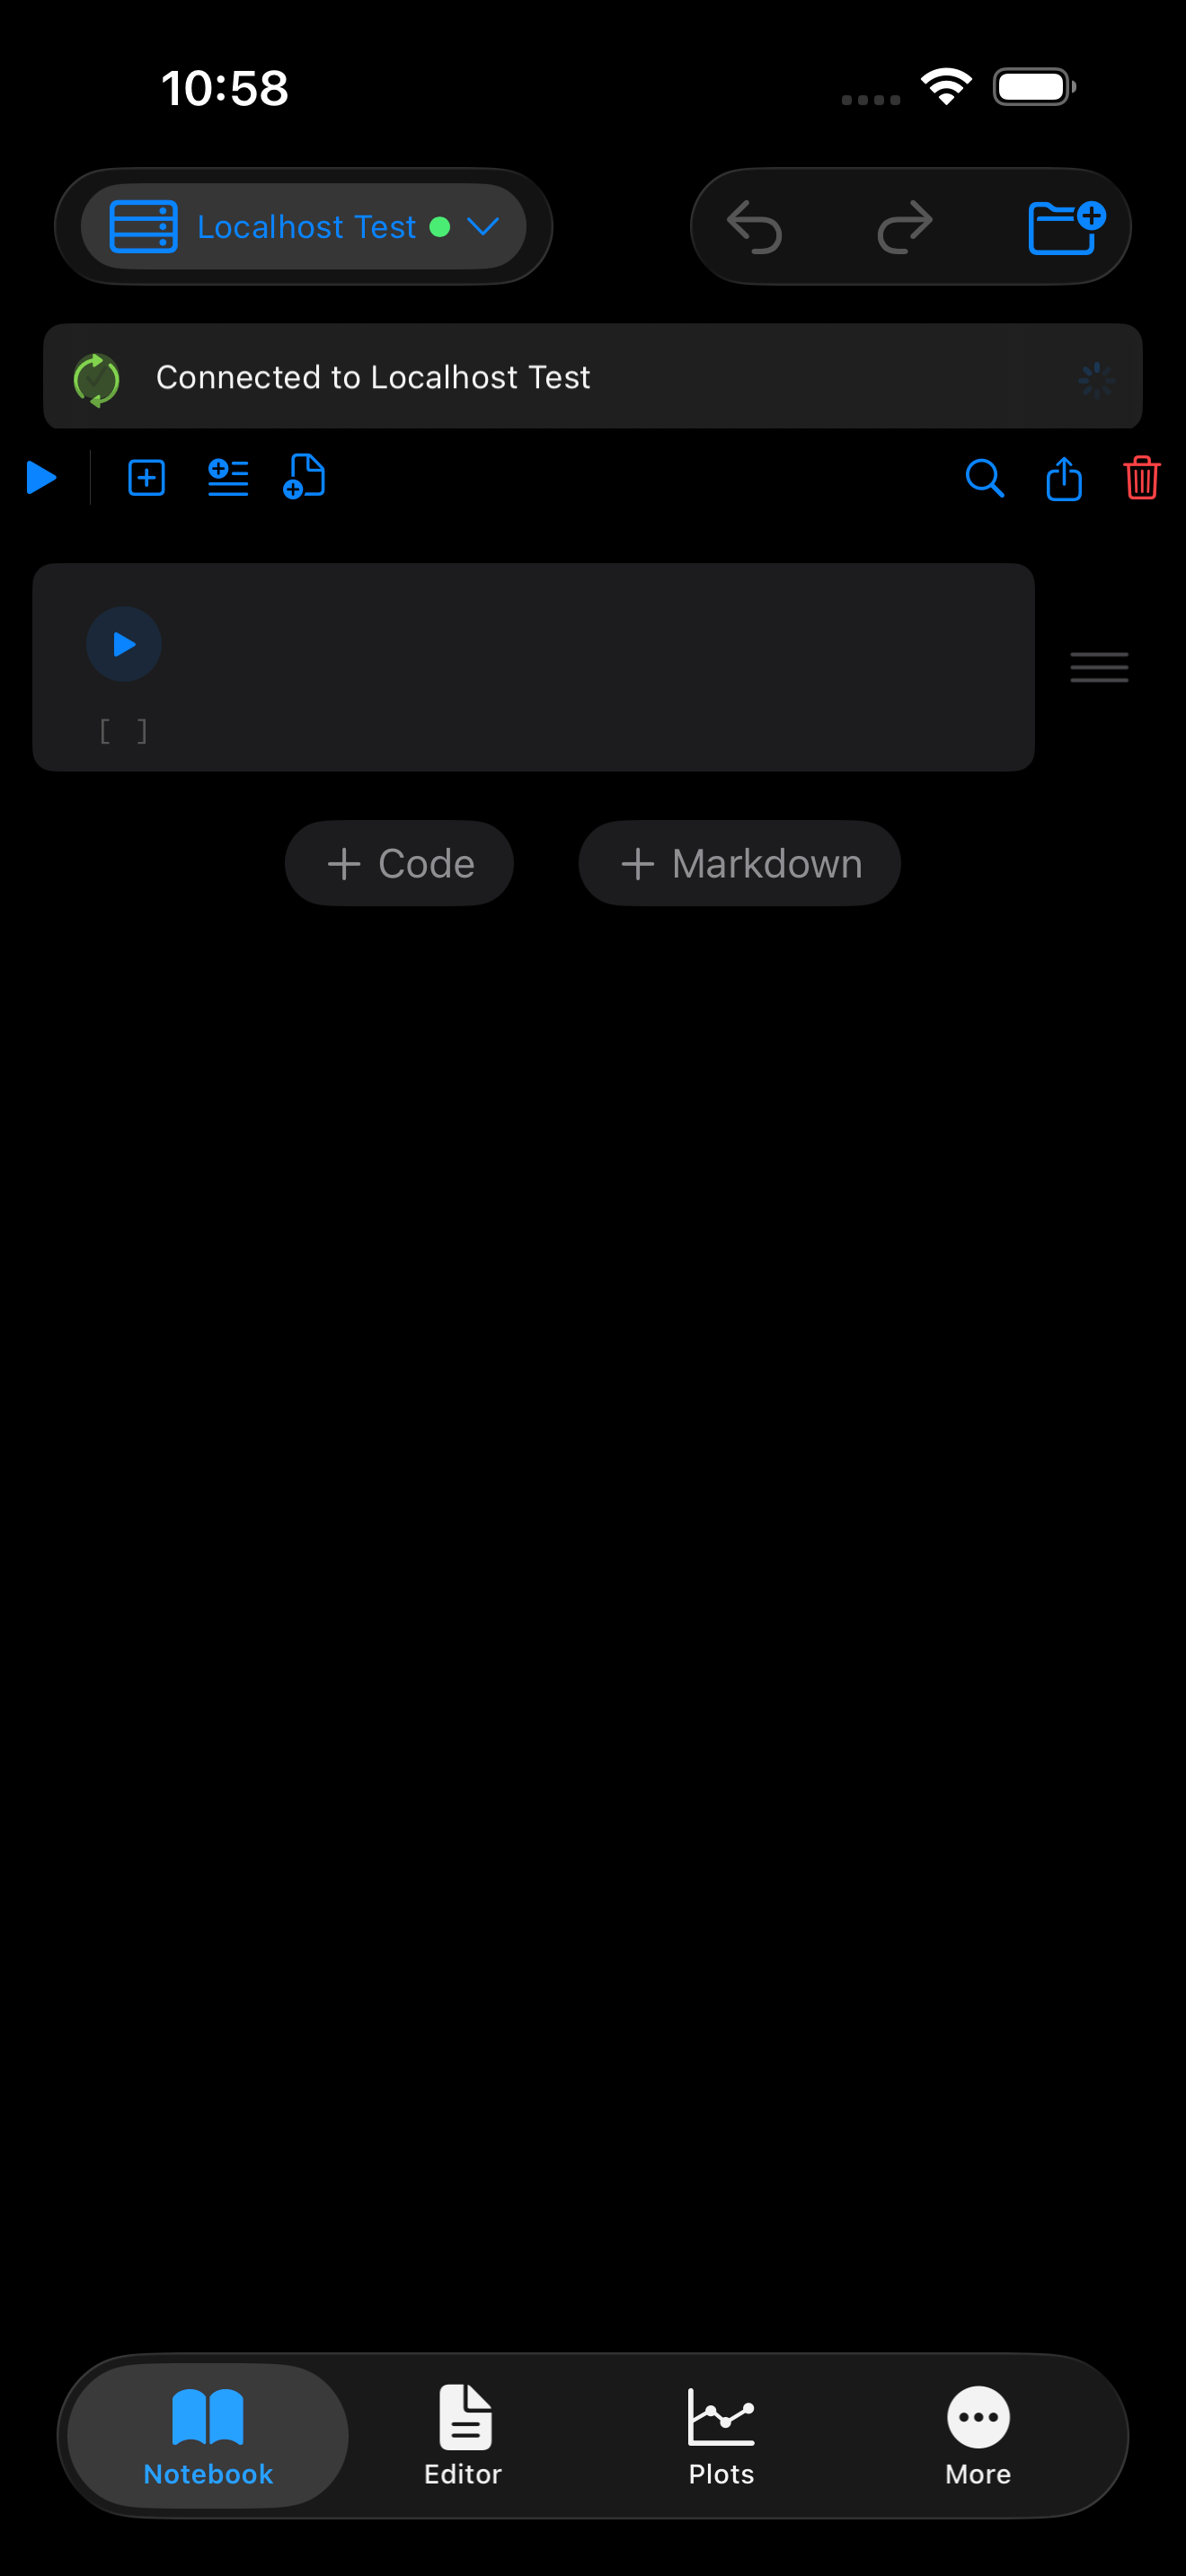
- On success, a green “Connected to {name}” banner appears and auto-dismisses after two seconds. The kernel picker now shows the server name as the active backend.
- If connection fails, an orange error banner appears with the error message and two buttons: Retry and Switch to Local.


Using a Remote Kernel
Once connected, everything works the same way as it does with the local kernel. The ExecutionServiceRouter abstracts the backend so notebooks, the editor, and the console all behave identically regardless of where the code is actually running.
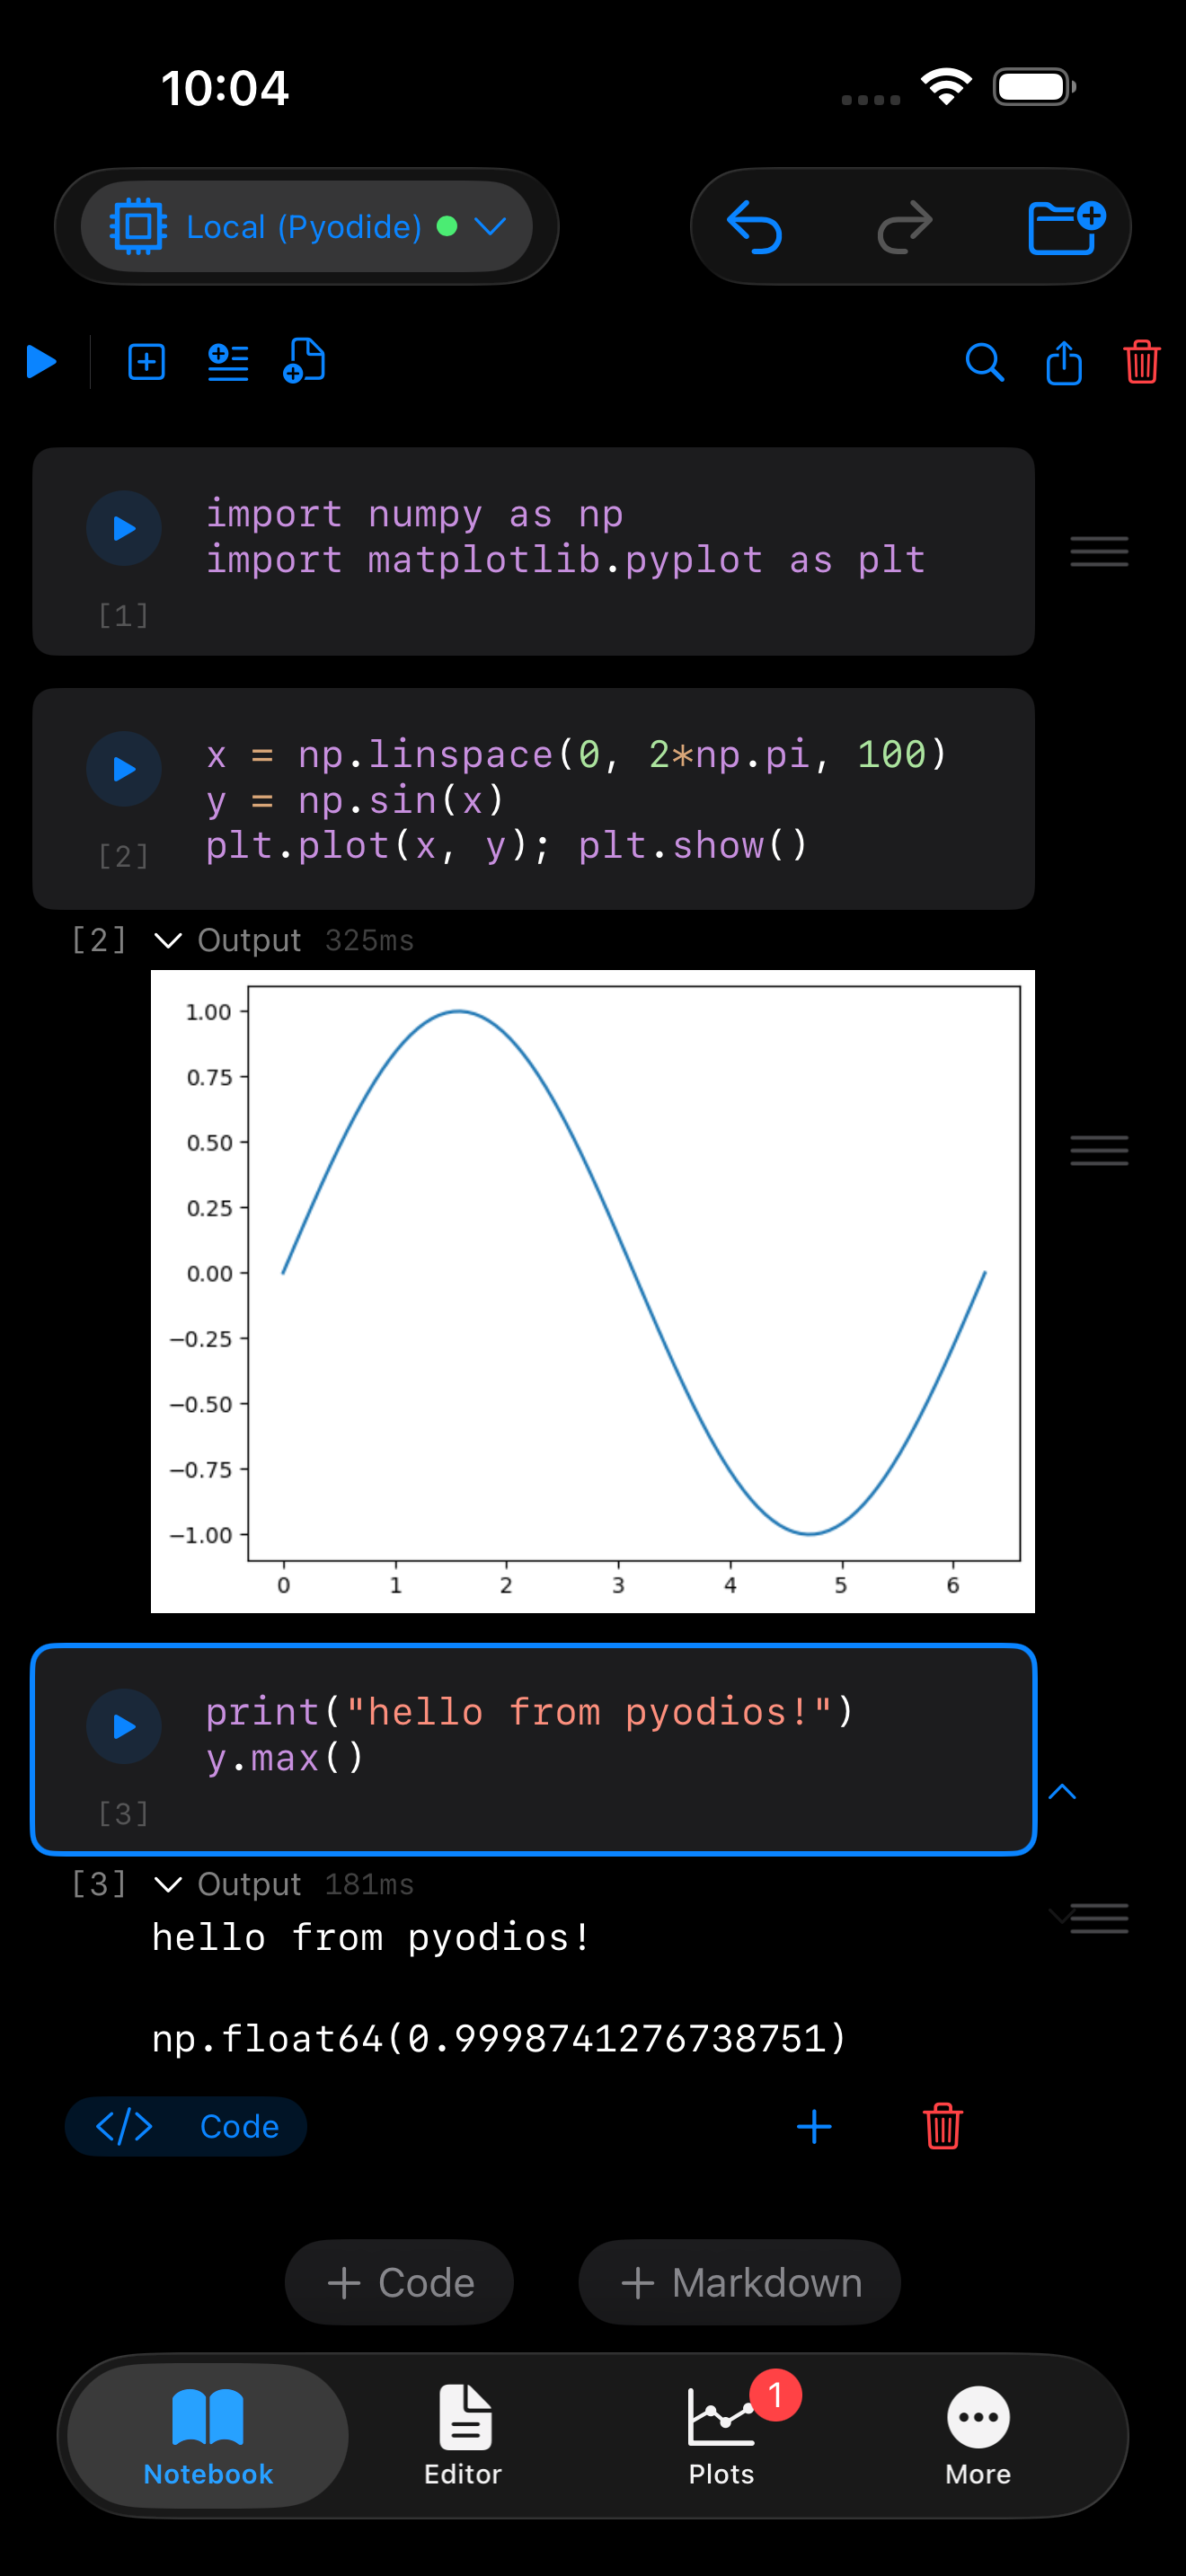
- Notebooks: run cells, see outputs inline, view plots, and read tracebacks exactly as you would locally.
- Editor: run scripts or selections, and see results in the output panel below.
- Console: type expressions at the
>>>prompt and get results immediately.
Outputs travel back over the Jupyter wire protocol. Text output, matplotlib plots (rendered as inline images), rich HTML output, DataFrames, and error tracebacks all appear in the same way you are used to.
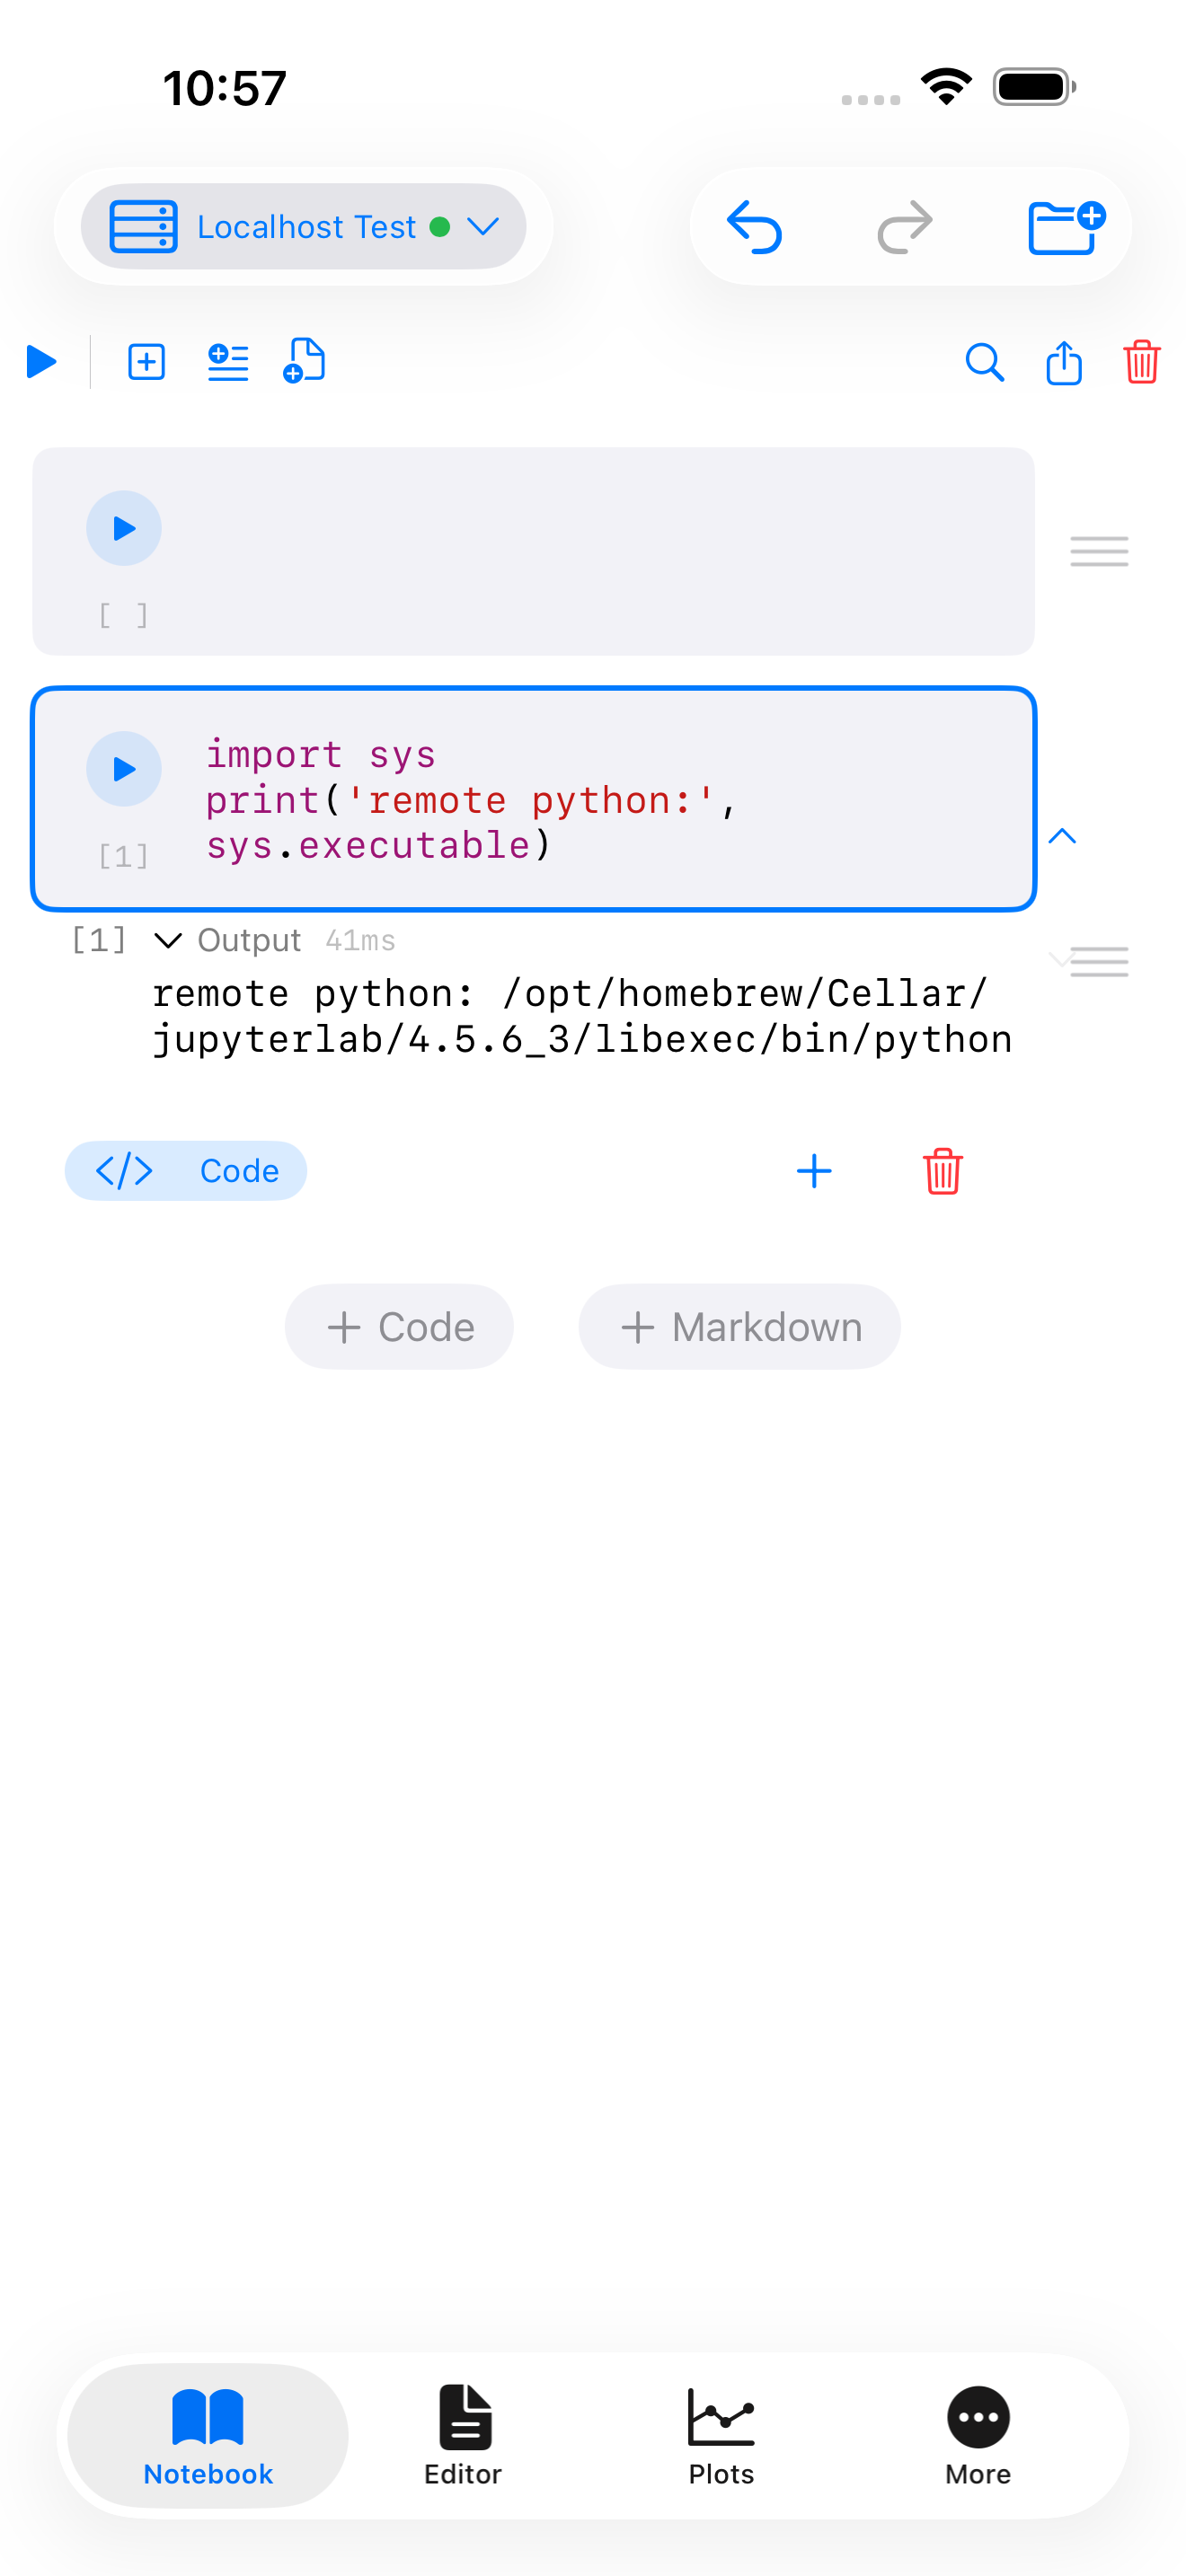
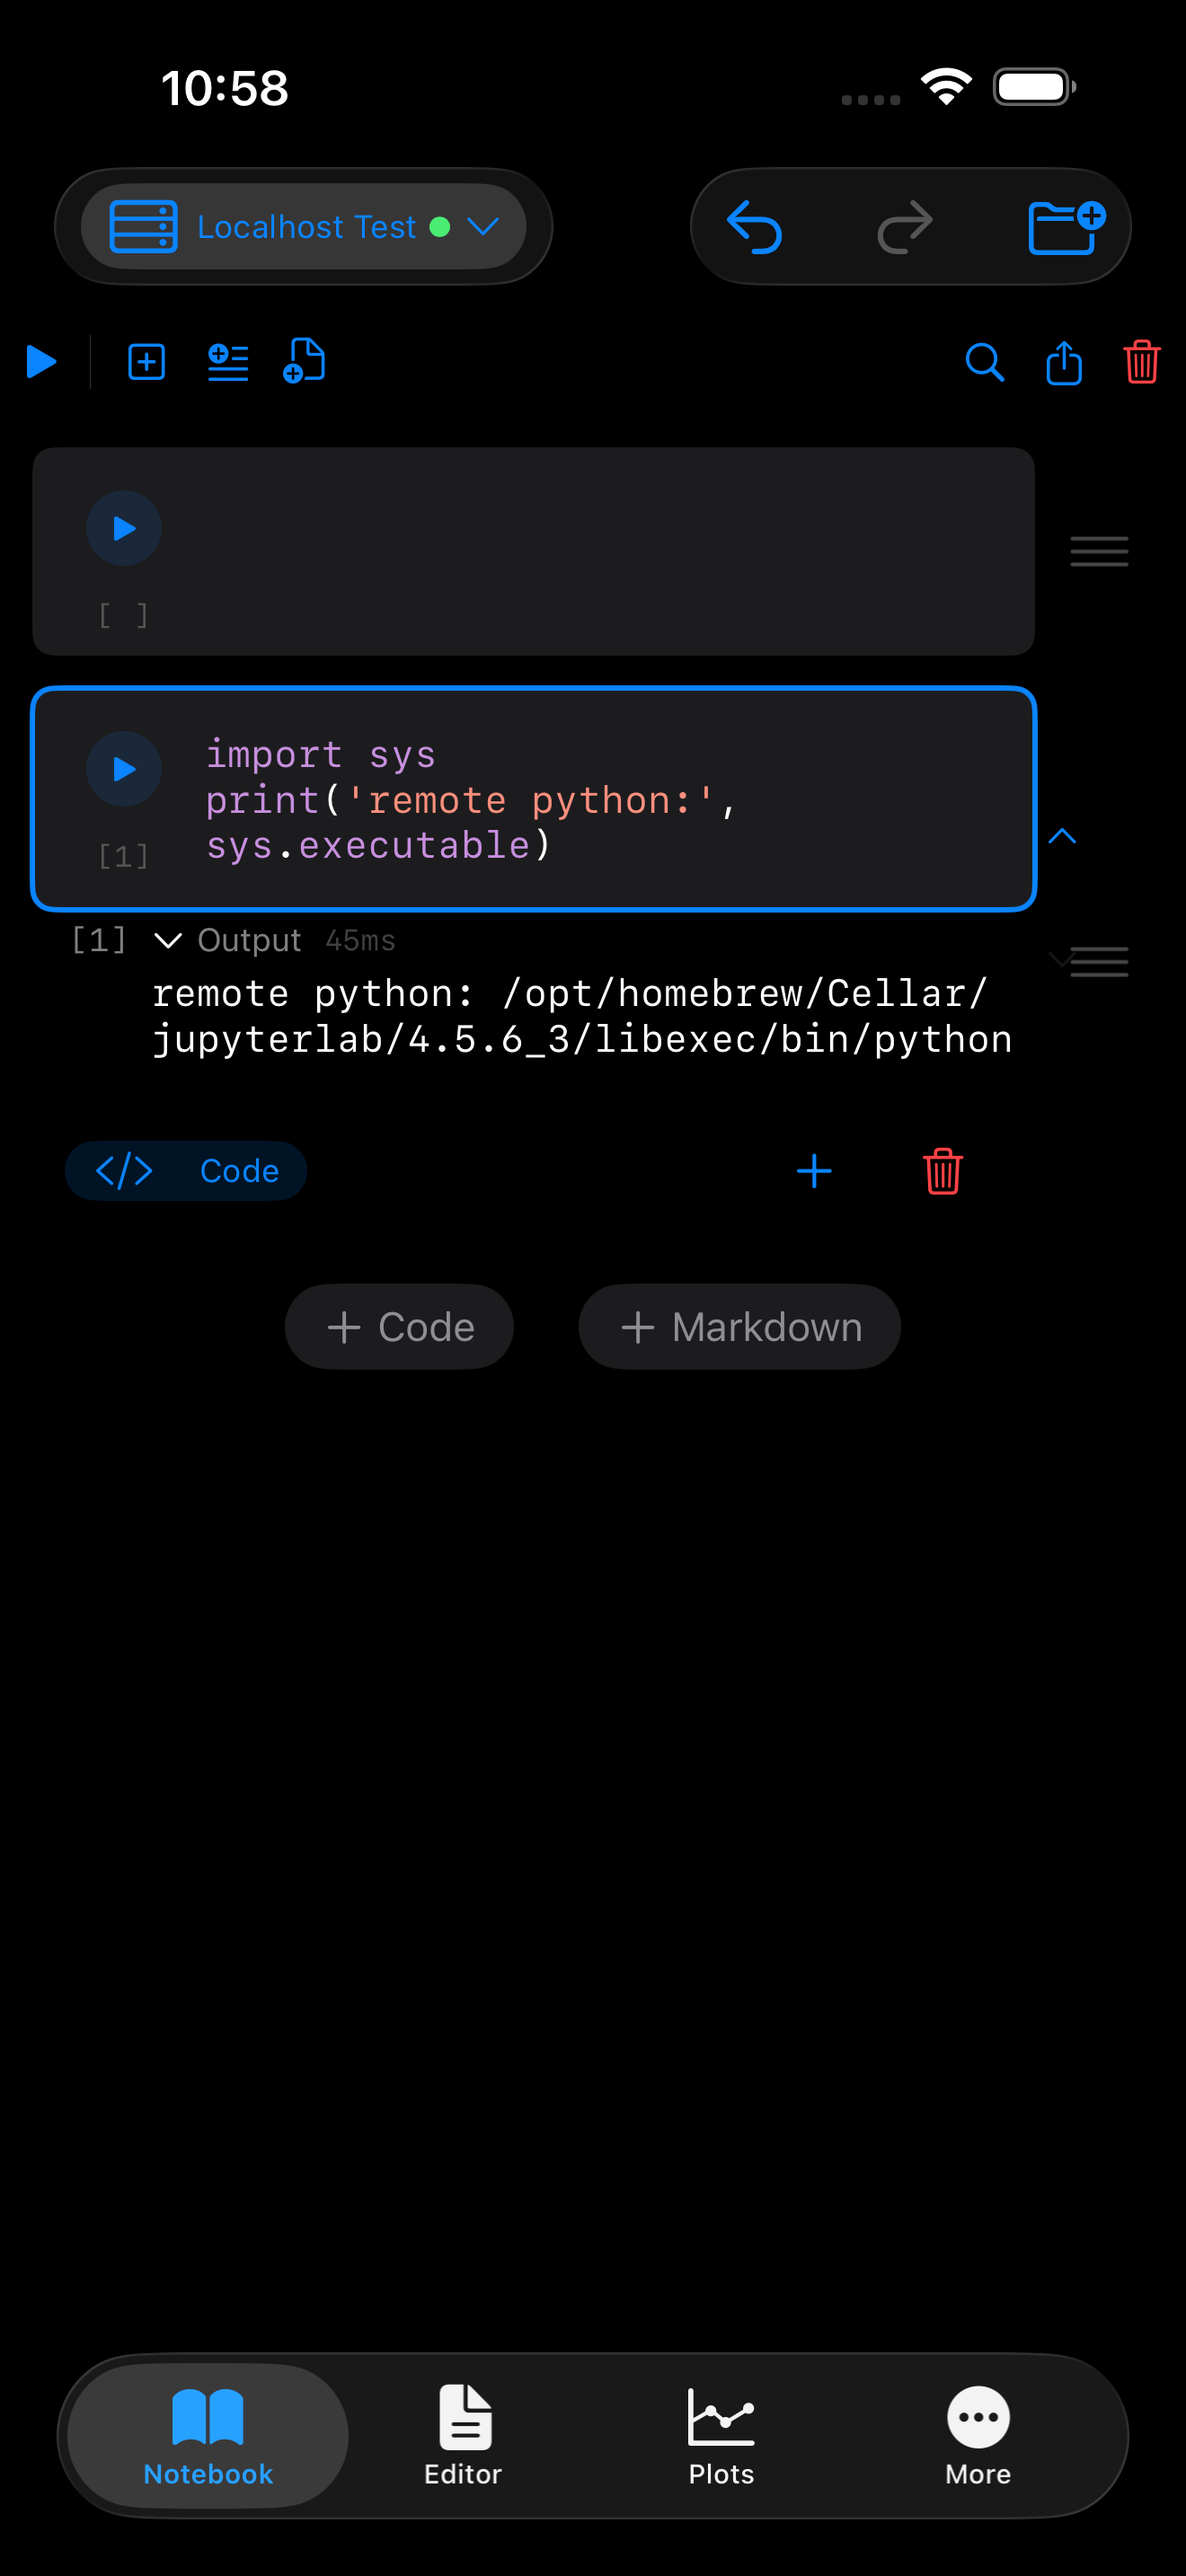
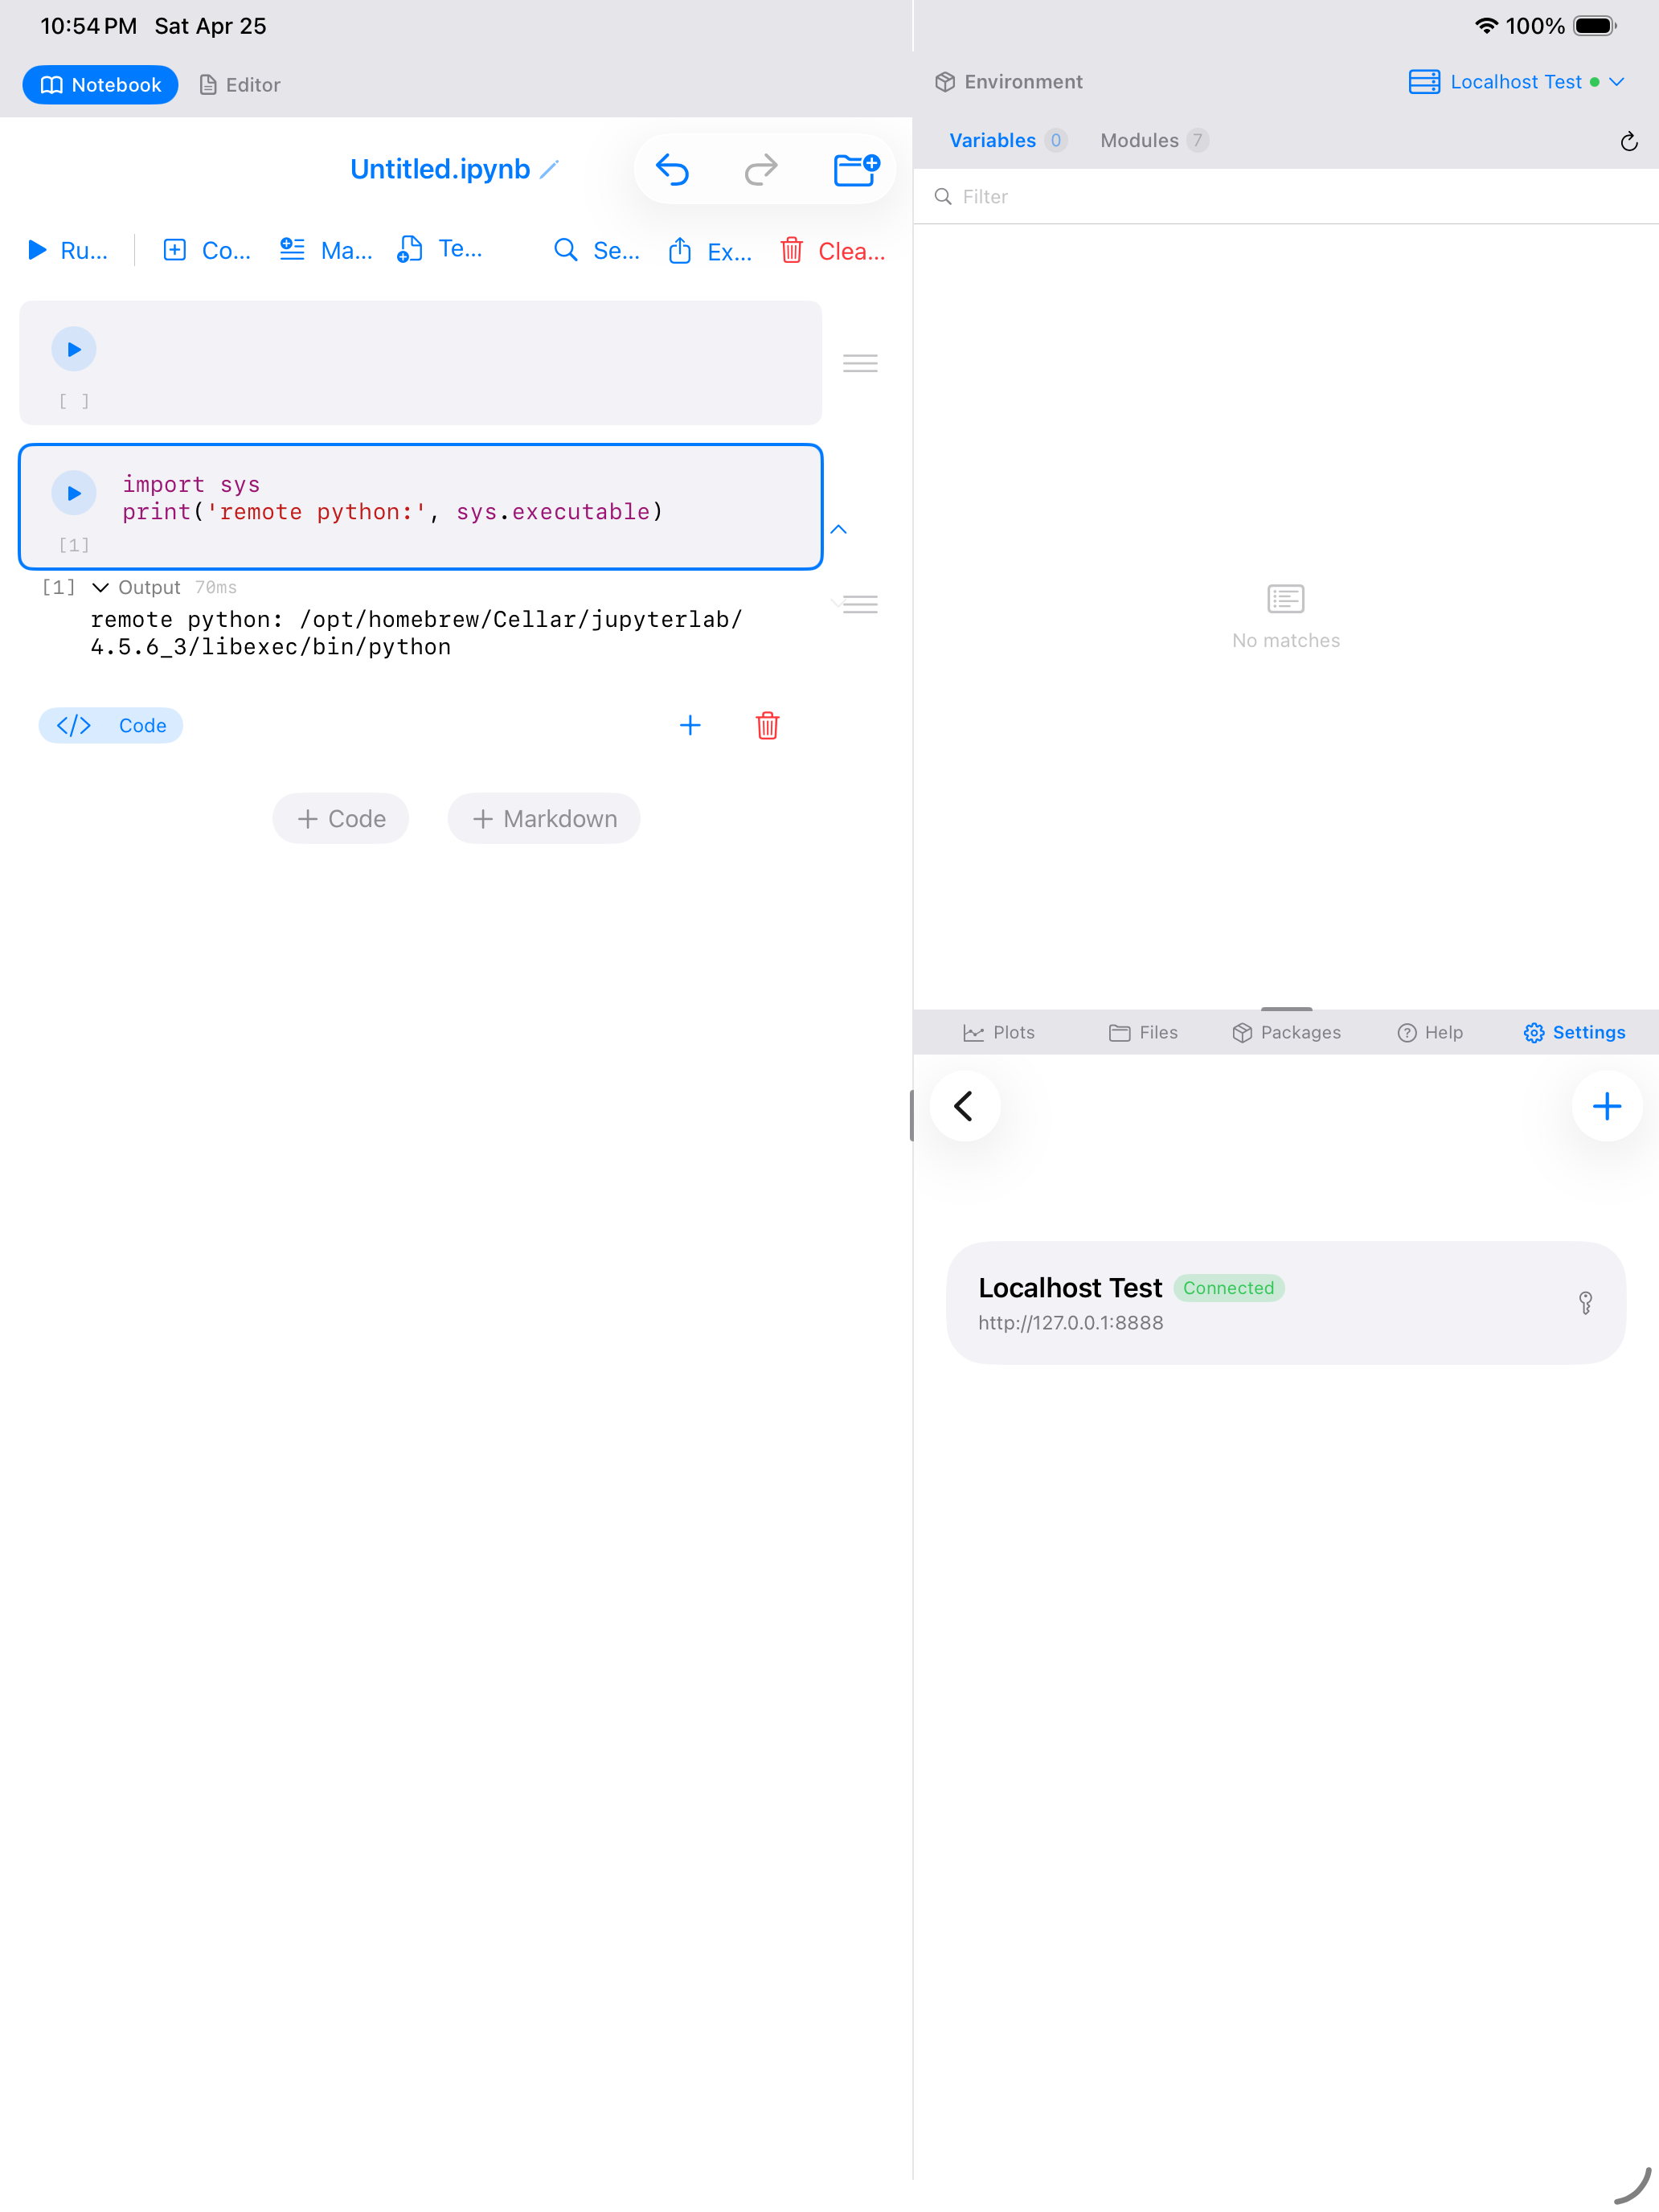
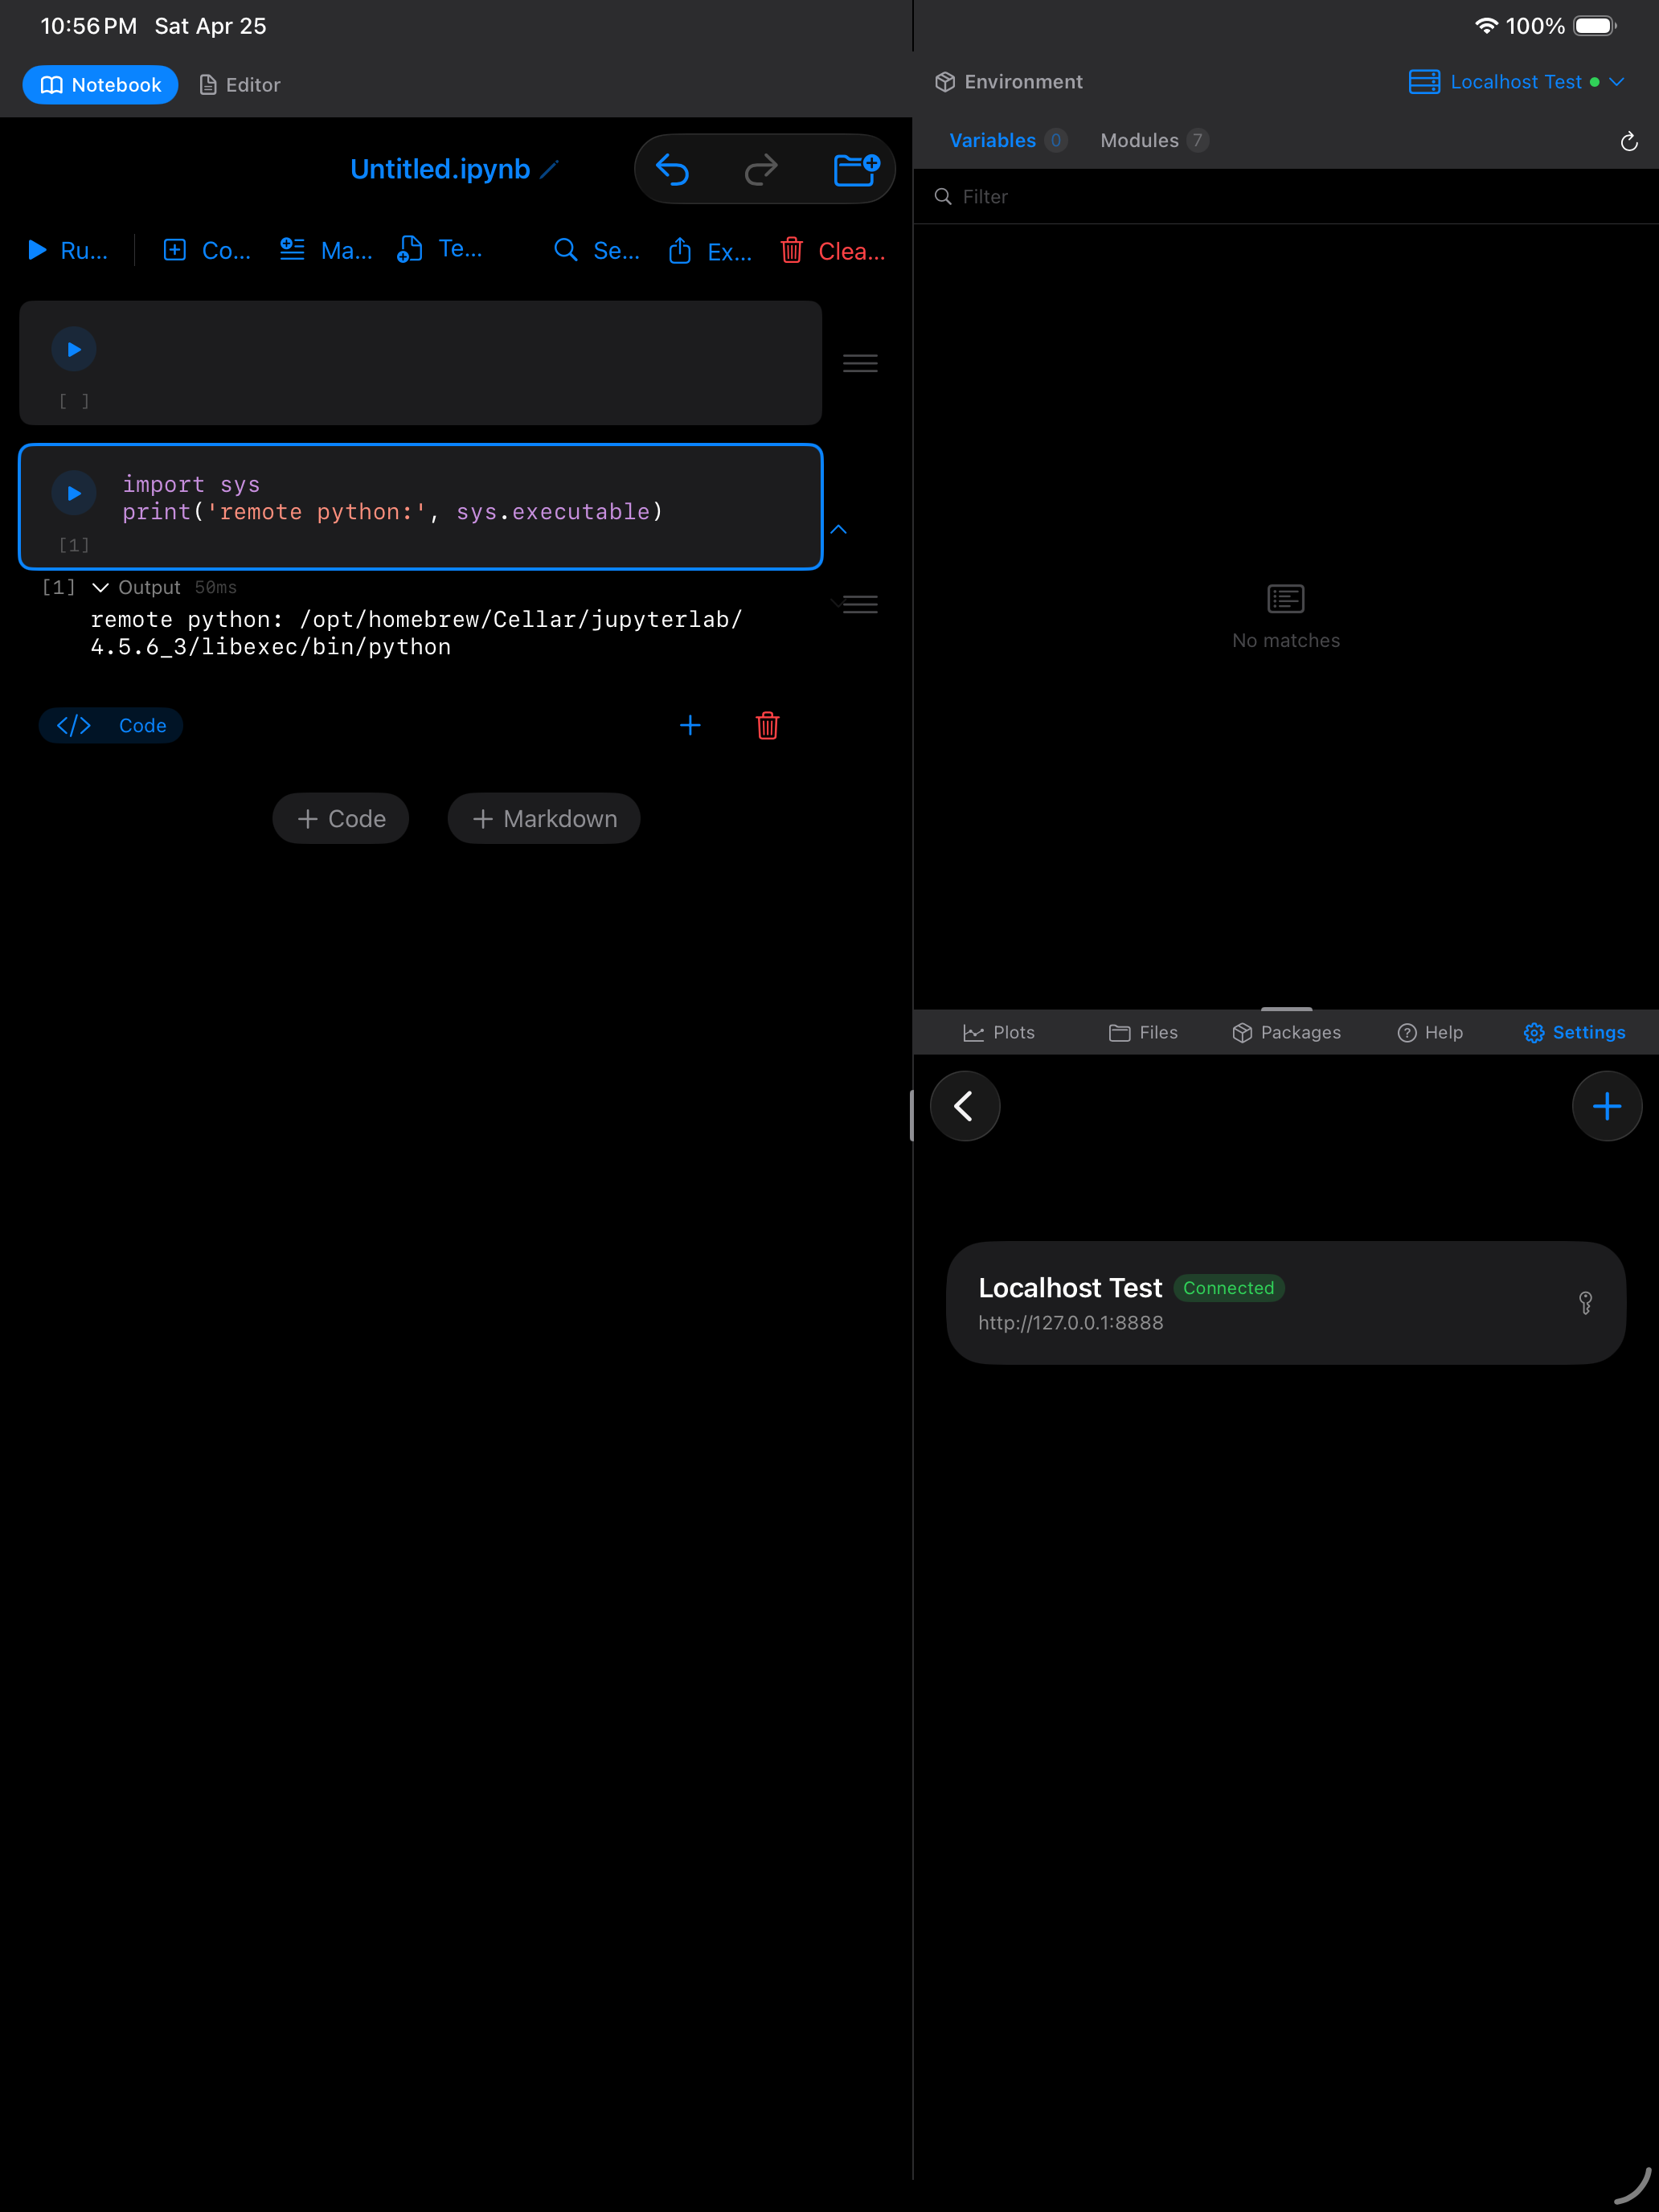
A quick way to confirm you really are executing on the remote CPython rather than Pyodide is to print sys.executable from a notebook cell. It will show the path to the Python binary on the server, not Pyodide’s /home/pyodide/this.program.
Features unique to remote kernels
A remote kernel running full CPython gives you capabilities that the local Pyodide sandbox does not have:
Interrupt execution. If a computation is taking too long, tap the stop button to send an interrupt signal to the remote kernel. The kernel receives a SIGINT and raises KeyboardInterrupt, stopping the running code without killing the kernel. This is not possible with the local Pyodide kernel.
Tab completion and inspection. The Jupyter wire protocol provides complete_request and inspect_request messages, so tab completion and object inspection (viewing docstrings and signatures) work over the remote connection.
Full pip install. You can install any package from PyPI at runtime, including packages with compiled extensions:
# Full CPython: install any package, including compiled extensions
import subprocess
subprocess.run(["pip", "install", "torch"], capture_output=True)

import torch
x = torch.randn(3, 3)
print(x)
print(f"CUDA available: {torch.cuda.is_available()}")
Subprocesses and system tools. Call command-line tools, run shell scripts, or interact with the server’s filesystem:
import subprocess

# List files on the remote server
result = subprocess.run(["ls", "-la", "/data"], capture_output=True, text=True)
print(result.stdout)

# Check available GPUs
result = subprocess.run(["nvidia-smi"], capture_output=True, text=True)
print(result.stdout)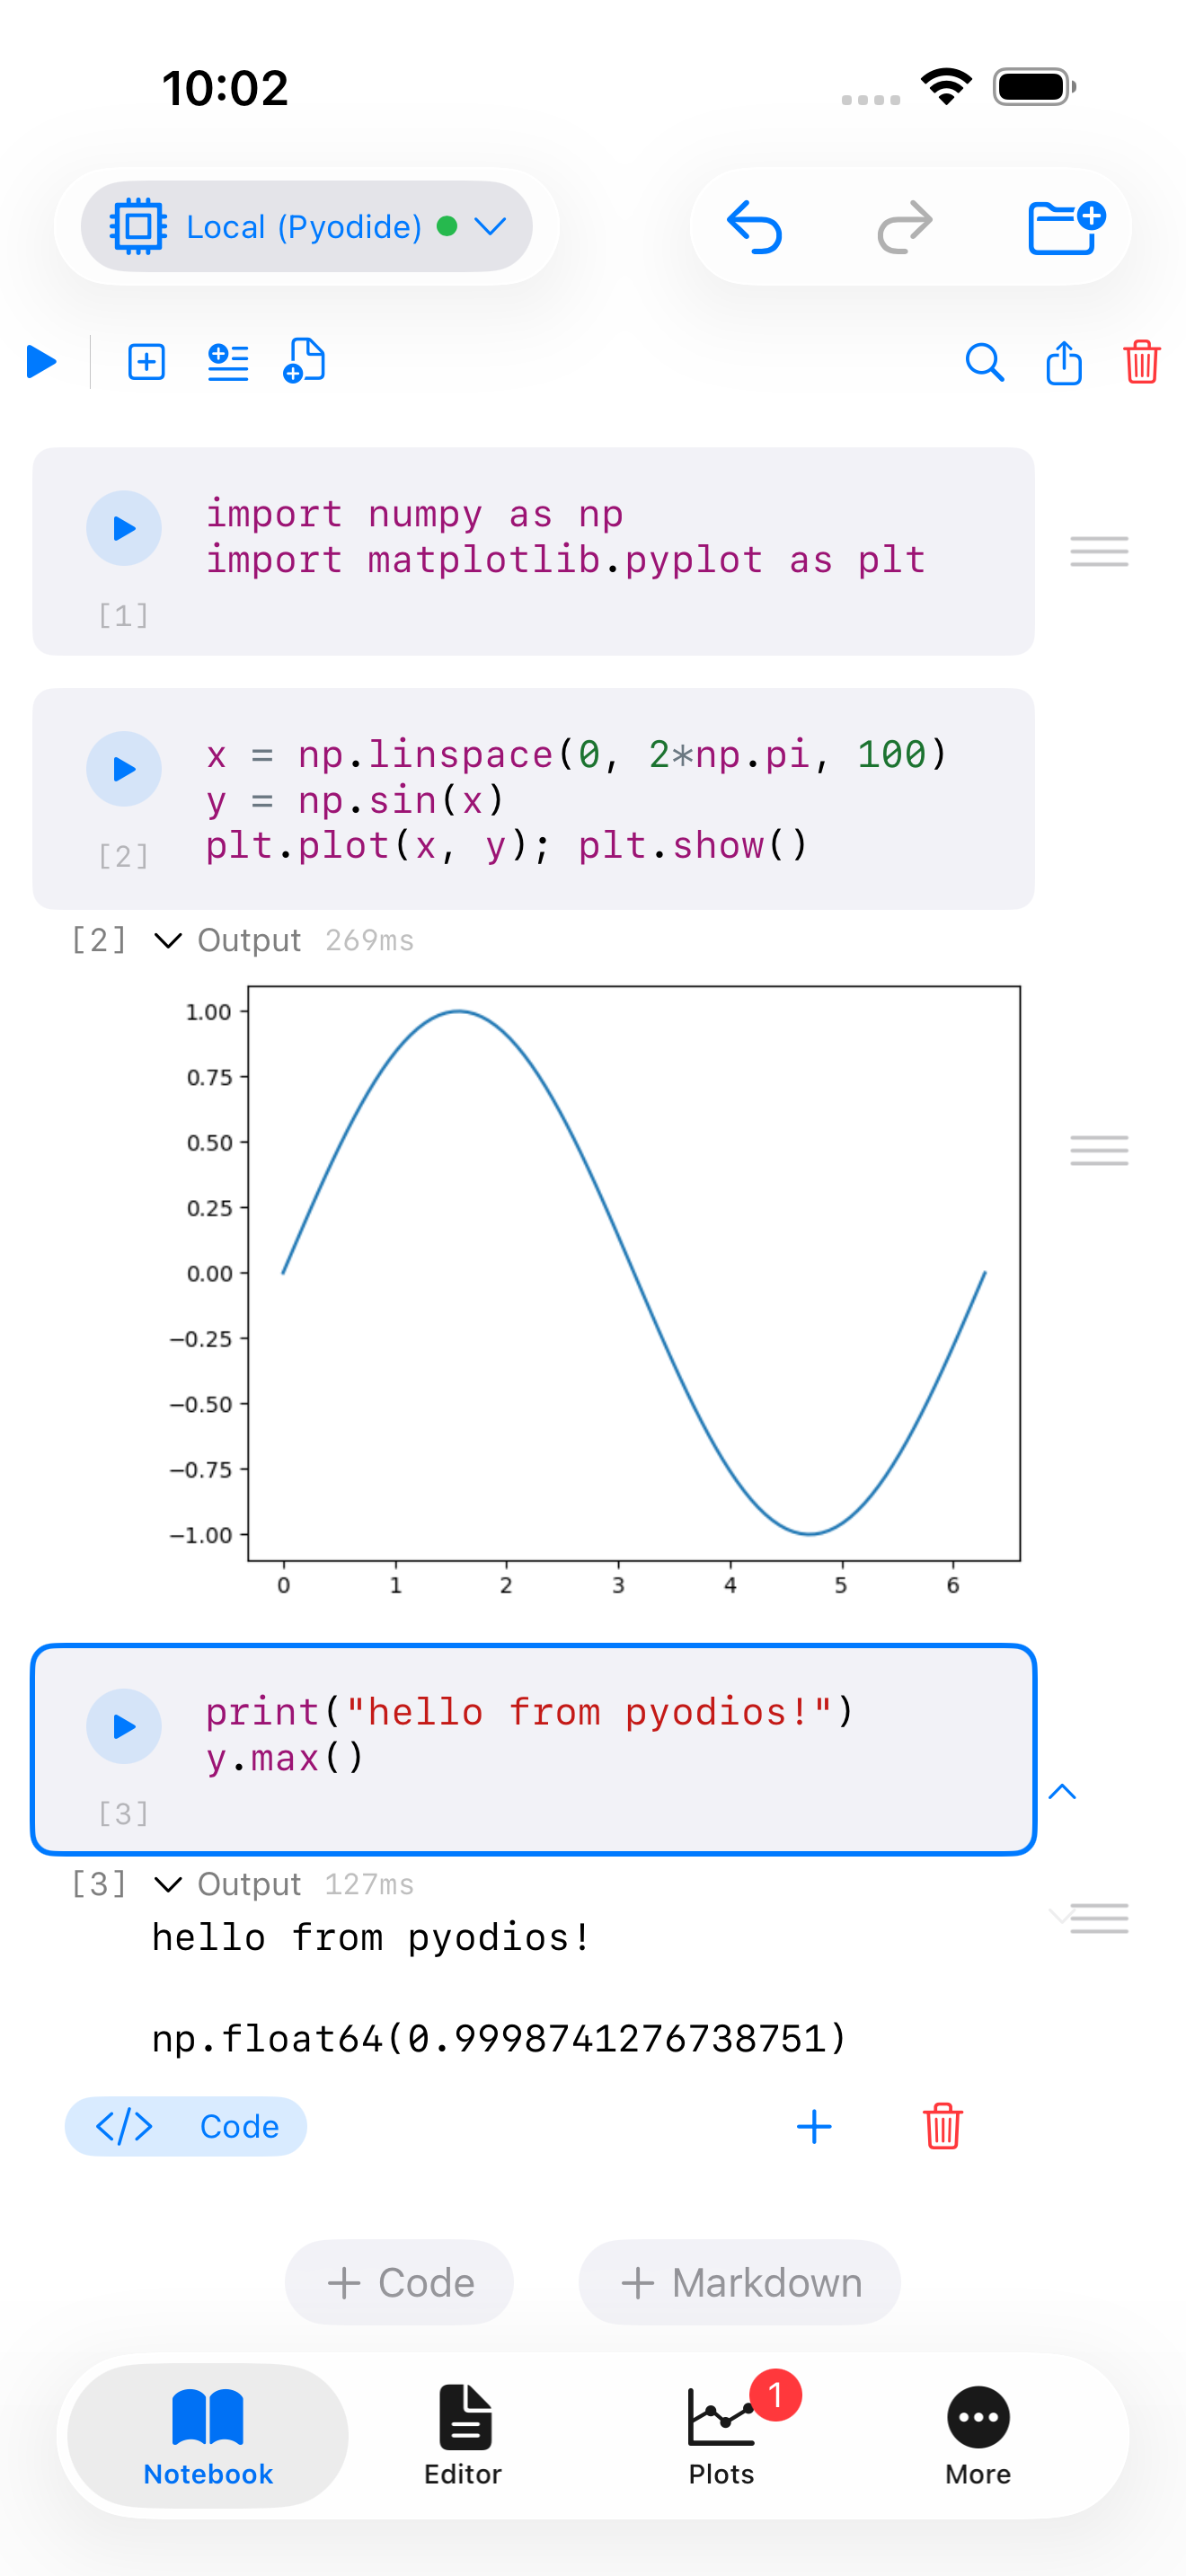
SSH Tunneling
When your Jupyter server is behind a firewall, on a private network, or otherwise not directly reachable from your device, SSH tunneling lets you connect securely through an intermediary SSH server. Pyodios creates the tunnel using a pure-Swift SSH implementation built on SwiftNIO, so there are no external dependencies.
Here is how the traffic flows:
iPhone / iPad (Pyodios)
  |
  └── SSH tunnel to ssh-host.example.com:22
       |
       └── Port forward: localhost:random-port → remote-server:8888
            |
            └── Jupyter WebSocket connection (encrypted inside SSH)
Your device opens an SSH connection to the SSH host, then forwards a local port through the tunnel to the Jupyter server’s port on the remote end. All Jupyter traffic (code, outputs, and authentication) travels encrypted inside the SSH tunnel. From Jupyter’s perspective, the connection appears to come from localhost on the remote machine.
Supported authentication methods
- Password: enter your SSH password in the server form. It is stored in the iOS Keychain.
- Private Key: import a
.pemor.keyfile from your device. Ed25519 keys are supported. The key file is stored securely in the Keychain, not as a plaintext file.
Host key verification is not currently implemented. Pyodios accepts all host keys when establishing SSH connections. For this reason, use SSH tunneling only on networks you trust, and be aware of the risk of man-in-the-middle attacks on untrusted networks.
Switching Between Local and Remote
You can switch between the local Pyodide kernel and a remote Jupyter kernel at any time, even in the middle of working on a notebook. The switch is immediate:
- Previous cell outputs are preserved. Everything that was already rendered stays on screen.
- New executions use the new backend. The next cell you run will execute on whichever backend you just selected.
- Variables do not carry over. Each backend has its own Python process with its own namespace. Variables defined in the local kernel are not available in the remote kernel, and vice versa.
- Your selection is remembered. The last backend you used is saved and automatically reconnected on the next app launch. If the remote server is unreachable at launch, Pyodios falls back to the local kernel.
Switching backends starts a fresh Python process on the new backend. If you switch from remote to local mid-notebook, any variables, imports, and state from the remote kernel are gone. Re-run the cells you need to rebuild your working state.
Local vs. Remote Comparison
This table summarizes the key differences between the two backends to help you decide which one to use for a given task.
| Capability | Local (Pyodide) | Remote (Jupyter) |
|---|---|---|
| Works offline | Yes | No |
| Startup time | 5–15 seconds | Depends on server |
| All PyPI packages | No (pure Python only) | Yes |
| GPU acceleration | No | Yes (if server has GPU) |
| Memory limit | ~300 MB | Server RAM |
| C/C++ extensions | No | Yes |
| Subprocesses | No | Yes |
| Interrupt execution | No | Yes |
| Tab completion | Yes | Yes |
| No network needed | Yes | No |
| Data stays on device | Yes | No |
You do not have to choose one or the other permanently. Use the local kernel for quick experiments, offline work, and tasks that only need pure-Python packages. Switch to a remote kernel when you need the full power of CPython, GPU access, or large datasets.
Setting Up a Jupyter Server
If you do not have a Jupyter server yet, here are three common ways to get one running.
On your Mac or PC
Open a terminal and run:
pip install jupyterlab
jupyter lab --no-browser --ip=0.0.0.0 --port=8888
Jupyter will print a URL with a token, something like:
http://127.0.0.1:8888/lab?token=abc123...Copy the token. In Pyodios, set the URL to http://<your-computer's-ip>:8888 and paste the token in the authentication field. Both devices must be on the same Wi-Fi network.
Run jupyter server list on your computer at any time to see the URL and token for all running Jupyter servers.
On a cloud server (AWS, GCP, Azure, etc.)
SSH into your cloud instance and run:
pip install jupyterlab
jupyter lab --no-browser --ip=0.0.0.0 --port=8888
Since the server is not on your local network, use the SSH tunnel option in Pyodios to connect securely. Enter your cloud instance’s public IP as the SSH host, your SSH username and key, and set the remote Jupyter port to 8888. You do not need to open port 8888 in your cloud firewall because the SSH tunnel handles everything.
Using JupyterHub
If your university or organization runs a JupyterHub, enter the Hub URL and your personal API token. Contact your JupyterHub administrator for the correct URL and credentials.
Troubleshooting
Here are solutions to the most common issues you may encounter when working with remote kernels.
- “Connection failed”
-
Check that the URL is correct and includes the port number (e.g.,
http://192.168.1.5:8888, not just192.168.1.5). Verify that the Jupyter server is running by checking the terminal on your server. If you are connecting over Wi-Fi, make sure both devices are on the same network. If using an SSH tunnel, confirm that the SSH host is reachable. - “Authentication failed”
-
Double-check your token or password. Tokens can change when the server restarts. Run
jupyter server liston your server to get the current token. If you are using password authentication, verify the password by logging into the Jupyter web interface in a browser. - “Kernel died”
- The remote kernel process crashed, most likely due to running out of memory on the server. Check the server’s terminal for error messages. Restart the Jupyter server and reconnect from Pyodios.
- Disconnected mid-execution
- Network interruptions happen. Pyodios offers automatic reconnection with exponential backoff and will attempt up to three reconnections. If automatic reconnection fails, an orange banner appears with Retry and Switch to Local buttons. Tap Retry to try again, or switch to the local kernel to keep working without the remote server.
- WebSocket drops when the app is backgrounded
- iOS aggressively suspends background network connections to save battery. When you switch away from Pyodios and come back, the WebSocket to the remote kernel may have been closed. The app detects this and shows a reconnection prompt. Return to the app and tap Reconnect to resume your session. Your kernel state on the server is preserved, and only the WebSocket link needs to be re-established.
- SSH tunnel fails to connect
-
Verify your SSH credentials (username, password, or private key). Make sure the SSH server allows TCP port forwarding (the
AllowTcpForwardingsetting insshd_configmust beyes). If you are using a private key, ensure it is in a supported format (Ed25519.pemor.key).
Enable Detailed Logging in Settings > Support before attempting to connect. If the connection fails, the logs will contain the specific error from the SSH or WebSocket layer, which makes diagnosing the problem much easier.
Security Considerations
Remote kernels involve sending your code over a network to another machine for execution. Here is how Pyodios handles security, and what you should be aware of.
Credential storage. All credentials (Jupyter tokens, passwords, SSH passwords, and private keys) are stored in the iOS Keychain. The Keychain is encrypted, protected by your device passcode or biometrics, and its contents are not included in iCloud backups.
SSH encryption. When you use an SSH tunnel, all traffic between your device and the remote server is encrypted by the SSH protocol. This includes the Jupyter token, your code, and all outputs.
HTTPS support. For servers accessible over HTTPS (e.g., https://jupyter.example.com), standard iOS certificate validation applies. Self-signed certificates are not accepted by default.
Code leaves your device. This is the most important thing to understand. When you use a remote kernel, every piece of code you execute is sent to the remote server, and every output is sent back. If your code handles sensitive data, make sure you trust the server and the network path between your device and the server.
When using a remote kernel, your code is sent to and executed on the remote server. Make sure you trust the server and network connection. If you are working with sensitive or proprietary data, verify that the server meets your organization’s security requirements.
Host key verification. SSH host key verification is not yet implemented. Pyodios currently accepts all host keys, which means it cannot detect if a man-in-the-middle is impersonating your server. Use SSH tunneling only on networks you trust, and prefer connecting to servers whose identity you can verify through other means.